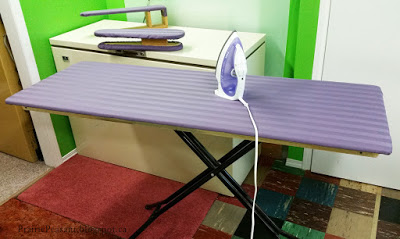
I actually do this but with simply a piece of corrugated plastic. I lay out all my collage pieces or stencils when working on a project. Pop on over to the blog Praire Peasant for her step-by-step tutorial on how to make an ironing board cover to increase work surface. I also have thrown a large tablecloth or piece of fabric over it to make a display space. Best yet, when you need more floor space it all folds up and stores away!
Maximize Your Creativity: How to Get Organized in a Small Craft Room!
Are you looking for ways to get organized in your small craft room? Whether you’re a quilter, sewer, or crafter, having an organized craft room can make all the difference when it comes to creating your next masterpiece. It can also help you find the supplies and tools you need quickly and easily.
Organizing your craft room can be overwhelming, especially when you’re dealing with limited space. But with the right tips and tricks, you can maximize the space you have and create a crafting space that is both functional and inspiring. Here are some tips for organizing your small craft room.
Introduction to Organization
Organization is a key component to having an enjoyable and productive craft room. It can make it easier to find the supplies and tools you need, and it can help you stay focused on your projects. Plus, it can help you keep your craft room clean and clutter-free.
Organizing your craft room doesn’t have to be complicated or expensive. All it takes is a little bit of planning and some creative problem-solving. Here are some tips for organizing your small craft room.
Benefits of Organization
Organizing your craft room can provide many benefits. It can help you stay focused and productive while working on your projects. It can also help you find the supplies and tools you need quickly and easily. Plus, it can help you keep your craft room clean and clutter-free.
Organizing your craft room can also help you make the most of the space you have. By maximizing the space you have, you can create a more efficient and inspiring crafting space.
Tips for Organizing a Small Craft Room
Organizing a small craft room can be challenging. But with the right tips and tricks, you can maximize the space you have and create a crafting space that is both functional and inspiring. Here are some tips for organizing a small craft room.
- Measure your space: Before you start organizing, measure the space you have. This will help you determine how much storage and furniture you can fit in the room.
- Utilize vertical space: Make use of vertical space by using shelves, pegboards, and wall racks. This will help you maximize the space you have and keep your craft room organized.
- Create zones: Create zones for different tasks or supplies. This will help you stay organized and make it easier to find the supplies you need.
- Make use of storage solutions: Make use of storage solutions such as baskets, bins, and boxes to organize and store your supplies. This will help you keep your craft room neat and organized.
- Label everything: Label all of your supplies and tools so that you can find them quickly and easily.
Considerations for Creating a DIY Quilt Table
If you’re a quilter, having a dedicated quilt table is essential for completing your projects. But if you’re working in a small craft room, you may not have enough space for a full-size quilt table. Fortunately, there are ways to create your own DIY quilt table. Here are some things to consider when creating a DIY quilt table.
- Size: Measure the space you have to determine what size quilt table you can fit.
- Materials: Choose materials that are both durable and lightweight. This will help keep the quilt table from taking up too much space.
- Design: Consider the design of the quilt table. This will help you create a quilt table that is both functional and stylish.
Different Types of Quilt Tables
There are several different types of quilt tables you can choose from. Here are some of the most popular quilt tables.
- Folding quilt table: Folding quilt tables are lightweight and easy to store. They are perfect for small craft rooms.
- Portable quilt table: Portable quilt tables are great for quilters who need to take their projects on the go.
- Wall-mounted quilt table: Wall-mounted quilt tables are perfect for small craft rooms. They are easy to install and don’t take up much space.
- Quilt frame: Quilt frames are great for those who prefer to quilt without a table. They can be hung on the wall or set up on a table.
Measurements for Your Quilt Table
When creating a DIY quilt table, it’s important to get the measurements right. Here are some measurements to consider when creating your quilt table.
- Length: The length of the quilt table should be at least 36 inches. This will give you enough space to work on your projects.
- Width: The width of the quilt table should be at least 24 inches. This will give you enough space to spread out your fabric and tools.
- Height: The height of the quilt table should be at least 30 inches. This will give you a comfortable working height.
Tips for Making a DIY Quilt Table
Making a DIY quilt table doesn’t have to be complicated. Here are some tips to help make the process easier.
- Choose the right materials: Choose materials that are both durable and lightweight. This will make it easier to move the quilt table around.
- Use screws: Use screws to attach the quilt table together. This will help ensure that the quilt table is secure.
- Add sandpaper: Add sandpaper to the surface of the quilt table to help keep fabric from slipping.
- Add leg supports: Add leg supports to help keep the quilt table stable.
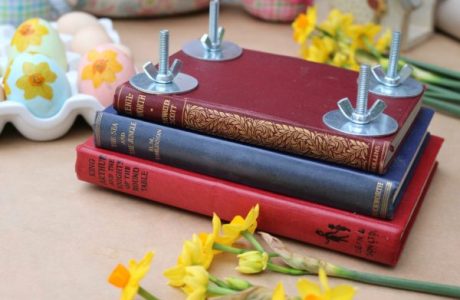
- Add a cover: Add a cover to the quilt table to keep the fabric and tools from slipping off the table.
Other Sewing Room Essentials
Now that you have your quilt table, you’ll need to fill it with supplies and tools. Here are some other sewing room essentials you should consider adding to your craft room.
- Cutting mat: A cutting mat is essential for any quilter or sewer. It will help protect your table from scratches and make it easier to cut fabric.
- Ironing board: An ironing board is essential for pressing fabric before sewing.
- Thread rack: A thread rack will help keep your threads organized and easy to find.
- Sewing machine: A sewing machine is essential for any quilter or sewer.
- Sewing notions: Sewing notions such as needles, pins, thread, and scissors are essential for any quilter or sewer.
Tips for Storing Craft Supplies
Storing craft supplies can be a challenge, especially in a small craft room. Here are some tips for storing craft supplies.
- Use clear containers: Use clear containers to store your craft supplies. This will make it easier to find the supplies you need quickly and easily.
- Utilize vertical space: Make use of vertical space by using shelves, pegboards, and wall racks. This will help you maximize the space you have and keep your craft room organized.
- Create zones: Create zones for different tasks or supplies. This will help you stay organized and make it easier to find the supplies you need.
- Label everything: Label all of your supplies and tools so that you can find them quickly and easily.
- Utilize baskets and bins: Use baskets and bins to store your craft supplies. This will help keep your craft room neat and organized.
Organizing your craft room can be a challenge, especially in a small space. But with the right tips and tricks, you can maximize the space you have and create a crafting space that is both functional and inspiring. By utilizing vertical space, creating zones, and making use of storage solutions, you can keep your craft room organized and clutter-free. Plus, by creating a DIY quilt table and adding other sewing room essentials, you can create a crafting space that is both efficient and inspiring. So make your own sewing table and get organized today!