• Home
  • Suggest A Craft
  • DIY Newsletter

Recycled Crafts

Creative DIY Projects That Turn Trash Into Treasure

  • About CraftGossip
  • Our Network
    • Bath & Body Crafts
    • Candle Making Ideas
    • Crochet Ideas
    • Cross Stitch
    • Edible Crafts
    • Felting Patterns
    • Glass Art
    • Home & Garden Ideas
    • Indie Crafts
    • Jewelry Making
    • Kids Crafts
    • Knitting Patterns
    • Lesson Plans
    • Needlework
    • Party Ideas
    • Polymer Clay
    • Quilting Ideas
    • Recycled Crafts
    • Scrapbooking
    • Sewing Patterns
    • Card Making
    • DIY Weddings
    • Not Craft Ideas
  • Giveaways
  • Roundups
  • Store
  • Search

7 Ways On How To Reuse an Old Ironing Board

August 8, 2016 by Larissa Coleman

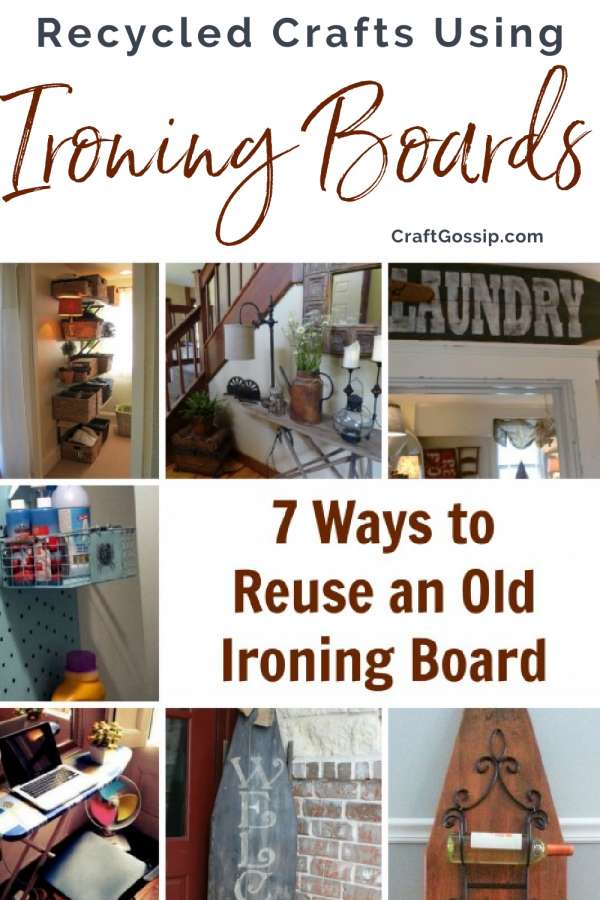
There’s something special about vintage items. They have a certain charm that just can’t be replicated by modern designs. And when it comes to finding vintage items that are both beautiful and functional, old ironing boards are a real treasure. They were once a household staple, used to press clothes and keep them looking sharp. But what do you do with an old ironing board when it’s no longer in use? Well, you upcycle it, of course!

Upcycling is a fun and creative way to give new life to old items. It’s all about taking something that might be seen as useless and turning it into something that’s both beautiful and functional. And when it comes to upcycling an old ironing board, the possibilities are endless.

First, you can turn your old ironing board into a unique piece of furniture. With a fresh coat of paint and a bit of creativity, an old ironing board can be transformed into a one-of-a-kind side table or bookshelf. It’s a great way to add some vintage charm to your home decor.

If you’re feeling crafty, you can turn your old ironing board into a creative work of art. With a little bit of imagination and some crafting supplies, you can transform your old ironing board into a decorative piece that’s perfect for displaying photos, artwork, or even plants.

Another great way to upcycle an old ironing board is to turn it into a functional piece of storage. You can use it to hold everything from craft supplies to kitchen utensils. And with a few hooks and shelves, you can create a storage solution that’s both stylish and practical.

For those who love to entertain, an old ironing board can be transformed into a unique and functional serving cart. With a bit of paint and some added wheels, your old ironing board can become a charming cart that’s perfect for serving up drinks and snacks.

And for the more practical-minded, an old ironing board can still be used for its original purpose. With a fresh cover and a bit of TLC, your old ironing board can be brought back to life and used for its intended purpose once again.

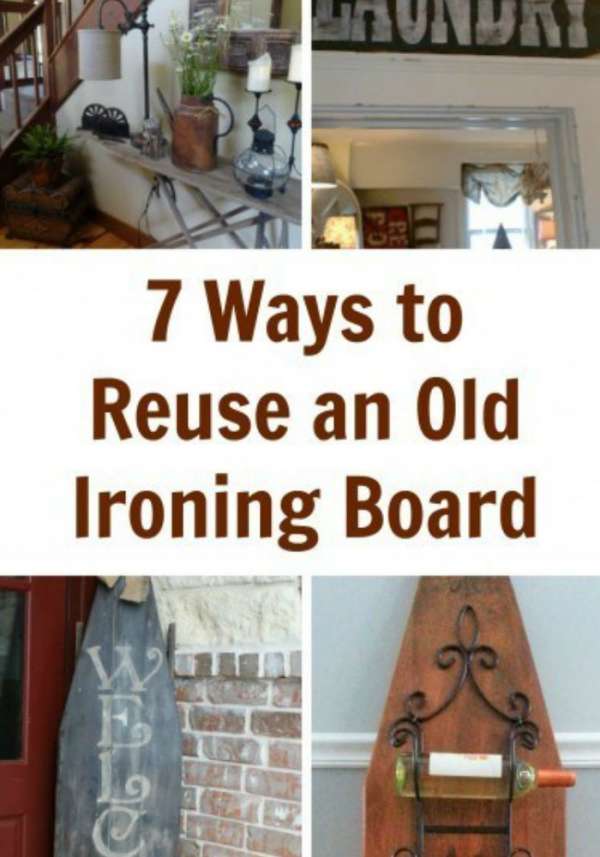
So, before you stash that old ironing board away in storage, take a look at these 7 ways to upcycle it. You never know, you might just find the perfect way to give it a new lease on life.

Looking for more ways to upcycle furniture? Check out these Upcycling Furniture Books we found on Amazon.

shelves

1- Closet Shelves from Patina General

entrytable

2- Entry Table from Vintageholic

laundrysign

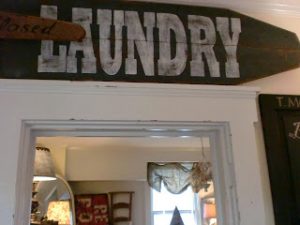
3- Laundry Sign from Molly Susan Strong

laundrycenter

4- Laundry Center from Coastal Bohemian

desk

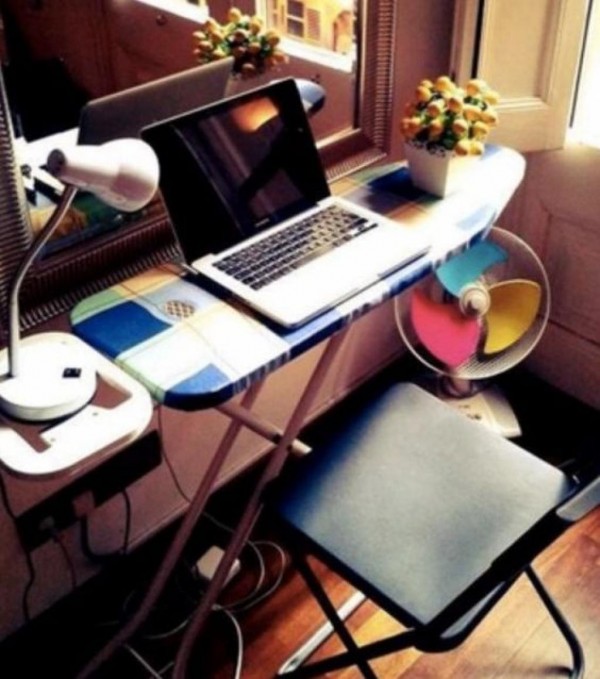
5- Desk from Trucs and Bricolages

welcome

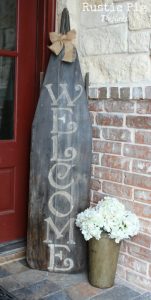
6- Ironing Board Turned Welcome Sign from The Rustic Pig

wine rack

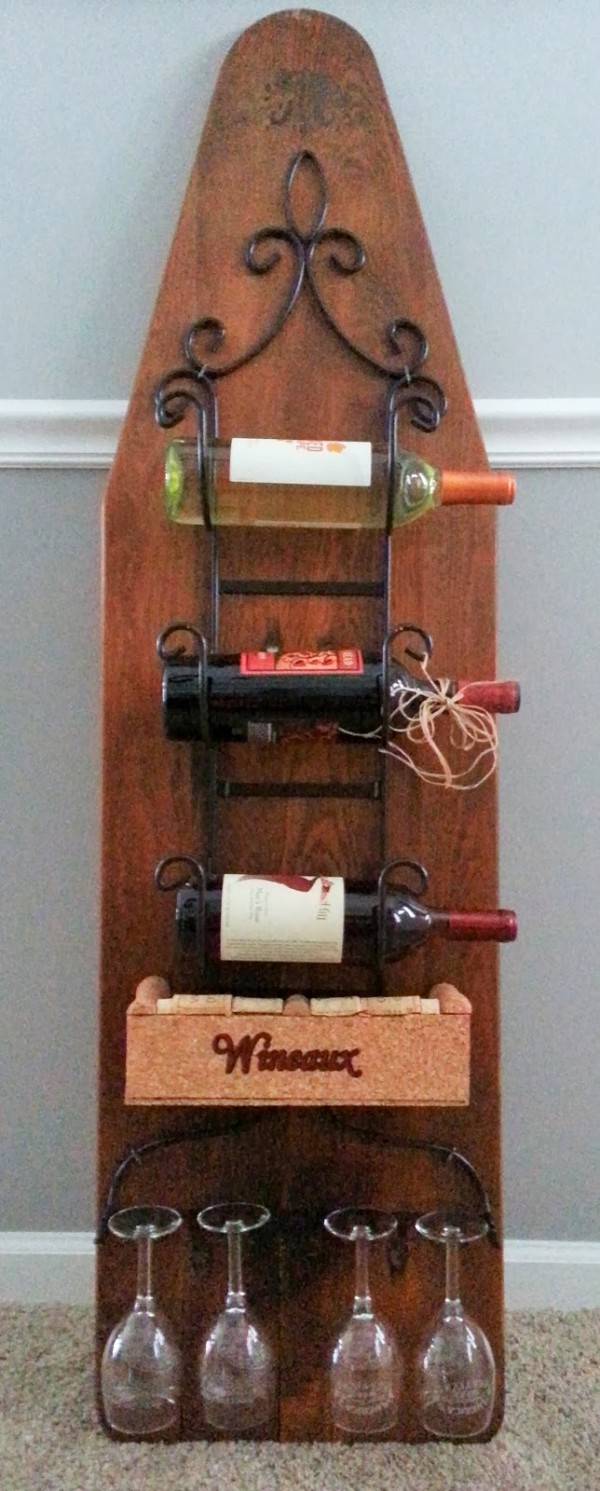
7- Rustic Wine Rack from So Very Shari Creations

Related Posts:

  • Upcycling or Hoarding? Why Your DIY Projects Could…
  • How to make recycled clothes pin puppets
«
»

Comments

  1. Michele Michael says

    December 15, 2016 at 9:38 pm

    Thanks for the link to Coastal Bohemian.

Have you read?

How to Paint Melamine Furniture

Recently, we received an email from Jenny, one of our readers, asking for some advice on painting melamine furniture. Jenny was looking to refresh an old dresser but wasn’t sure about the right way to tackle the project. Well, we’ve got just the thing! After some digging, we came across a fantastic article on Spraypaint Blog titled How to Recycle and Paint Melamine Furniture, which walks you through the process step-by-step.

Why This Article is Perfect for Jenny (and You!)

This guide is incredibly comprehensive, covering everything you need to know about painting melamine—an often tricky material to work with. Melamine is known for its smooth, glossy surface, which can be tough to paint without the right preparation. But with the tips from this article, you’ll learn how to properly prep your melamine pieces, choose the right paint, and achieve a professional-looking finish.

The article also dives into the importance of sanding and priming the surface to ensure that the paint adheres well. With these steps, Jenny (and anyone else trying this project) can be sure that their painted melamine furniture will not only look great but last for years to come.

Jenny, we hope this article gives you all the info you need to tackle your melamine furniture project! It’s clear from the tutorial that a little prep work goes a long way, and with the right products, even melamine can be transformed into a beautiful, personalized piece.

For anyone else curious about painting melamine, check out the full article on Spraypaint Blog for all the tips and techniques: How to Recycle and Paint Melamine Furniture. Happy painting!

My Tips for Painting Melamine Furniture

Hey Jenny (and anyone else planning a melamine project), here are my top tips to help you get the best results when painting melamine furniture:

Prep is Key
Clean the surface well, then lightly sand it with fine-grit sandpaper to give the primer something to grip onto. Trust me, it makes a big difference!

Prime Like a Pro
Don’t skip the primer! Use a bonding primer that’s made for glossy surfaces or melamine. It’ll make sure your paint sticks and lasts.

Pick the Right Paint
Go for a good enamel or acrylic paint. I use a foam roller for a smooth finish—no brushstrokes! Apply a few thin coats, letting each one dry in between.

Topcoat for Durability
Once the paint’s dry, apply a protective topcoat (polyurethane or polycrylic) to help it stay scratch-free.

Give It Time
Let the paint cure for at least 48 hours before using the furniture—longer is even better! It’ll help the finish hold up over time.

Get Creative
Don’t be afraid to try fun colors or finishes! Melamine is perfect for getting a bit adventurous.

Explore

books Christmas CraftGossip Giveaways Craft Inspirations Easter glass halloween Home Decor kid crafts mason jar More Crafts Patterns & Tutorials recycled art Recycled Clothing Recycled Jewelry Recycled Sewing Recycled Tutorials Recycling Ideas Recycling Organizing tin can

RSS More Articles

  • Artistic Stitches: Exploring Punch Needle Tattoo Designs
  • Knit Dinosaurs on a Circular Knitting Machine
  • Emily’s Paris Scarf – Crochet Kit
  • 30 Big Block Quilts For Beginners Or Time Poor Quilters
  • FREE Patchwork Pouch Pattern
  • Book Review: Secret Stories of Lost Beasts
  • Etsy Spotlight: 1955 Baby Doll Nightgown & Bloomers Pattern
  • Baby Banner and Mini Album Project
  • Color Wheel Block Tutorial by Red Pepper Quilts
  • How to Paint Melamine Furniture

Pick Your Blog

  • Sewing
  • Knitting
  • Quilting
  • Crochet
  • Home & Garden
  • Recycled Crafts
  • Scrapbooking
  • Card Making
  • Polymer Clay
  • Cross-Stitch
  • Edible Crafts
  • Felting
  • Glass Art
  • Indie Crafts
  • Kids Crafts
  • Jewelry Making
  • Lesson Plans
  • Needlework
  • Bath & Body
  • Party Ideas
  • Candle Making
  • DIY Weddings
  • Not Craft
  • Free Craft Projects

Copyright © 2025 · CraftGossip | Start Here | Contact Us | Link to Us | Your Editors | Privacy and affiliate policy