• Home
  • Suggest A Craft
  • DIY Newsletter

Recycled Crafts

Creative DIY Projects That Turn Trash Into Treasure

  • About CraftGossip
  • Our Network
    • Bath & Body Crafts
    • Candle Making Ideas
    • Crochet Ideas
    • Cross Stitch
    • Edible Crafts
    • Felting Patterns
    • Glass Art
    • Home & Garden Ideas
    • Indie Crafts
    • Jewelry Making
    • Kids Crafts
    • Knitting Patterns
    • Lesson Plans
    • Needlework
    • Party Ideas
    • Polymer Clay
    • Quilting Ideas
    • Recycled Crafts
    • Scrapbooking
    • Sewing Patterns
    • Card Making
    • DIY Weddings
    • Not Craft Ideas
  • Giveaways
  • Roundups
  • Store
  • Search

Recycled Book Review: Build It! With Pallets

December 30, 2009 by Stefanie Girard

how to recycle pallets

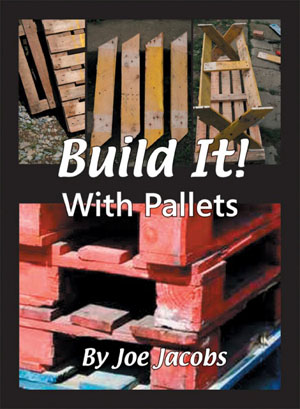
Build It! With Pallets is a fun little book. If you are a handy sort and like to build stuff out of found wood pallets this is a great source for how-to projects. There are great instructions with nice little hand drawn sketches and black and white photos to follow. One of the best parts about making projects with recycled pallets is you didn’t invest in the materials so if you are a beginner or you mess up, no big loss. Just go out scavenging and try again! To see an inside peek into the book and a free project on how to build a raised bed out of a recycled wood pallet, pop on over to this post.

More from the Publisher about:

Build It! With Pallets

By

Joe Jacobs

Often found abandoned at the back of factories, at dumps or even in skips, the humble pallet for many practically minded people, represents a huge source of inspiration as well as a challenge. When skillfully broken down into timber and smartened up, they can be refashioned into chairs, tables, fences, gates, chicken arks, planters, sheds, decking, cladding and many other functional items.

Joe Jacobs shows you what kind of pallet to look for, and provides over 20 plans for tables, fences, chairs, planters and other items of indoor and outdoor furniture. Build It! With Pallets is the ideal companion for anyone looking for inspiration and an economical source of wood, making them the ultimate recycling solution.

Looking for more Pallet Crafts? Check out these Pallet Project books.

10 Ways To Use Old Pallets In Your Farm Wedding [DIY Weddings]

15 Desks You Can Make From Upcycled Wood Pallets [Home and Garden]

22 Halloween Pallet projects

Related Posts:

  • Teaching Kids About Recycling: Fun Activities to…
  • Build Big Memories on a Budget: DIY Cubby House…
«
»

Comments

  1. crayonmonster says

    January 1, 2010 at 9:50 am

    Wish I had more space!! I’d do pallet building for sure! Thanks for the link and idea.
    -CM

  2. sharon says

    March 15, 2010 at 10:35 am

    sounds awesome! will put it on my wish list. am hoping it has ideas for a woodshed and greenhouse…can’t wait!

Have you read?

How To Make A Milk Carton Village – A Recycled Craft for Kids

Ready to turn your recycling bin into a colorful, miniature village? Grab those empty milk cartons and let’s create a town filled with tiny houses, shops, and even a school or bakery! This craft is perfect for kids of all ages and encourages imagination, storytelling, and eco-friendly creativity.

 What You’ll Need:

  • Empty milk or juice cartons (washed and dried)

  • Paints or markers

  • Paintbrushes

  • Craft glue or glue stick

  • Scissors (adult supervision recommended)

  • Colored paper or old magazines

  • Bottle caps, buttons, or plastic lids (for windows or decorations)

  • Sticks, straws, or skewers (for flag poles or chimneys)

  • Optional: glitter, stickers, washi tape, cotton balls (for snow or clouds!)

 Step-by-Step Instructions:

Step 1: Clean and Prep the Cartons
Make sure your milk or juice cartons are washed and completely dry. Remove any plastic lids or caps and keep them for decorations!

Step 2: Plan Your Village
Decide how many buildings you want to make. Each milk carton becomes a house, shop, or whatever your imagination dreams up. Arrange them side by side or in a circle like a real village square.

Step 3: Cut Out Doors and Windows
With the help of an adult, carefully cut small door and window shapes into your cartons. You can also glue cut-out shapes from colored paper if you’d rather not cut into the carton.

Step 4: Paint and Decorate
Use paint or markers to bring your buildings to life. Make brick patterns, colorful siding, or roof tiles. Let each child choose their own theme – rainbow bakery, monster house, fairy home, or tiny fire station!

Step 5: Add the Roofs
You can paint the top pointy part of the carton like a roof, or glue on cardboard triangles to create overhangs. Want to add a chimney? Glue a straw or cardboard roll on top!

Step 6: Make Flags and Signs
Cut small flags from recycled plastic or paper and tape them to straws or sticks. Glue your flags to the rooftops. You can even create tiny signs for each building – “Toy Store,” “Library,” or “Super Cat’s House.”

Step 7: Build Your Village
Place all the finished buildings together on a large piece of cardboard, tray, or table. Use bottle caps for stepping stones, cotton balls for bushes or clouds, and draw roads with marker.

Step 8: Play!
Now that your village is built, use little toys, action figures, or LEGO people to live in your new town. Create stories and adventures—your Milk Carton Village is officially open!

 Learning Bonus:

This craft is not just fun—it also teaches recycling, fine motor skills, creative thinking, and storytelling. Plus, it’s a great group activity for playdates, classrooms, or family craft nights.

Let your kids’ imaginations run wild—and remember, no two villages need to look the same. Each one tells its own story!

Explore

books Christmas CraftGossip Giveaways Craft Inspirations Easter glass halloween Home Decor kid crafts More Crafts Patterns & Tutorials recycled art Recycled Clothing Recycled Jewelry Recycled kids crafts Recycled Sewing Recycled Tutorials Recycling Ideas Recycling Organizing tin can

RSS More Articles

  • Stenciling Like a Pro? You NEED These Must-Have Supplies
  • 15 Highland Cows You Can Crochet
  • Etsy Spotlight – The Thomas Boys Shirt Sewing Pattern
  • 7 FREE Back to School SVG Cut Files
  • How to Make a Sticks and Stones Quilt – Free Quilting Tutorial
  • Cozy Toes Await: Cable Crochet Slipper Boots Botties Wool Insoles Kit
  • Printable Cross Stitch Sheets Make it Easy to Cross Stitch on Clothes
  • Layered Embroidery on Watercolor Fabric: Mixed Media Magic
  • Paf – Panda Dad Free Crochet Pattern
  • How To Use Bath Salts in the Shower Without a Bath – Relaxation, Skincare, and a DIY Salt Recipe

Copyright © 2025 · CraftGossip | Start Here | Contact Us | Link to Us | Your Editors | Privacy and affiliate policy