• Home
  • Suggest A Craft
  • DIY Newsletter

Recycled Crafts

Creative DIY Projects That Turn Trash Into Treasure

  • About CraftGossip
  • Our Network
    • Bath & Body Crafts
    • Candle Making Ideas
    • Crochet Ideas
    • Cross Stitch
    • Edible Crafts
    • Felting Patterns
    • Glass Art
    • Home & Garden Ideas
    • Indie Crafts
    • Jewelry Making
    • Kids Crafts
    • Knitting Patterns
    • Lesson Plans
    • Needlework
    • Party Ideas
    • Polymer Clay
    • Quilting Ideas
    • Recycled Crafts
    • Scrapbooking
    • Sewing Patterns
    • Card Making
    • DIY Weddings
    • Not Craft Ideas
  • Giveaways
  • Roundups
  • Store
  • Search

How to paint a watermelon hat and flip-flops

June 13, 2017 by Stefanie Girard

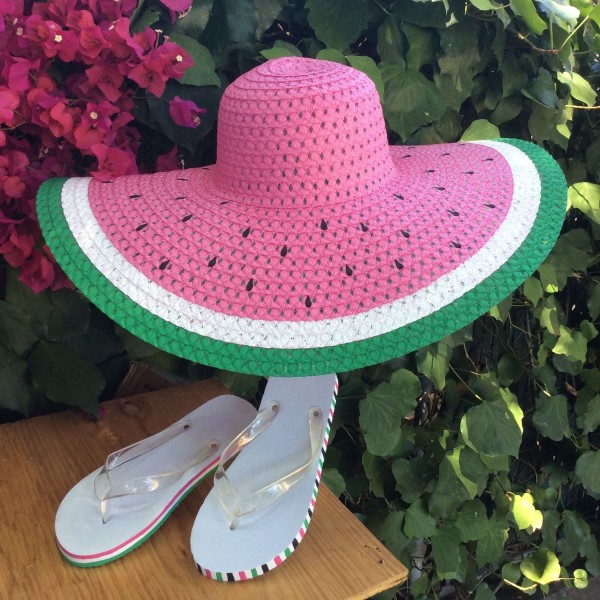
Painting some new summer accessories like a wide-brimmed hat and flip-flops with Testors craft paint can be a fun project as each summer can have a new theme and color scheme – this year it is watermelon for me! If you like pink, green, black and white why not try painting some watermelons on your summer accessories.

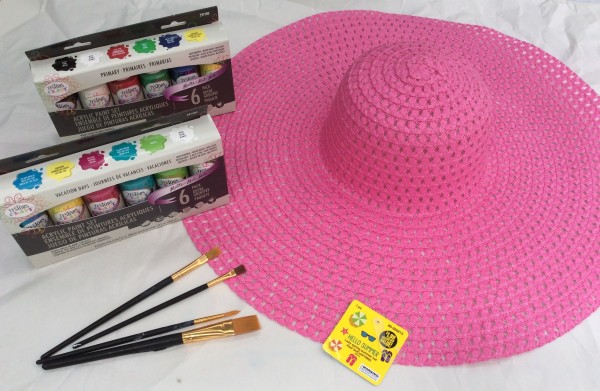
I happen to find a great pink wide-brimmed hat for just $2. This will keep the sun off me in style!

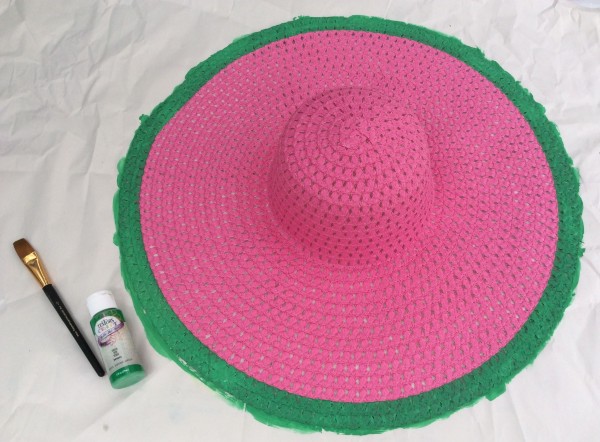
The first step in transforming this plain hat into a watermelon is with a stripe of green around the outermost edge with Testors craft paint . This is so easy as you simply used the stitching rings as your guide. Where the ring ends simply ease the stripe together.

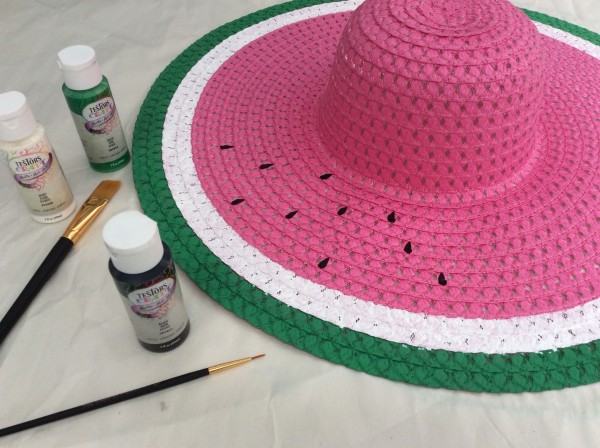
Repeat this step with white paint for the next two rings.

Then paint little black seeds that are teardrop shaped randomly around the remaining pink area of the hat.

I like to get a new pair of flip-flops each year and dress them up. For this pair I thought I’d paint them differently but with the same colors as my hat. One flip-flop I made lots of little vertical stripes in all the colors of Testors craft paint  around the side edge. The other I did 2 horizontal stripes all the way around the side edge. I think they came out petty fun!

Both hats and flip-flops are a great surfaces for all ages of painters to put their personal touch on.

Related Posts:

  • 45 amazing ways to reuse and recycle old playing cards
  • Upcycling or Hoarding? Why Your DIY Projects Could…
«
»

Comments

  1. Kelly miller says

    June 14, 2017 at 9:14 am

    Where did you finf the 2 hat?

  2. Stefanie Girard says

    June 14, 2017 at 11:49 am

    99 cents store (it was actually 2$) 🙂

  3. laura taylor says

    June 18, 2017 at 9:59 am

    What happens if you are wearing the hat in the rain…is the paint run-proof…

  4. Stefanie Girard says

    June 19, 2017 at 11:45 am

    Well, I can’t imagine wearing a sun hat in the rain but is is acrylic paint so it is permanent and waterproof.

Have you read?

How To Make A Milk Carton Village – A Recycled Craft for Kids

Ready to turn your recycling bin into a colorful, miniature village? Grab those empty milk cartons and let’s create a town filled with tiny houses, shops, and even a school or bakery! This craft is perfect for kids of all ages and encourages imagination, storytelling, and eco-friendly creativity.

 What You’ll Need:

  • Empty milk or juice cartons (washed and dried)

  • Paints or markers

  • Paintbrushes

  • Craft glue or glue stick

  • Scissors (adult supervision recommended)

  • Colored paper or old magazines

  • Bottle caps, buttons, or plastic lids (for windows or decorations)

  • Sticks, straws, or skewers (for flag poles or chimneys)

  • Optional: glitter, stickers, washi tape, cotton balls (for snow or clouds!)

 Step-by-Step Instructions:

Step 1: Clean and Prep the Cartons
Make sure your milk or juice cartons are washed and completely dry. Remove any plastic lids or caps and keep them for decorations!

Step 2: Plan Your Village
Decide how many buildings you want to make. Each milk carton becomes a house, shop, or whatever your imagination dreams up. Arrange them side by side or in a circle like a real village square.

Step 3: Cut Out Doors and Windows
With the help of an adult, carefully cut small door and window shapes into your cartons. You can also glue cut-out shapes from colored paper if you’d rather not cut into the carton.

Step 4: Paint and Decorate
Use paint or markers to bring your buildings to life. Make brick patterns, colorful siding, or roof tiles. Let each child choose their own theme – rainbow bakery, monster house, fairy home, or tiny fire station!

Step 5: Add the Roofs
You can paint the top pointy part of the carton like a roof, or glue on cardboard triangles to create overhangs. Want to add a chimney? Glue a straw or cardboard roll on top!

Step 6: Make Flags and Signs
Cut small flags from recycled plastic or paper and tape them to straws or sticks. Glue your flags to the rooftops. You can even create tiny signs for each building – “Toy Store,” “Library,” or “Super Cat’s House.”

Step 7: Build Your Village
Place all the finished buildings together on a large piece of cardboard, tray, or table. Use bottle caps for stepping stones, cotton balls for bushes or clouds, and draw roads with marker.

Step 8: Play!
Now that your village is built, use little toys, action figures, or LEGO people to live in your new town. Create stories and adventures—your Milk Carton Village is officially open!

 Learning Bonus:

This craft is not just fun—it also teaches recycling, fine motor skills, creative thinking, and storytelling. Plus, it’s a great group activity for playdates, classrooms, or family craft nights.

Let your kids’ imaginations run wild—and remember, no two villages need to look the same. Each one tells its own story!

Explore

books Christmas CraftGossip Giveaways Craft Inspirations Easter glass halloween Home Decor kid crafts More Crafts Patterns & Tutorials recycled art Recycled Clothing Recycled Jewelry Recycled kids crafts Recycled Sewing Recycled Tutorials Recycling Ideas Recycling Organizing tin can

RSS More Articles

  • Knit a Stunning Shawl That Wears Like a Collar
  • How to Make a Summer Pocket Mini Scrapbook Album
  • Book Review: This is How a Ball Rolls
  • A Sweet Top to Show Off Colorful Yarns
  • Egyptian Eye Throw – Crochet Pattern
  • Easy to make fall garland
  • Fancy Pumpkin Cross Stitch Patterns
  • DMC Orange Punch Needle Pattern
  • How To Make A Milk Carton Village – A Recycled Craft for Kids
  • Easy Sleeveless Top – Free Crochet Pattern

Copyright © 2025 · CraftGossip | Start Here | Contact Us | Link to Us | Your Editors | Privacy and affiliate policy