• Home
  • Suggest A Craft
  • DIY Newsletter

Recycled Crafts

Creative DIY Projects That Turn Trash Into Treasure

  • About CraftGossip
  • Our Network
    • Bath & Body Crafts
    • Candle Making Ideas
    • Crochet Ideas
    • Cross Stitch
    • Edible Crafts
    • Felting Patterns
    • Glass Art
    • Home & Garden Ideas
    • Indie Crafts
    • Jewelry Making
    • Kids Crafts
    • Knitting Patterns
    • Lesson Plans
    • Needlework
    • Party Ideas
    • Polymer Clay
    • Quilting Ideas
    • Recycled Crafts
    • Scrapbooking
    • Sewing Patterns
    • Card Making
    • DIY Weddings
    • Not Craft Ideas
  • Giveaways
  • Roundups
  • Store
  • Search

How to make recycled teddy bear jar Christmas light decorations

November 29, 2016 by Stefanie Girard

teddy-bear-jar-decoration-stefanie-girard

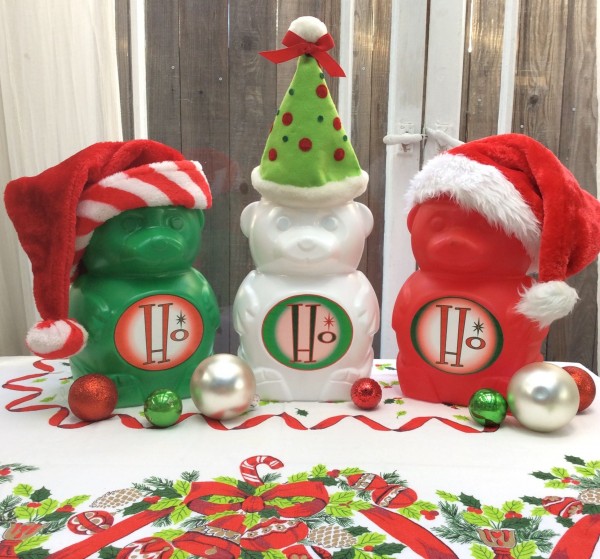
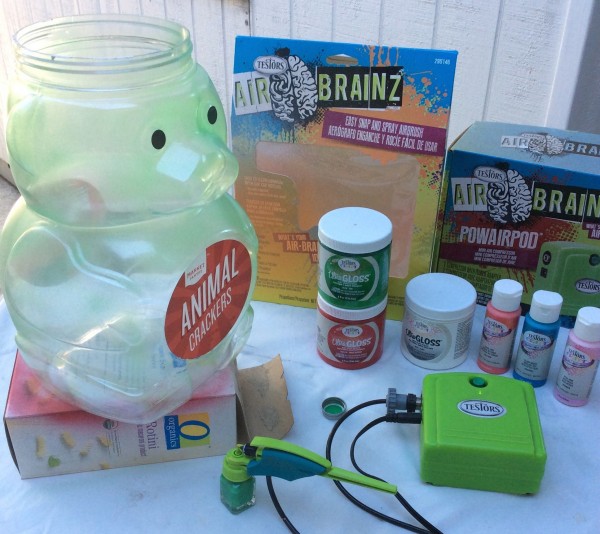
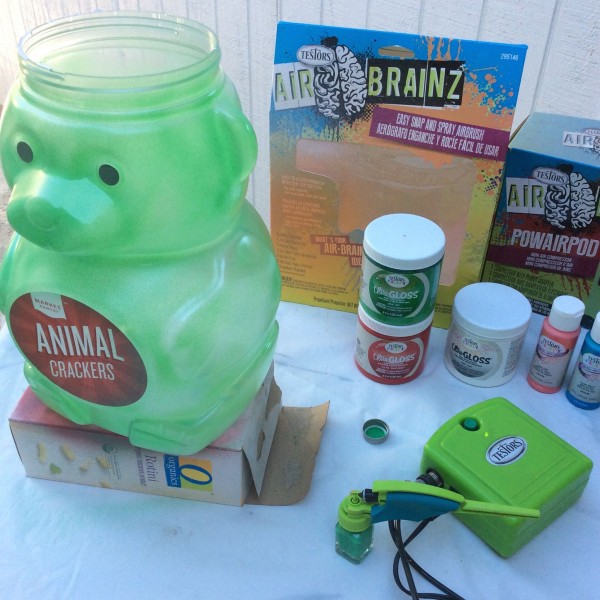
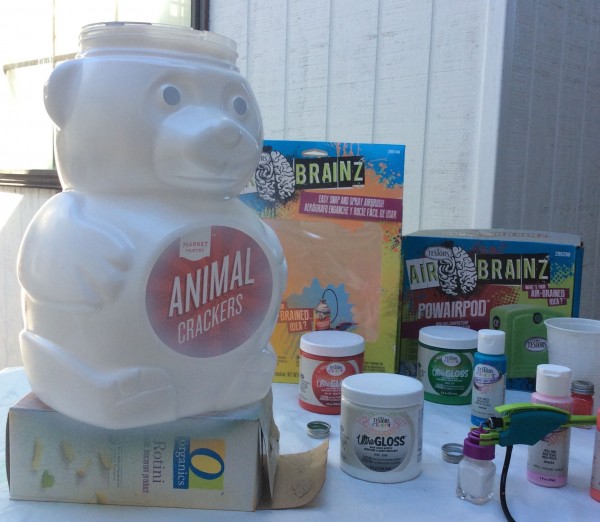
Ho Ho Ho my recycled teddy bear cookie jars say! With an easy coat of paint with an  Testors AirBrainz Airbrush Kit , Mini Powairpod AirBrainz Air Compressor  and some free downloadable graphics from below you too can upcycle a bunch of Animal cracker teddy bear jars into a fun light up Christmas decoration. Smaller ones are available on Amazon and larger ones are available at Target.

teddy-bear-christmas-lights-stefanie-girard

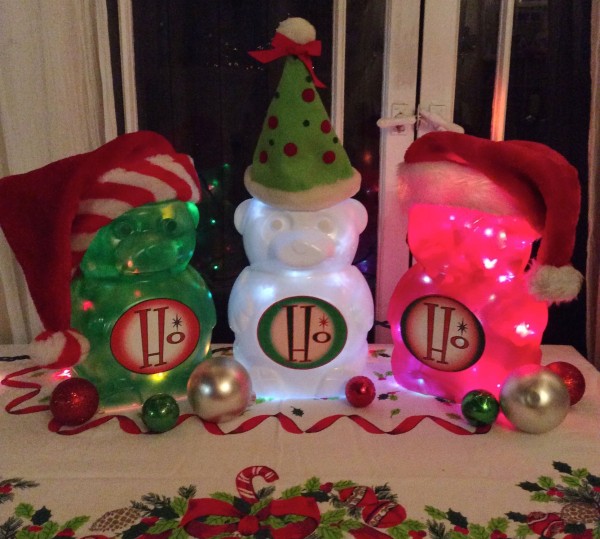
I can’t decide which way I like them better, lit up at night or during the day when they look like giant gummy bears.

airbrushed-teddy-bear-jar-decoration

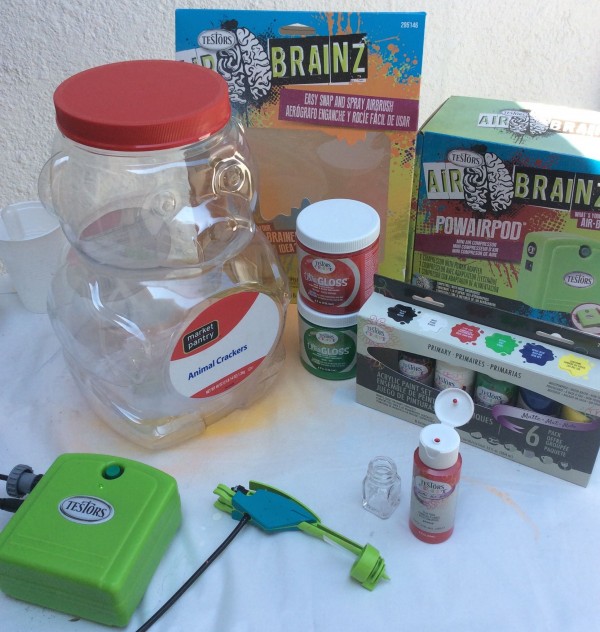
These were so easy to make. I simply airbrushed them using a variety of Testors Craft Acrylic paint.

gummy-bear-decoration-light

This is what it starts out looking like after one coat of Testors Ultra Gloss green paint.

how-to-paint-a-teddy-bear-jar-light

Then after two coats.

teddy-bear-cookie-jar-airbrushed-decoration

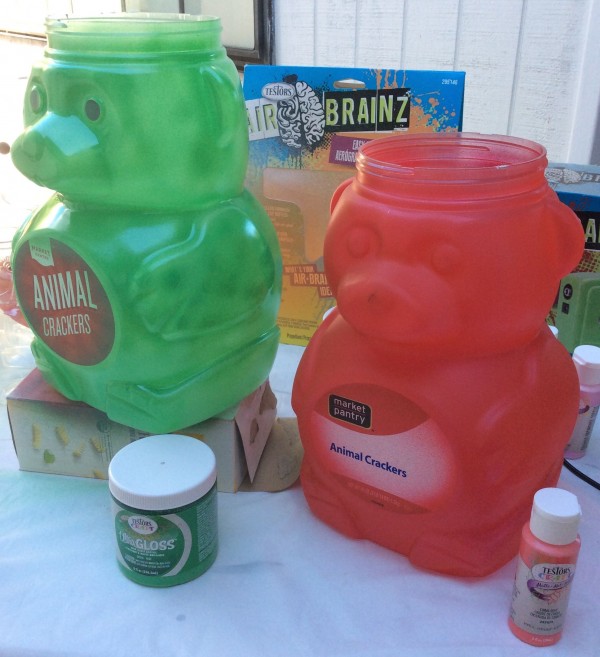
Here is the red bear complete using Testors red matt paint completed and the green one almost done. You can see the difference in the green gloss and the red matt finish.

giant-gummy-bear-jar-light-painted

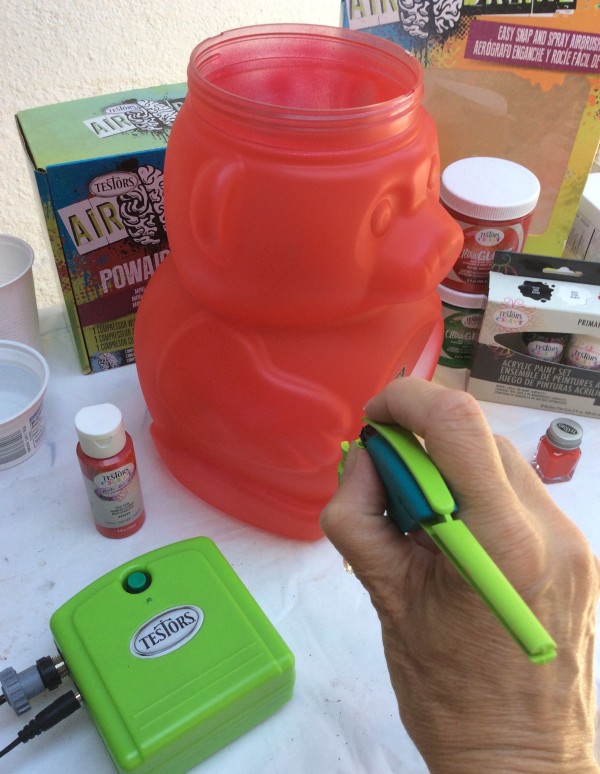
Simply keep airbrushing light layers until you have full coverage.

teddy-bear-christmas-decoration-girard

Lighter colors like the Testors Ultra Gloss White feature the bear’s details better than the darker colors.

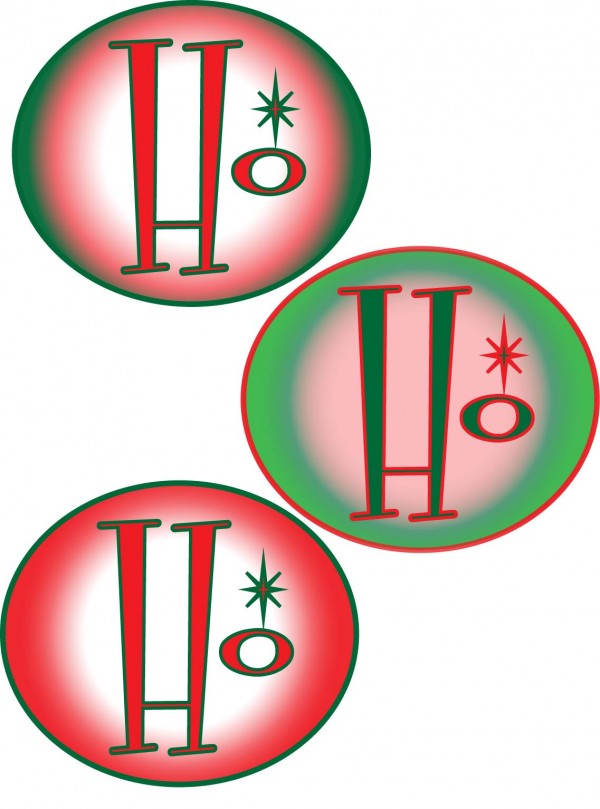
Once you have your recycled teddy bear jars all painted download and print out these labels or make some of your own.

Fill the teddy bear jars with low temp Christmas lights (standard ones will be TOO HOT!!!!) and top off with Santa hats.

ho-ho-ho-graphics


Related Posts:

  • Thrift Your Way to Sustainable Crafting: 10 Flea…
  • 30 Brilliant Uses for Empty Pill Bottles You…
«
»

Have you read?

DIY Paper Bag Mushrooms – A Creative Upcycled Craft for Kids and Nature Lovers

There’s something magical about mushrooms — maybe it’s the fairy-tale vibes or their cozy woodland charm. Either way, turning ordinary brown paper bags into mushrooms is a fun, hands-on craft project that kids (and adults) will enjoy. The best part? You’re reusing materials that might otherwise go to waste. Win-win!

This easy tutorial walks you through making your very own forest of recycled mushrooms using simple supplies you likely already have around the house.

What You’ll Need:

  • Brown paper lunch bags (you can even use grocery bags cut to size)

  • Scrap paper or newspaper for stuffing

  • String, yarn, or twine

  • Scissors

  • Paints (acrylic or tempera work best)

  • Paintbrushes or sponges

  • Optional extras: markers, stickers, googly eyes, craft glue

Step-by-Step: How to Make Your Mushrooms

Step 1: Create the Mushroom Top
Start by opening your paper bag and gently crumpling up some newspaper or scrap paper. Stuff it into the bottom of the bag — not too tight, just enough to give it a rounded shape that will form the mushroom cap.

Step 2: Form the Stem
Once the top is nice and puffy, hold the bag just underneath the stuffed section and twist it lightly to shape the stem. Tie a piece of twine or string around this part to hold the form. You’ll now have a mushroom top with a long paper bag hanging down — that’s your stem.

Step 3: Trim to Size
If the stem looks too long or uneven, grab your scissors and snip it down to your preferred height. You can even experiment with making some taller and some short and chubby for a little mushroom variety.

Step 4: Paint and Decorate
Time for the fun part — painting! Flip the mushroom cap upright and paint it any way you like. Classic red with white spots? Go for it. Bright blue with glitter? Why not! Use brushes or dabbers to add spots, swirls, or patterns. Let kids express their creativity — there’s no wrong way to decorate a magic mushroom!

Step 5: Let It Dry
Place your mushrooms somewhere safe to dry. You can use a sheet of newspaper or cardboard to avoid mess. Once dry, they’ll stiffen a little and hold their shape nicely.

Step 6: Display Your Mushroom Garden
Line them up on a windowsill, add them to a play area, or build a fairy village in the corner of a room. You can even glue them to a cardboard base and add moss, pebbles, and tiny paper critters for a full scene.

Extra Ideas:

  • Add flags or tiny doors to make mushroom homes.

  • Draw faces or names on the stems to turn them into characters.

  • Use cotton balls or pom-poms for fluffy mushroom spots.

Why This Project Rocks:

This is one of those crafts that doesn’t need a trip to the store or fancy tools — just a little time, a few basic supplies, and a bit of imagination. Plus, it encourages kids to see the creative potential in everyday materials — a great step toward more mindful, eco-conscious crafting.

So go ahead, raid the recycling bin and bring a mini mushroom forest to life.

How to make giant toadstools out of recycled tires

How to make champagne cork toadstools

How to make recycled Easter egg mushrooms

How to make recycled toilet paper tube mushrooms

How to make a rainbow forest of adorable recycled mushrooms

Explore

books Christmas CraftGossip Giveaways Craft Inspirations Easter glass halloween Home Decor kid crafts More Crafts Patterns & Tutorials recycled art Recycled Clothing Recycled Jewelry Recycled kids crafts Recycled Sewing Recycled Tutorials Recycling Ideas Recycling Organizing tin can

RSS More Articles

  • DIY Paper Bag Mushrooms – A Creative Upcycled Craft for Kids and Nature Lovers
  • Book Review – Stitched Photo Mosaic Quilting
  • Free Crochet Pattern – Halloween Skull Sweater
  • 5 FREE Cute, Comfy and Cozy Fall Coloring Pages
  • Meet Mr. Boo – The Ultimate Halloween Decoration That Will Steal the Show
  • Book Review: Cross Stitch Alphabet and Number Patterns
  • Knit a Jacket Inspired by an Iconic Coco Chanel Look
  • Learning about Côte D’ivoire for Kids
  • 12 Autumn Botanical Scrapbook Layout Ideas
  • Green Gifting: Sustainable Gift Wrap Ideas Using What You Already Have

Copyright © 2025 · CraftGossip | Start Here | Contact Us | Link to Us | Your Editors | Privacy and affiliate policy