• Home
  • Suggest A Craft
  • DIY Newsletter

Recycled Crafts

Creative DIY Projects That Turn Trash Into Treasure

  • About CraftGossip
  • Our Network
    • Bath & Body Crafts
    • Candle Making Ideas
    • Crochet Ideas
    • Cross Stitch
    • Edible Crafts
    • Felting Patterns
    • Glass Art
    • Home & Garden Ideas
    • Indie Crafts
    • Jewelry Making
    • Kids Crafts
    • Knitting Patterns
    • Lesson Plans
    • Needlework
    • Party Ideas
    • Polymer Clay
    • Quilting Ideas
    • Recycled Crafts
    • Scrapbooking
    • Sewing Patterns
    • Card Making
    • DIY Weddings
    • Not Craft Ideas
  • Giveaways
  • Roundups
  • Store
  • Search

How to make die cut felt hedgehogs and Christmas trees

September 22, 2017 by Stefanie Girard

I am always looking for new ways to use my dies as I love die cutting. The new Crafter’s Companion Rose Flower and Daisy Flower dies are perfect for making felt hedgehogs and Christmas trees.

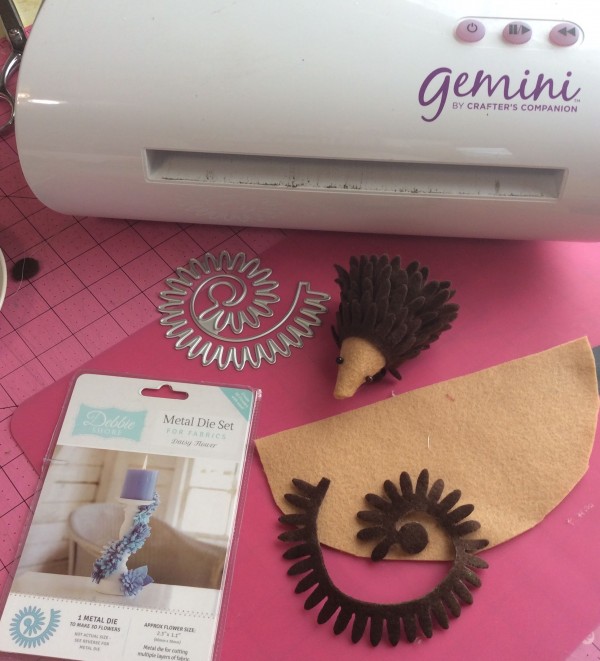
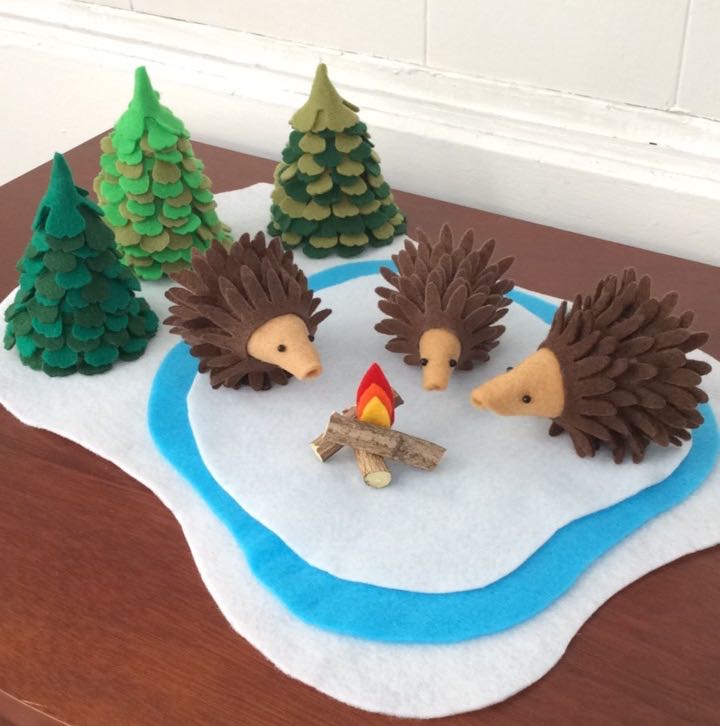
For the base of the hedgehog I simply cut a piece of felt in a half circle and rolled it up in a cone shape.

I hot glued the die cut daisy flower strips onto the cone shape starting from the wide part and coiling them around until there was about 1 inch left.

I sewed two little black beads onto the head area for eyes.

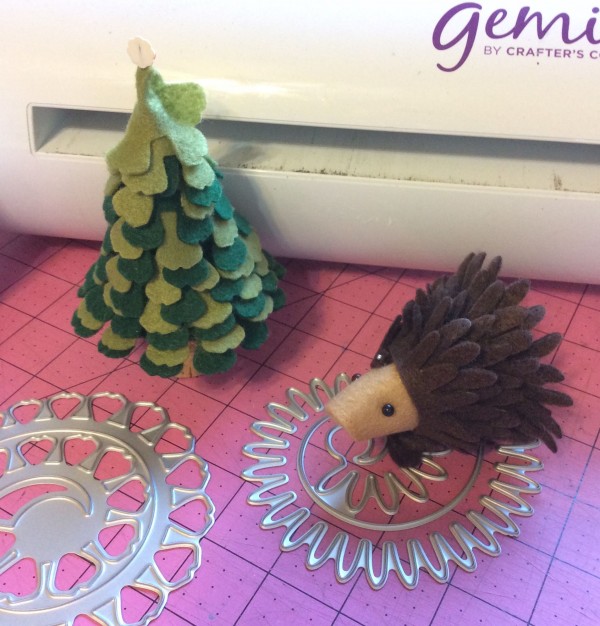
The tree is made the same way only I used two different shades of green felt and the Rose Flower die.

To make the little fire I cut 3 pieces of a branch from my yard and stacked them in a little pile.

The flames are made with red, orange and yellow pieces of felt glued together and on top of the little pile of wood.

All the elements are placed on three layers of felt cut in irregular shapes stacked- white smallest, then light blue, and then a large piece of white felt.


Related Posts:

  • Your pasta machine is good for more than pasta or…
  • How to make recycled clothes pin puppets
«
»

Have you read?

How to Paint Melamine Furniture

Recently, we received an email from Jenny, one of our readers, asking for some advice on painting melamine furniture. Jenny was looking to refresh an old dresser but wasn’t sure about the right way to tackle the project. Well, we’ve got just the thing! After some digging, we came across a fantastic article on Spraypaint Blog titled How to Recycle and Paint Melamine Furniture, which walks you through the process step-by-step.

Why This Article is Perfect for Jenny (and You!)

This guide is incredibly comprehensive, covering everything you need to know about painting melamine—an often tricky material to work with. Melamine is known for its smooth, glossy surface, which can be tough to paint without the right preparation. But with the tips from this article, you’ll learn how to properly prep your melamine pieces, choose the right paint, and achieve a professional-looking finish.

The article also dives into the importance of sanding and priming the surface to ensure that the paint adheres well. With these steps, Jenny (and anyone else trying this project) can be sure that their painted melamine furniture will not only look great but last for years to come.

Jenny, we hope this article gives you all the info you need to tackle your melamine furniture project! It’s clear from the tutorial that a little prep work goes a long way, and with the right products, even melamine can be transformed into a beautiful, personalized piece.

For anyone else curious about painting melamine, check out the full article on Spraypaint Blog for all the tips and techniques: How to Recycle and Paint Melamine Furniture. Happy painting!

My Tips for Painting Melamine Furniture

Hey Jenny (and anyone else planning a melamine project), here are my top tips to help you get the best results when painting melamine furniture:

Prep is Key
Clean the surface well, then lightly sand it with fine-grit sandpaper to give the primer something to grip onto. Trust me, it makes a big difference!

Prime Like a Pro
Don’t skip the primer! Use a bonding primer that’s made for glossy surfaces or melamine. It’ll make sure your paint sticks and lasts.

Pick the Right Paint
Go for a good enamel or acrylic paint. I use a foam roller for a smooth finish—no brushstrokes! Apply a few thin coats, letting each one dry in between.

Topcoat for Durability
Once the paint’s dry, apply a protective topcoat (polyurethane or polycrylic) to help it stay scratch-free.

Give It Time
Let the paint cure for at least 48 hours before using the furniture—longer is even better! It’ll help the finish hold up over time.

Get Creative
Don’t be afraid to try fun colors or finishes! Melamine is perfect for getting a bit adventurous.

Explore

books Christmas CraftGossip Giveaways Craft Inspirations Easter glass halloween Home Decor kid crafts mason jar More Crafts Patterns & Tutorials recycled art Recycled Clothing Recycled Jewelry Recycled Sewing Recycled Tutorials Recycling Ideas Recycling Organizing tin can

RSS More Articles

  • DIY Microwave Bowl Cozy Sewing Pattern – A Must-Have for Your Kitchen
  • Artistic Stitches: Exploring Punch Needle Tattoo Designs
  • Knit Dinosaurs on a Circular Knitting Machine
  • Emily’s Paris Scarf – Crochet Kit
  • 30 Big Block Quilts For Beginners Or Time Poor Quilters
  • FREE Patchwork Pouch Pattern
  • Book Review: Secret Stories of Lost Beasts
  • Etsy Spotlight: 1955 Baby Doll Nightgown & Bloomers Pattern
  • Baby Banner and Mini Album Project
  • Color Wheel Block Tutorial by Red Pepper Quilts

Pick Your Blog

  • Sewing
  • Knitting
  • Quilting
  • Crochet
  • Home & Garden
  • Recycled Crafts
  • Scrapbooking
  • Card Making
  • Polymer Clay
  • Cross-Stitch
  • Edible Crafts
  • Felting
  • Glass Art
  • Indie Crafts
  • Kids Crafts
  • Jewelry Making
  • Lesson Plans
  • Needlework
  • Bath & Body
  • Party Ideas
  • Candle Making
  • DIY Weddings
  • Not Craft
  • Free Craft Projects

Copyright © 2025 · CraftGossip | Start Here | Contact Us | Link to Us | Your Editors | Privacy and affiliate policy