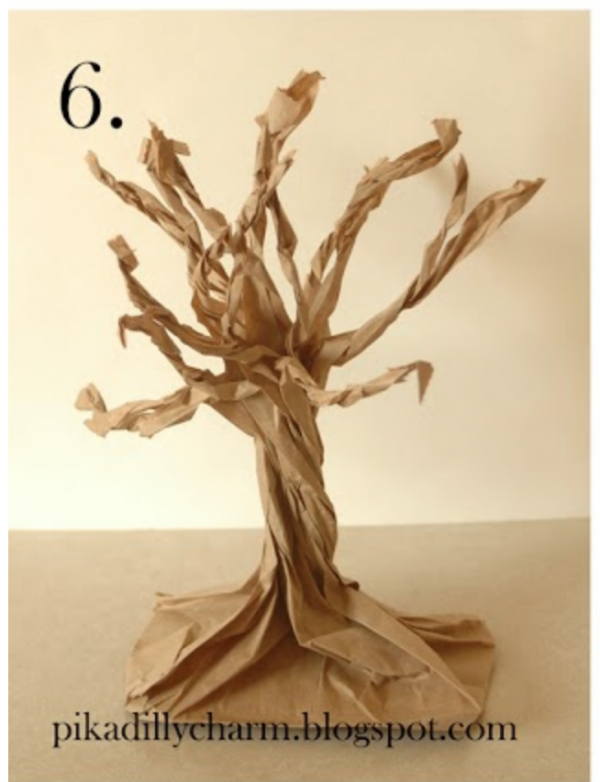
 Paper bags are the perfect recycled material to make trees with and a spooky tree makes a great base for all sorts of mini Halloween decorations. A forest of them could hold all sorts of creepy goodies and creatures. Pop on over to the blog Pikadilly Charm for the step by step tutorial on how to make a paper bag tree.
Have you read?
10 Halloween Bowling Ball Crafts for Spooky Upcycled Garden Décor
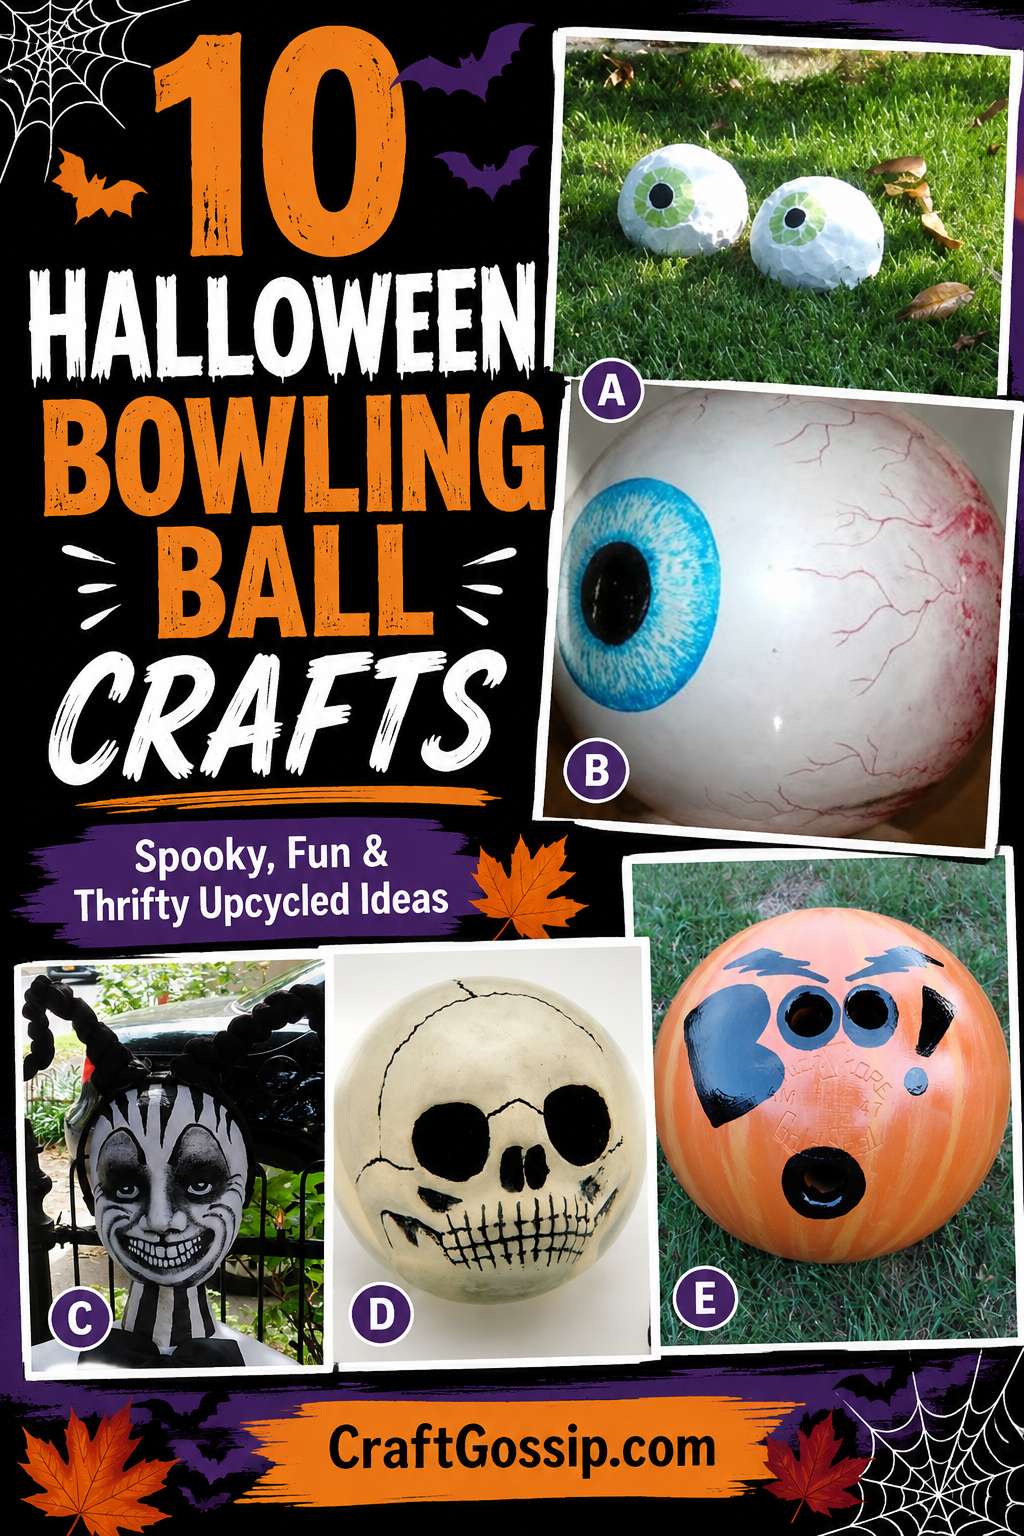
I checked CraftGossip.com and CraftBits.com and did not find an existing roundup devoted specifically to Halloween bowling ball crafts. CraftGossip has covered plenty of recycled Halloween decorating ideas, but this wonderfully odd little corner of bowling-ball upcycling appears to be wide open.
There are thrift-shop finds that make perfect sense the moment you spot them. A basket for yarn? Obviously. A chipped wooden stool waiting for paint? Into the trolley it goes. Then there are the slightly more questionable purchases—such as an old bowling ball that weighs half as much as Aloo and has no apparent purpose beyond making the walk back to the car unnecessarily difficult.
Halloween, however, is where an old bowling ball finally earns its keep.
Its heavy, rounded shape is ideal for making reusable outdoor Halloween decorations. Bowling balls can become pumpkins, eyeballs, skulls, spiders, monster heads and wonderfully strange creatures that sit securely among the garden beds without being carried away by the first enthusiastic October breeze.
Unlike real pumpkins, these upcycled Halloween decorations can be brought out year after year. There is no carving, no collapsing pumpkin lurking beside the front door and no mysterious smell developing three days before trick-or-treat night.
Many vintage bowling-ball crafts were shared online as photographs rather than complete tutorials, so this roundup includes a mixture of step-by-step projects and Pinterest inspiration. Each design can be adapted using exterior primer, suitable craft paint and a weather-resistant clear sealer.
Painted Jack-O’-Lantern Bowling Ball
A painted pumpkin is the most natural Halloween transformation for an old bowling ball. Cover the ball with orange paint, add subtle curved lines to create pumpkin sections and paint a traditional jack-o’-lantern face across the front.
This Halloween bowling ball pumpkin shows how effectively the finger holes can become part of the expression. Rather than filling every opening, use them as eyes, nostrils or a dramatic open mouth for a pumpkin with plenty of personality.
Finish it with a short branch or chunky wooden knob for the stem. A twisting piece of wire and a few artificial leaves will disguise the top and make it look more like a proper garden pumpkin.
Giant Eyeball Bowling Balls
A cluster of enormous eyeballs scattered across the lawn is wonderfully unsettling—and very easy to make. Paint each bowling ball white, add a large coloured iris and black pupil, then use a fine brush to create red veins around the sides.
This painted bowling ball eyeball inspiration features thrifted bowling balls rolled around the garden as spooky Halloween decorations. Make several with different iris colours so they look as though a gathering of garden monsters is quietly watching the neighbours.
For a glossy, wet-looking finish, protect the paint with a compatible high-gloss exterior sealer.
Spooky Bowling Ball Skull
Painting a skull onto a bowling ball works particularly well because the black finger holes can be incorporated into the eyes, nose or missing teeth. Begin with an ivory, grey or white base coat before sketching the skull design with chalk.
This spooky bowling ball skull is a useful visual reference for creating dramatic black eye sockets and a simple skeletal grin. Sit the finished skull among autumn leaves, beside a faux gravestone or inside an old wire basket.
Dry-brushing grey and brown paint around the edges will make the skull appear older and slightly grubby—which is one of those rare occasions when a less-than-perfect paint finish is an advantage.
Beetlejuice-Inspired Striped Bowling Ball
A black-and-white striped bowling ball makes a fabulous addition to a quirky Halloween porch. Paint alternating sections around the ball, then add green, purple or acid-yellow details for a theatrical haunted-house look.
This Beetlejuice-inspired painted ball was created as pumpkin décor, but the striped design translates beautifully to a thrifted bowling ball.
Add a mischievous face, a small top hat or tufts of mossy green yarn. Just avoid using protected character logos or exact commercial artwork if you plan to sell the finished decoration.
One-Eyed Monster Bowling Ball
Turn the bowling ball into a colourful monster by painting it purple, lime green, turquoise or bright orange. Add one enormous eye, a crooked mouth and a collection of uneven teeth.
An evil-face painted bowling ball offers plenty of inspiration for creating a more menacing expression. The smooth surface is ideal for bold graphic features, and the original finger holes can become nostrils, warts or mysterious extra eyes.
For a friendlier version, add floppy felt ears or pipe-cleaner antennae. For something properly creepy, paint several tiny eyes around the back so the monster can watch in every direction.
Black Cat Bowling Ball
Paint an old bowling ball matte black and transform it into a round Halloween cat. Add large yellow eyes, a small pink nose and white whiskers, then attach triangular ears made from sealed wood, plastic or weather-resistant craft foam.
The design is simple enough to create without a detailed pattern. Use a stable flowerpot or metal ring as the base, then add a curled wire or flexible tubing tail behind the ball.
A pair of these black cats placed on either side of the front steps would make sweet Halloween guards. They are more charming than frightening, but not everyone wants the porch to look as though something has recently escaped from a crypt.
Creepy Spider Bowling Ball
A glossy black bowling ball is practically asking to become the oversized body of a garden spider. Paint on red hourglass markings, fluorescent dots or a fuzzy cartoon face, depending on how scary you want it to be.
Attach eight legs made from thick wire, bent metal tubing or sealed lengths of flexible conduit. Push the finished spider partly beneath a shrub or nestle it into a stretched web so trick-or-treaters notice it only when they get close.
This Pinterest collection of bowling ball upcycles includes hundreds of bowling-ball garden-art ideas and is a useful place to explore shapes, stands and attachment methods before building your spider.
Ghostly White Bowling Ball Faces
Give several bowling balls a white base coat and paint each one with a different ghost expression. Long black mouths, uneven eyes and raised eyebrows will make them look like a gathering of surprised little spirits.
This Halloween bowling ball inspiration includes ghostly faces, eyeballs and other seasonal bowling designs.
Arrange the ghost balls in a row along the garden path or display them in black metal plant stands. Add scraps of white gauze beneath each one if you would like the ghosts to have wispy bodies.
Witch Head Bowling Ball
Paint the ball green and add a long crooked nose, deep purple eyelids and one or two extravagant warts. The face does not need to be pretty; in fact, the more uneven and theatrical it is, the better.
Top the finished head with a child-sized witch hat or make one from black felt stiffened with cardboard. Raffia, yarn or strips of torn fabric can be glued beneath the hat to create wild witchy hair.
Use the painted-ball methods shown across this repurposed bowling ball inspiration board to explore different facial styles and garden-display ideas.
A cauldron, old broom or cluster of potion bottles will turn the finished witch into a complete porch vignette.
Glow-in-the-Dark Alien Eyeball
Paint a bowling ball neon green, radioactive yellow or ghostly white, then add one oversized black alien eye. Glow-in-the-dark paint can be used for the iris, veins or strange little markings around the surface.
The realistic eye design on this eyeball bowling ball can be simplified into an alien version by changing the colours and elongating the pupil.
Charge the glow paint beneath a bright light before placing the ball outside. Display it inside a black plant stand or among silver-painted branches so it resembles a mysterious object that has landed in the garden.
Bonus Idea: Bowling Ball Halloween Game
Your bowling ball does not have to remain a static decoration. Paint it like a pumpkin, skull or giant eyeball and use it with a set of lightweight homemade Halloween pins.
Empty plastic bottles can be painted as ghosts, mummies, vampires and monsters. This DIY Halloween bowling-game inspiration uses painted ghost bottles and a small pumpkin as the ball, but a decorated bowling ball could be used for older players on a suitable outdoor surface.
A real bowling ball is extremely heavy, so keep younger children well clear and never roll it across tiles, decking or indoor floors. For children’s parties, display the painted bowling ball beside the game and use a lightweight rubber ball for the actual bowling.
How to Prepare an Old Bowling Ball for Painting
Bowling balls have slick, polished surfaces, so taking time with the preparation will prevent your Halloween masterpiece from shedding its skin halfway through October.
Wash the ball thoroughly with warm soapy water. Once dry, wipe it with rubbing alcohol or an appropriate degreaser to remove wax, oil and years of mysterious bowling-alley residue.
Lightly sand the entire surface with fine-grit sandpaper. You only need to remove the shine and create enough texture for the primer to grip.
The finger holes can be included in a monster face or filled for a smooth finish. Use a durable exterior-grade filler or epoxy putty, following its safety and curing instructions. Deep openings may need to be filled in stages.
Apply a bonding primer suitable for resin, plastic or glossy non-porous surfaces. Once cured, add exterior acrylic paint, multisurface craft paint or compatible spray paint in several light layers.
Complete the project with a UV-resistant exterior clear sealer. Check that the paint and sealer are compatible before coating the entire ball, as some products may wrinkle or soften the layer underneath.
Displaying Halloween Bowling Ball Decorations
A heavy bowling ball still needs a stable base, particularly when displayed on steps or a raised stand. Sit it in a terracotta pot, metal plant ring, old lampshade frame or purpose-made garden-ball holder.
For ground-level displays, tuck the ball slightly into mulch or gravel so it cannot shift. Keep it away from walkways where excited trick-or-treaters may trip over it in the dark.
Group several designs together for the biggest impact. An eyeball beside a skull is creepy; six eyeballs surrounding a witch’s head looks like you have made a full commitment to the theme.
At the end of Halloween, wipe the decorations clean and store them somewhere dry. With a little care, these painted bowling ball crafts can return to haunt the garden for years—which is more than can be said for the real pumpkin slowly liquefying beside the letterbox.