• Home
  • Suggest A Craft
  • DIY Newsletter

Recycled Crafts

Creative DIY Projects That Turn Trash Into Treasure

  • About CraftGossip
  • Our Network
    • Bath & Body Crafts
    • Candle Making Ideas
    • Crochet Ideas
    • Cross Stitch
    • Edible Crafts
    • Felting Patterns
    • Glass Art
    • Home & Garden Ideas
    • Indie Crafts
    • Jewelry Making
    • Kids Crafts
    • Knitting Patterns
    • Lesson Plans
    • Needlework
    • Party Ideas
    • Polymer Clay
    • Quilting Ideas
    • Recycled Crafts
    • Scrapbooking
    • Sewing Patterns
    • Card Making
    • DIY Weddings
    • Not Craft Ideas
  • Giveaways
  • Roundups
  • Store
  • Search

Giveaway- Washi Tape and how to make a recycled container mobile

February 16, 2016 by Stefanie Girard

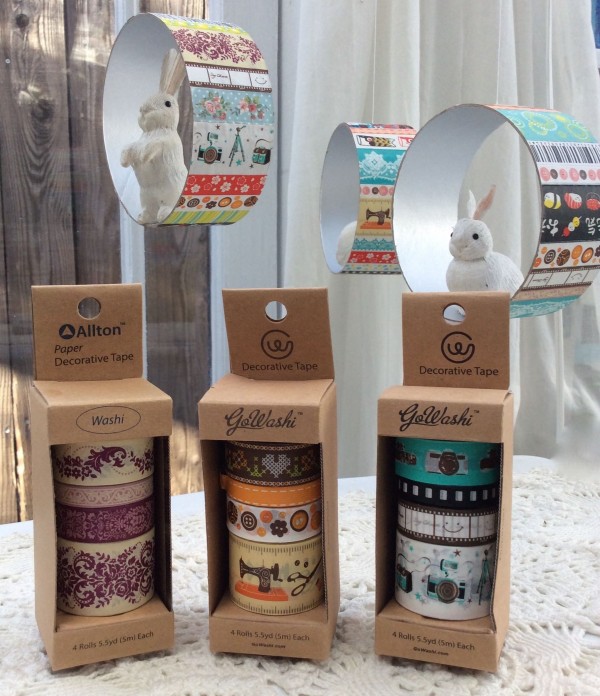
Go Washi Tape

Giveaway- 3 Packages of GoWashi.com Washi Tape

Leave a comment in today’s post by Feb. 25, 2016 and you are entered to win:

1 Pack Victoria

1 Pack Sewing

1 Pack Photograph

of Designers Choice GoWashi tape.

Open to U. S. residents only please.
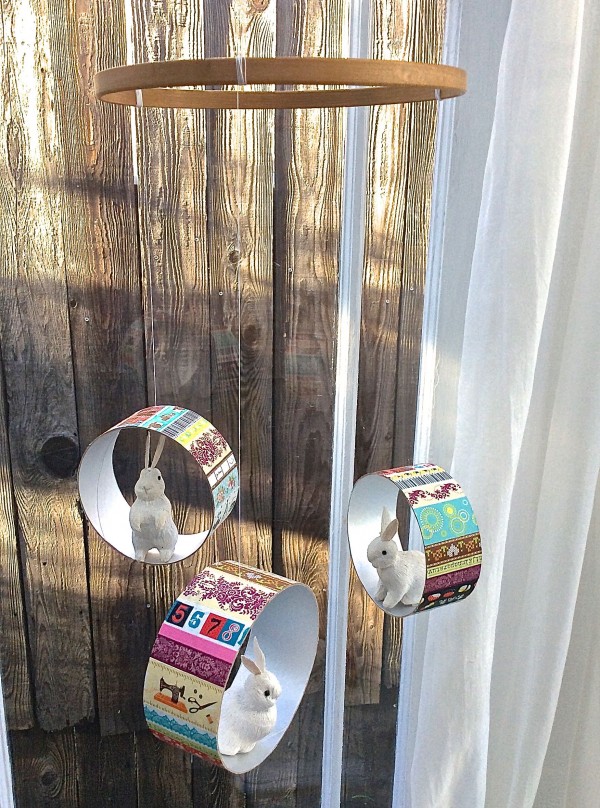
GoWashi tape recycled container mobile

Using washi tape to cover recycled containers is a great way to transform them into stylish home decor items. That’s just what I’ve done to a cardboard container. Simply by slicing it up and covering with washi tape I have made a fun mobile perfect to display fun little figurines.
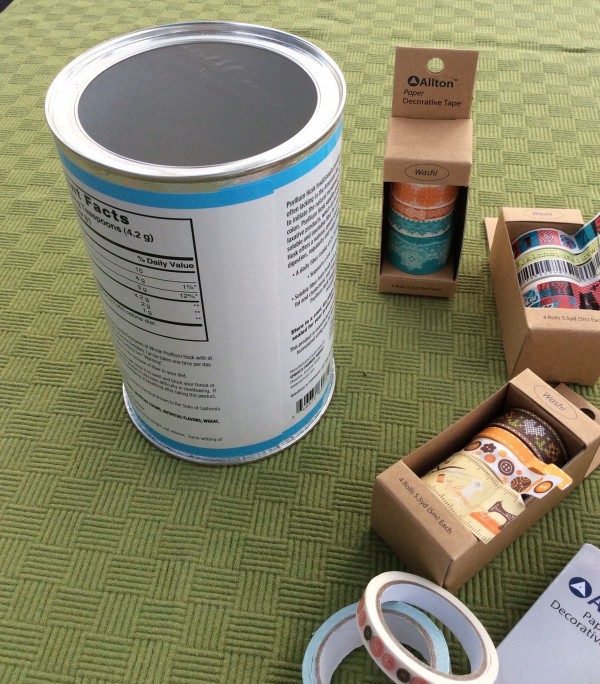
how to make a cylinder mobile

The first step is to slice the container into sections.

First I cut the metal part off the top.
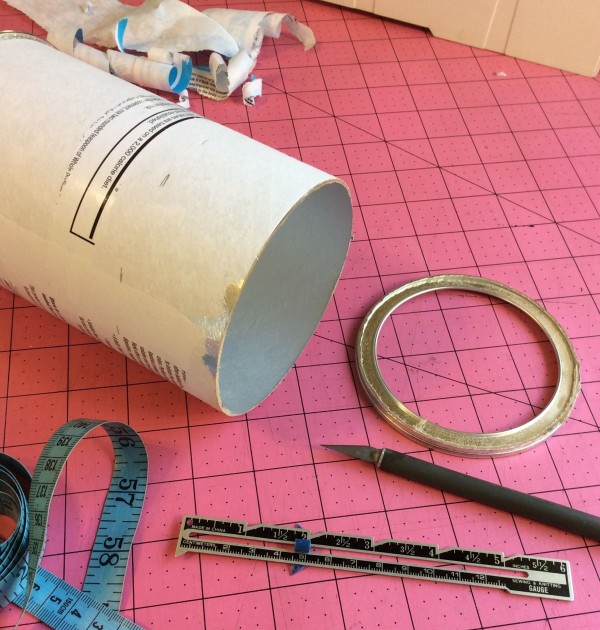
how to cut a cardboard cylinder

I used a seam gauge to mark 1 3/4 inch sections with a pencil.
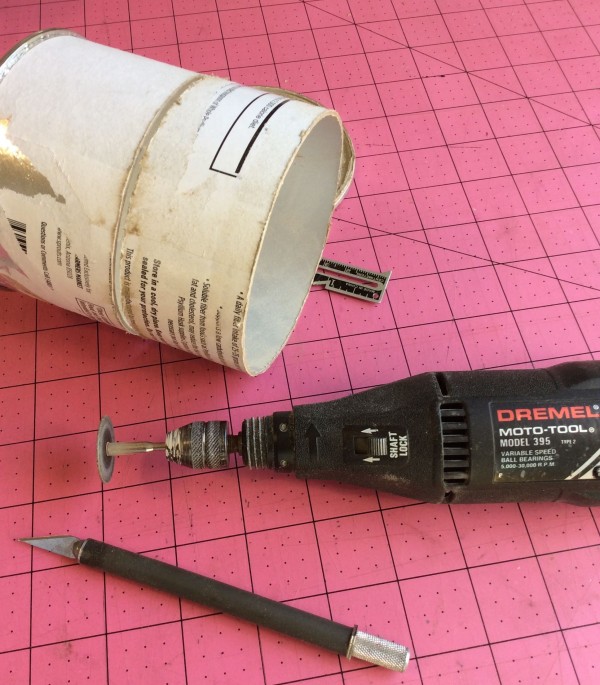
how to cut a carboard container Dremel

I used a combination of an X-Acto knife and a Dremel.
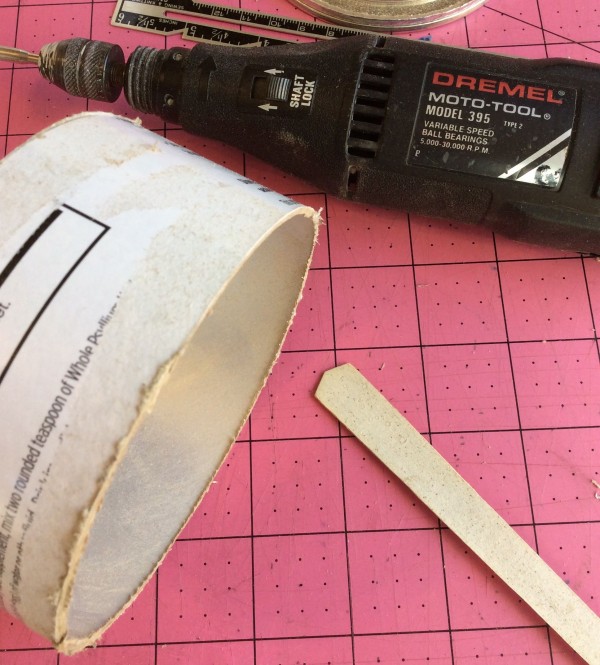
sand cardboard edge with nail file

To make the edges smooth I used the high-tech tool, a nail file (emery board). I also pealed the paper label off as much as would come off easy and then sanded sown the rest with the emery board.
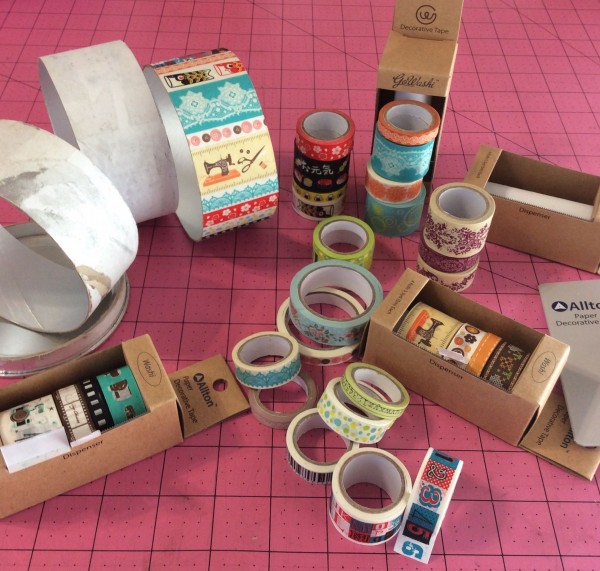
Alton Go washi tape mobile

These packs of Washi tape from GoWashi come with cutting edge on the dispenser. How cool! You can see all the different packs and more washi tape projects at their site.
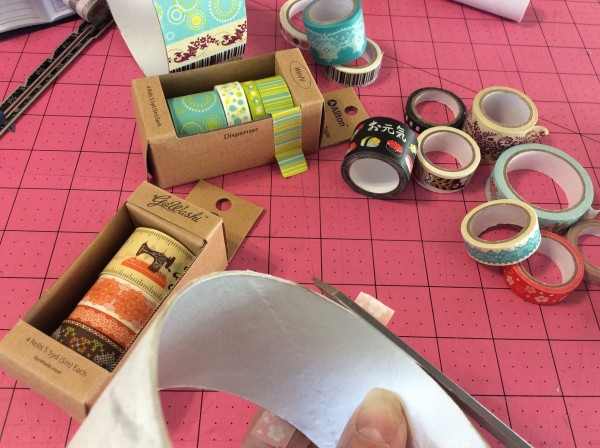
Go washi tape cutting tip

Cover each section with strips of washi tape. I like to cut the tape from the back side so the edge of the scissors is flush to the edge of the cardboard. This makes a perfect flush cut.

On the last piece of washi tape I put on the cylinder I slipped one end of button thread under it with a bit of white glue to secure.

Once the glue is dry tie the other end of the thread to an embroidery hoop and use a bit more thread to hang the hoop.

I plan on switching out what I display in the mobile. The variety of prints on the washi tape will allow me to mix up my decorations throughout the year.
Related Posts:

  • Creative Ways to Teach Kids About Recycling
  • How to make recycled clothes pin puppets
«
»

Comments

  1. Kathi Kovach says

    February 16, 2016 at 10:37 am

    Adorable! I ? washi tape!

  2. Hannah Deter says

    February 16, 2016 at 10:48 am

    Cute! Love the washi tape!

  3. CarolynR says

    February 16, 2016 at 11:03 am

    So cute an idea. I’ve got to try some washi tape!

  4. Bonney says

    February 16, 2016 at 11:04 am

    How cute is this idea!! And simple enough to do in an afternoon. I love it!

  5. Trudi says

    February 16, 2016 at 11:07 am

    This would be a nice way to cover cans to hold my colored pencils! I love the sewing tapes

  6. Megan says

    February 16, 2016 at 11:09 am

    So cute! I love the purple set. Fingers crossed 🙂

  7. Deb Neerman says

    February 16, 2016 at 11:12 am

    I LOVE this idea … so clever and cute while keeping cardboard containers out of the landfills … an adorable win-win!

    Thanks so much for the chance to win some really unique washi tape … you’re the best, CraftGossip!

  8. cardlady says

    February 16, 2016 at 11:15 am

    Such a cute idea!

  9. Mary Helene says

    February 16, 2016 at 11:17 am

    This is why I love washi tape. So many projects to use it on.

  10. brhissoc says

    February 16, 2016 at 11:20 am

    Oh my gosh, how cute these are. I love the ones with the camera.

  11. Julie Henderson says

    February 16, 2016 at 11:21 am

    Oh Mercy! To say I’m smitten is a way understatement. It’s the type of lovely art aesthetic application where it’s actually simple in the amt of elements, but it’s the “most bang for the buck” impact, y’know? I could see this done up in all manner of seasonal decor, but also lots of possibilities for a baby room mobile, or any kind of personalized kid or teen room decor, piece, ’cause you’re certainly not limited to the number of rings to design up! Anyhoo, can you tell I just love this? LOVE THE PRETTY TAPES. Thanks much for the giveaway & blessings to all! 🙂

  12. Barbara Lawson says

    February 16, 2016 at 11:21 am

    OH wow, I love this and I will be doing this project very soon.

  13. Catie says

    February 16, 2016 at 11:22 am

    So cute!

  14. Kitty Oechler says

    February 16, 2016 at 11:23 am

    love the simplicity of washi tape

  15. Susan Spiers says

    February 16, 2016 at 11:23 am

    Luv the colors of the washi tape! Would like to try this, would be my first time-very interesting.

  16. Isobel villano says

    February 16, 2016 at 11:26 am

    My granddaughter and I always do crafts together and this is great!

  17. Maryellen Webber says

    February 16, 2016 at 11:28 am

    What a cute project, I love upcycled crafts.
    Thanks for the chance to win.

  18. Sarah says

    February 16, 2016 at 11:30 am

    Very adorable ideas and simple to do for anyone. Thanks for sharing them.

  19. Cindy ziliak says

    February 16, 2016 at 11:32 am

    I’m becoming a washi tape hoarder!

  20. Lita Warehime says

    February 16, 2016 at 11:34 am

    So many fun ideas for using washi tape! I would love to win

  21. Carla Hall says

    February 16, 2016 at 11:35 am

    This product is so versatile and beautiful!

  22. Brenda Ackerman says

    February 16, 2016 at 11:35 am

    I just discovered this wonderful craft accessory at Christmas time this year and your idea is great! I would love to win this great prize and make some spectacular gifts and crafts! Thank you for the opportunity and for sharing!

  23. merrilymarylee says

    February 16, 2016 at 11:35 am

    Major cuteness here. Baby granddaughter has a new lamp with a rabbit base. Be still, my heart!

  24. laineyhf says

    February 16, 2016 at 11:37 am

    What a wonderful reuse of containers, and I love the Washi tape! So many great things can be done with it. Thank you for sharing this idea and for giving us the opportunity to win some of that cute tape!

  25. Michele T says

    February 16, 2016 at 11:38 am

    Great idea!! I love Washi tape!!

  26. Brekke says

    February 16, 2016 at 11:44 am

    Those are the coolest Washi tapes I have ever seen! Definitely a must have!

  27. Ann Tamer says

    February 16, 2016 at 11:44 am

    Enter me in your contest! I look forward to reading CraftGossip every day! Thanks!

  28. Sarah says

    February 16, 2016 at 11:46 am

    I am new to Washi tape and only one roll but am loving all the creative ways to use it, so I may have to venture out for some more!

  29. 3stairs says

    February 16, 2016 at 11:50 am

    I think my daughter would be just as excited about this as I would!

  30. Holly Young says

    February 16, 2016 at 11:55 am

    your project turned out so cute! I would love to win this tape – it would be perfect for prettying up all the new organization stuff I’m presently working on!

  31. Megumi says

    February 16, 2016 at 11:55 am

    My friend’s little daughter is in love with washi tape. She stuck a piece of her red and yellow chevron washi tape on my phone case to make my phone look pretty. It was a very sweet gesture. Since then, I’ve been buying washi tape to send to my friend for a surprise care package. 🙂

  32. Tina Wegner says

    February 16, 2016 at 11:58 am

    What a cute idea, so many options! Would love to try this with my won Washi tape! ????

  33. rrjane011749 says

    February 16, 2016 at 12:26 pm

    Love this adorable idea!

  34. Diane says

    February 16, 2016 at 12:42 pm

    I adore the new sewing washi tape! Have to have it!!!

  35. Amy C. says

    February 16, 2016 at 12:43 pm

    I love washi tape! There are so many cute uses for it!

  36. Kristen says

    February 16, 2016 at 1:04 pm

    What a fun way to use washi tape!

  37. Cathleen says

    February 16, 2016 at 1:16 pm

    I love washi tape!

  38. Carla Hundley says

    February 16, 2016 at 1:36 pm

    Washi tape rules and
    this is a cute creation
    using it!
    Carla from Utah

  39. janejthomas says

    February 16, 2016 at 1:48 pm

    I love how the Washi tape comes in so many different colors and widths. I would love to win this prize.

  40. Donna H says

    February 16, 2016 at 1:53 pm

    What a cute idea! Thanks for another great giveaway!!

  41. Iris says

    February 16, 2016 at 1:54 pm

    I love washi tape so much fun to use

  42. Brenda says

    February 16, 2016 at 2:06 pm

    Love washi tape! ????

  43. Cindy DeSpain says

    February 16, 2016 at 2:13 pm

    thank you for the ideas! I love washi tape.

  44. Gil Crews says

    February 16, 2016 at 2:14 pm

    What a great idea!

  45. Denise Bryant says

    February 16, 2016 at 2:17 pm

    Awesome washi tapes and a fun project! Thanks for the chance to win the washi tapes!

  46. Patty Manders says

    February 16, 2016 at 2:18 pm

    I wishy-washi I have good luck in this drawing. It took a while before I was able to find any washi tape in our area!

  47. Penny Hall says

    February 16, 2016 at 2:24 pm

    I do love me some Washi tape!

  48. sifven says

    February 16, 2016 at 2:31 pm

    Washin tape covers a variety of sins.

  49. yarnaddicted says

    February 16, 2016 at 2:34 pm

    I would love to try washi tape with recycled items, awesome!!
    Thanks, Kim

  50. Rose says

    February 16, 2016 at 2:37 pm

    All the comments above have said it all! I would love to win!

Newer Comments »

Have you read?

How to Paint Melamine Furniture

Recently, we received an email from Jenny, one of our readers, asking for some advice on painting melamine furniture. Jenny was looking to refresh an old dresser but wasn’t sure about the right way to tackle the project. Well, we’ve got just the thing! After some digging, we came across a fantastic article on Spraypaint Blog titled How to Recycle and Paint Melamine Furniture, which walks you through the process step-by-step.

Why This Article is Perfect for Jenny (and You!)

This guide is incredibly comprehensive, covering everything you need to know about painting melamine—an often tricky material to work with. Melamine is known for its smooth, glossy surface, which can be tough to paint without the right preparation. But with the tips from this article, you’ll learn how to properly prep your melamine pieces, choose the right paint, and achieve a professional-looking finish.

The article also dives into the importance of sanding and priming the surface to ensure that the paint adheres well. With these steps, Jenny (and anyone else trying this project) can be sure that their painted melamine furniture will not only look great but last for years to come.

Jenny, we hope this article gives you all the info you need to tackle your melamine furniture project! It’s clear from the tutorial that a little prep work goes a long way, and with the right products, even melamine can be transformed into a beautiful, personalized piece.

For anyone else curious about painting melamine, check out the full article on Spraypaint Blog for all the tips and techniques: How to Recycle and Paint Melamine Furniture. Happy painting!

My Tips for Painting Melamine Furniture

Hey Jenny (and anyone else planning a melamine project), here are my top tips to help you get the best results when painting melamine furniture:

Prep is Key
Clean the surface well, then lightly sand it with fine-grit sandpaper to give the primer something to grip onto. Trust me, it makes a big difference!

Prime Like a Pro
Don’t skip the primer! Use a bonding primer that’s made for glossy surfaces or melamine. It’ll make sure your paint sticks and lasts.

Pick the Right Paint
Go for a good enamel or acrylic paint. I use a foam roller for a smooth finish—no brushstrokes! Apply a few thin coats, letting each one dry in between.

Topcoat for Durability
Once the paint’s dry, apply a protective topcoat (polyurethane or polycrylic) to help it stay scratch-free.

Give It Time
Let the paint cure for at least 48 hours before using the furniture—longer is even better! It’ll help the finish hold up over time.

Get Creative
Don’t be afraid to try fun colors or finishes! Melamine is perfect for getting a bit adventurous.

Explore

books Christmas CraftGossip Giveaways Craft Inspirations Easter glass halloween Home Decor kid crafts mason jar More Crafts Patterns & Tutorials recycled art Recycled Clothing Recycled Jewelry Recycled Sewing Recycled Tutorials Recycling Ideas Recycling Organizing tin can

RSS More Articles

  • Etsy Spotlight: 1955 Baby Doll Nightgown & Bloomers Pattern
  • Baby Banner and Mini Album Project
  • How to Paint Melamine Furniture
  • Color Wheel Block Tutorial by Red Pepper Quilts
  • How to make a Summer Wreath with Hydrangeas
  • 18 FREE Labubu Coloring Pages and Digital Images
  • How to Make the Perfect Little Baker’s Apron for Kids: A Fun Sewing Project
  • Mr Fox Toy Crochet Pattern
  • 5 Genius Tips to Keep Your New Home Clutter-Free from Day One
  • All About Stitching on Perforated Paper

Pick Your Blog

  • Sewing
  • Knitting
  • Quilting
  • Crochet
  • Home & Garden
  • Recycled Crafts
  • Scrapbooking
  • Card Making
  • Polymer Clay
  • Cross-Stitch
  • Edible Crafts
  • Felting
  • Glass Art
  • Indie Crafts
  • Kids Crafts
  • Jewelry Making
  • Lesson Plans
  • Needlework
  • Bath & Body
  • Party Ideas
  • Candle Making
  • DIY Weddings
  • Not Craft
  • Free Craft Projects

Copyright © 2025 · CraftGossip | Start Here | Contact Us | Link to Us | Your Editors | Privacy and affiliate policy