• Home
  • Suggest A DIY
  • DIY Newsletter

Recycled Crafts

Creative DIY Projects That Turn Trash Into Treasure

  • About CraftGossip
  • Our Network
    • Bath & Body Crafts
    • Candle Making Ideas
    • Crochet Ideas
    • Cross Stitch
    • Edible Crafts
    • Felting Patterns
    • Glass Art
    • Home & Garden Ideas
    • Indie Crafts
    • Jewelry Making
    • Kids Crafts
    • Knitting Patterns
    • Lesson Plans
    • Needlework
    • Party Ideas
    • Polymer Clay
    • Quilting Ideas
    • Recycled Crafts
    • Scrapbooking
    • Sewing Patterns
    • Card Making
    • DIY Weddings
    • Not Craft Ideas
  • Giveaways
  • Roundups
  • Store
  • Search

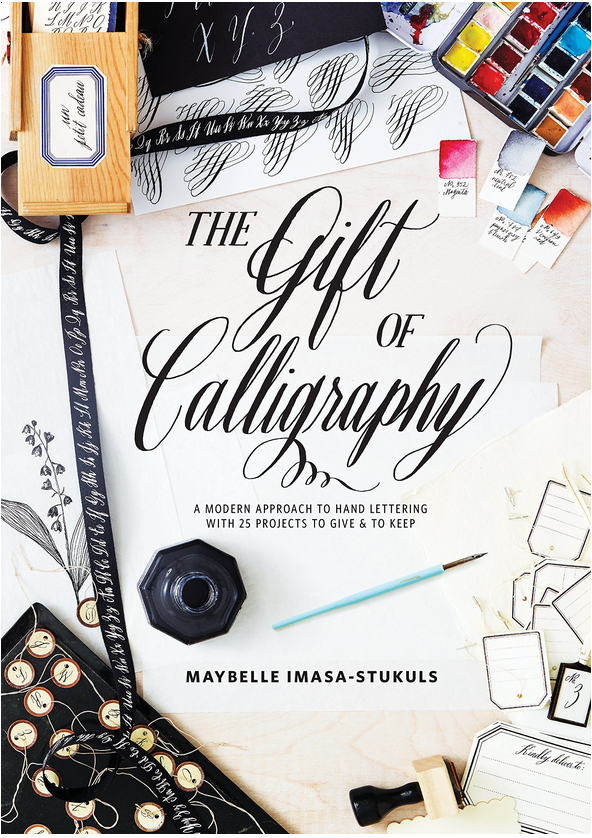
Giveaway; The Gift of Calligraphy: A Modern Approach to Hand Lettering with 25 Projects to Give and to Keep

September 27, 2018 by Stefanie Girard

Giveaway: The Gift of Calligraphy: A Modern Approach to Hand Lettering with 25 Projects to Give and to Keep

Leave a comment in today’s post by October 5, 2018 and you are in the running for this beautiful lettering book filled with both great instructions and inspiration.

Open to U. S. residents only please.

An easy-to-follow guide to learning the art of calligraphy, with 25 gorgeously photographed projects that use calligraphy to make beautiful gifts and home décor.

Calligraphy and hand lettering have surged in popularity as people rediscover traditional handicrafts as a creative outlet and way to relax. Unlike other hand lettering books, The Gift of Calligraphy shows you how to use your calligraphy skills to create invitations, wall art, wrapping paper, a tote bag, even a calligraphy kit for kids. Maybelle Imasa-Stukuls, calligraphy teacher and author of Belle Calligraphy, brings her signature modern style to this traditional craft. The first quarter of the book provides a primer for creating a simple alphabet and how to find your own personal style of lettering, followed by wonderful projects that will delight your family, impress your friends, and beautify your home, all accompanied by clear step-by-step photography and inspiring shots of the finished pieces.
«
»

Comments

  1. Denise Smith says

    September 27, 2018 at 3:45 pm

    I have wanted to learn calligraphy since I was just a young girl but of course, had no way to purchase any of the supplies. Now that I am an adult, if I had guidance like the book would provide, I could certainly get the supplies. Thanks for the opportunity.

  2. Deborah says

    September 27, 2018 at 4:02 pm

    Wonderful Gift, would like to win it!

  3. Marilyn Garcia says

    September 27, 2018 at 4:35 pm

    What a wonderful gift for someone who wants to give Calligraphy a try. It’s something I’ve wanted to do for a long time, but never think of it when I am in a store where these items are sold

  4. Bonney Morcom Teti says

    September 27, 2018 at 4:37 pm

    Just in time for all those Christmas cards!!! It’s such a beautiful craft that I’d love to learn.

  5. A Brown says

    September 27, 2018 at 6:52 pm

    My younger daughter has gotten into hand lettering and done some beautiful things. This would make a lovely resource!

  6. lee says

    September 27, 2018 at 7:20 pm

    I have always wanted to do nice lettering!! thank you!

  7. Deborah Dewey says

    September 27, 2018 at 8:25 pm

    I use calligraphy for greeting cards and invitations and just to keep my handwriting neat and clean.

  8. Christi says

    September 27, 2018 at 11:41 pm

    I would love to have a copy of this book. Would be fun to learn.

  9. Melody Johnson says

    September 28, 2018 at 6:30 am

    I wan to learn lettering

  10. deborah says

    September 28, 2018 at 6:53 am

    I would love to win this – learned calligraphy years ago but haven’t practiced so this would be a marvelous way to get back into it

  11. Clemencia says

    September 28, 2018 at 6:56 am

    thank you so much for the giveaway, I’ve been wanting to practice Calligraphy for the longest time ever lol

  12. Marybeth Petersen says

    September 28, 2018 at 7:17 am

    The lost art of calligraphy! Thanks for bringing it back.

  13. annehaun says

    September 28, 2018 at 7:27 am

    This would be such a fun win!!

  14. RuthAnn Koltveit says

    September 28, 2018 at 7:30 am

    Would love to Win! Thanks for the chance!

  15. Mary Mac says

    September 28, 2018 at 7:35 am

    This book just get me inspired to go back to trying Calligraphy.

  16. Jo Skidmore says

    September 28, 2018 at 9:49 am

    I’m getting back into calligraphy after many years. Loving it!

  17. Layne Lanpher says

    September 28, 2018 at 10:11 am

    I would love to give this a try – I’ve done a tiny bit of calligraphy.

  18. 3stairs says

    September 28, 2018 at 10:18 am

    My daughter and I are both interested in calligraphy!

  19. Christine says

    September 28, 2018 at 10:25 am

    My aunt did calligraphy. I would love to keep this art alive in the family! Thank you for this opportunity.

  20. Theresa says

    September 28, 2018 at 10:44 am

    I’ve always been told that I have beautiful handwriting and that I should learn to do Calligraphy. I never really had the time to explore and learn/practice before, but now that I am retired it would be a perfect time. The book “The Gift of Calligraphy” sounds like it would be a great book to coach me along and also provide some inspiration for projects I could make. Thank you sincerely for the opportunity to enter the Giveaway..
    Warm Regards 🙂

  21. Maryellen Webber says

    September 28, 2018 at 10:46 am

    I would love to win this. Thanks for the chance to win!

  22. Linda Tillis says

    September 28, 2018 at 10:56 am

    My granddaughter is trying to learn and this would help.

  23. Cynthia Rankin says

    September 28, 2018 at 11:17 am

    Have always wanted to learn calligraphy.

  24. tonilea says

    September 28, 2018 at 11:29 am

    Took a class once many years ago. I wasn’t very good at it. I would like to try again now that I have more time and patience.

  25. Jerilyn Markle says

    September 28, 2018 at 11:39 am

    Gorgeous gift! Hope I’m the lucky winner!

  26. Deb Downing says

    September 28, 2018 at 11:45 am

    This tool would be very beneficial for me. I have been trying to learn Calligraphy so that my Birthday, Christmas Cards and letters (Yes I still like to send snail mail, lol) This looks like an awesome set.

  27. DianneVdC says

    September 28, 2018 at 11:47 am

    Pick me, please!

  28. JANET C CAMPBELL says

    September 28, 2018 at 12:11 pm

    I started calligraphy 30 yrs ago before my husband was killed and I had to quit learning due to the fact of no time raising five boys. Now, I would love to pick it up again – thank you for the offer.

  29. Pamela Blowers says

    September 28, 2018 at 12:12 pm

    Would love to win this. Trying to get back into calligraphy and hand lettering.

  30. Nancy Camley says

    September 28, 2018 at 12:57 pm

    I have always wanted to try calligraphy. I’d love to win this!

  31. Joanne says

    September 28, 2018 at 1:38 pm

    I have been wanting to learn this for so long now. Would love to win.

  32. Debbie C. says

    September 28, 2018 at 2:34 pm

    I first took a class in calligraphy in 8th grade. Just doing that 6 week course improved my regular writing. I loved it. I have always wanted to do it more and get very good at calligraphy.

  33. Renee Yates says

    September 28, 2018 at 3:45 pm

    Yes please!! People have always asked me to fill out Bibles and Certificates because I have nice handwriting. Calligraphy would be a great plus!!

  34. Charmaine Bannister says

    September 28, 2018 at 4:49 pm

    Calligraphy the art of writing beautifully. Love Calligraphy wish it was still taught in art classes. Lost my old pages I did in school during a fire wish I could find the old fractur style.

  35. Charissa G says

    September 28, 2018 at 4:52 pm

    I’ve always wanted to learn calligraphy!

  36. Ricki Duke says

    September 28, 2018 at 8:50 pm

    This writing is so beautiful . Love to learn.

  37. Melinda M Fulk says

    September 29, 2018 at 12:33 am

    I have a daughter who would absolutely love this! Thanks for the review and the giveaway.

  38. Joanne D. says

    September 29, 2018 at 1:14 am

    Studied calligraphy in my late teens/early twenties…would love to get back into it. Thanks for the chance!

  39. Barbara Cameron says

    September 29, 2018 at 2:00 am

    Looks like a beautiful book. Thanks for the giveaway.

  40. Jackie Posnansky says

    September 29, 2018 at 4:36 am

    I would LOVE to win this great book! My fingers are crossed….

  41. Karen Rowell says

    September 29, 2018 at 7:36 am

    My daughter has a card sending ministry. i would love to learn calligraphy so that I can design cards for her!

  42. boilermom27 says

    September 29, 2018 at 9:25 am

    Looks like a wonderful book, would love to improve my skills!

  43. GGMama says

    September 29, 2018 at 9:44 am

    A wonderful opportunity to learn a new art! Thanks so much for offering the opportunity to win the book – – –

  44. cityrecordsnow says

    September 29, 2018 at 2:10 pm

    I have enjoyed the art of calligraphy since I was age 13 but of course, Now that I am an adult I have the time to really get into it. This guidebook would supply the information I need and, I could certainly get the supplies. Thanks for the opportunity. Bennie McDonald jr

  45. Bethany v Thompson says

    September 29, 2018 at 3:33 pm

    Haven’t done any calligraphy since art school when I didn’t have much patience. This would be a great way to get back into an art form all its own.

  46. Amy says

    September 29, 2018 at 5:24 pm

    I would love to learn “real” calligraphy!

  47. Kathleen Donnenworth says

    September 30, 2018 at 8:59 am

    I would be so jazzed to win this book! Cheers!

  48. Karen Wrenne says

    September 30, 2018 at 5:09 pm

    I have always wanted to learn calligraphy! Would be thrilled to win!

  49. Nancy Robinson says

    September 30, 2018 at 5:56 pm

    I have tried to teach myself calligraphy but I am not having much luck. I hope my luck turns and I win. Thanks.

  50. Carmen N says

    September 30, 2018 at 6:30 pm

    Thank you! I did some calligraphy years ago but would love to revisit it again!

Newer Comments »

Have you read?

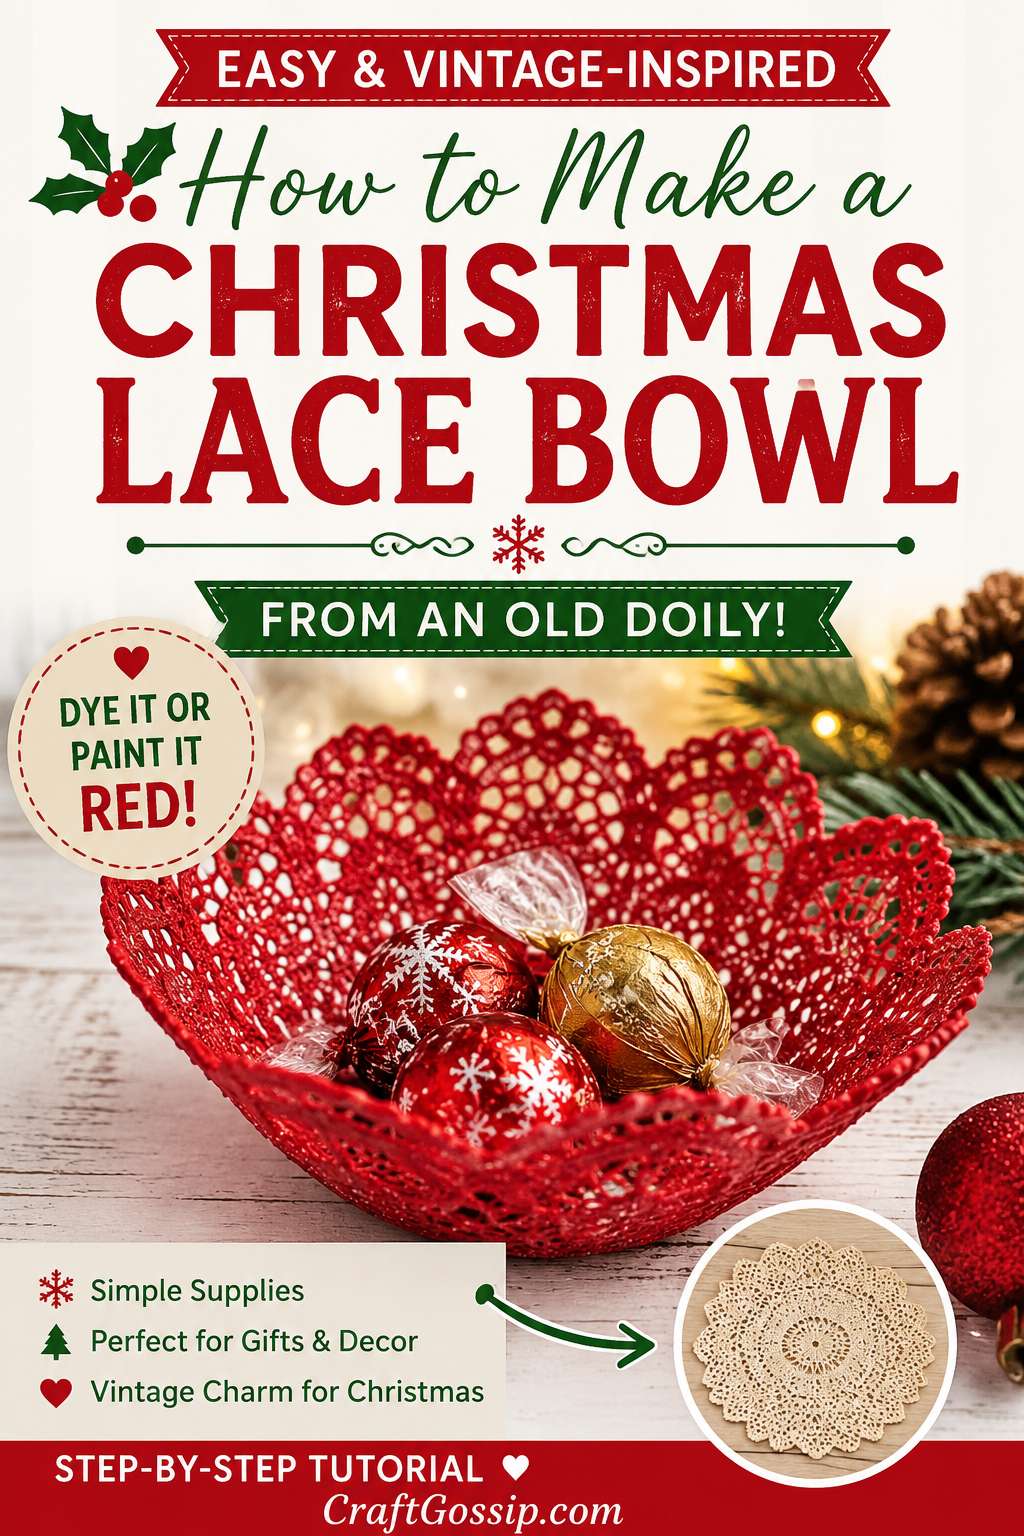
How To Make A Christmas Lace Bowl From An Old Doily

There is something so charming about a lace doily at Christmas, especially when it has that vintage handmade feeling that makes you think of biscuit tins, old linen cupboards, and someone’s grandmother who absolutely knew how to starch things properly.

This Christmas lace bowl is a pretty little upcycled craft made from an old lace doily, fabric stiffener or glue, and a bowl used as a mould. Once it dries, you end up with a delicate decorative bowl that can be used for wrapped sweets, baubles, jewellery, table favours, or festive little gift displays.

For this Christmas version, we are giving the lace a lovely red finish. You can either dye the lace using fabric dye for a deeper, more even colour, or paint it with watered-down red acrylic paint for a softer handmade look. Both methods work, and both have their own charm. The dye gives a more traditional fabric finish, while watered-down paint gives you a little more control if you want that slightly rustic, vintage Christmas feel.

This is a great project for using old doilies, thrifted lace, or crochet pieces that are too pretty to throw away but maybe not quite table-ready anymore. You know the ones — a tiny stain here, a pulled thread there, and suddenly they live in the “I’ll do something with this one day” pile. Well, today is that day.

If you enjoy vintage-style handmade decorations, you might also like this lace-inspired idea for DIY stamped air dry clay bowls, or have a browse through the CraftBits home crafts section for more easy handmade décor ideas.

What You Can Use A Christmas Lace Bowl For

These lace bowls are decorative rather than heavy-duty, but they are surprisingly useful during the festive season.

Use them for:

  • wrapped Christmas chocolates
  • small baubles
  • jewellery gifts
  • handmade soaps
  • table place setting gifts
  • battery tea lights
  • sewing clips or buttons
  • Christmas craft stall displays
  • festive trinkets
  • small wrapped treats

They also look beautiful on a mantel, sideboard, Christmas lunch table, bedside table, or craft room shelf. Just remember that these bowls are not washable and should not be used for wet food or anything heavy.

Supplies You Will Need

You will need:

  • 1 lace doily or piece of lace fabric
  • Red fabric dye or red acrylic paint
  • White PVA craft glue or fabric stiffener
  • Warm water
  • Bowl, jar, or rounded container to use as a mould
  • Plastic wrap or cling film
  • Mixing bowl or disposable container
  • Foam brush
  • Gloves
  • Baking paper or newspaper
  • Scissors
  • Optional: gold paint, glitter, ribbon, beads, small bells, or metallic wax
  • Optional: spray sealer

If you are planning to make several of these for Christmas gifts or craft stalls, it is worth having a large bottle of craft glue or fabric stiffener on hand. A good foam brush, disposable gloves, and a self-healing craft mat or covered table will make the whole thing much less messy. You can usually find basic supplies like PVA glue, acrylic paint, fabric dye, foam brushes, and plastic wrap on Amazon. For vintage doilies and lace bundles, Etsy is always a lovely place to look, especially if you want mismatched old-fashioned pieces.

Before You Start: Dye Or Paint?

There are two easy ways to make your lace bowl red.

Option 1: Fabric Dye

Fabric dye is best if you want a richer, more even red and your lace is made from cotton or another natural fibre. Vintage crochet doilies often dye beautifully, especially if they are cotton.

Fabric dye may not work as well on synthetic lace, so check the fibre if you can. If you are using a thrifted lace piece and have no idea what it is made from, do a small test first.

Option 2: Watered-Down Acrylic Paint

Watered-down acrylic paint works well if you want a softer red finish or if your lace is synthetic and may not take dye properly. It is also handy if you only need to make one bowl and do not want to set up a full dye bath.

This method gives the lace a more painted, handmade finish. It can be a little rustic, which I personally think suits Christmas crafts beautifully.

Step 1: Choose Your Lace

Choose a clean lace doily with a pretty pattern. Round doilies are the easiest to shape into bowls, but oval or square pieces can work too.

Look for lace with strong details such as flowers, scalloped edges, stars, leaves, or repeating patterns. Once the lace is stiffened, those details become the feature.

Avoid lace that is too fragile, torn, or full of loose threads. A little wear is charming. Falling apart in your hands is less charming.

If your lace has stains, do not worry too much if you are dyeing or painting it red. The colour will hide many small marks.

Step 2: Wash And Dry The Lace

If your lace is thrifted or has been stored for a long time, give it a gentle wash first.

Use warm water and mild soap, then rinse well and let it dry completely. This helps remove dust, oils, or old starch that could stop the dye or paint from soaking in properly.

Do not use fabric softener, as it can interfere with the stiffening process later.

Step 3: Colour The Lace Red

Now it is time to turn the lace into something festive.

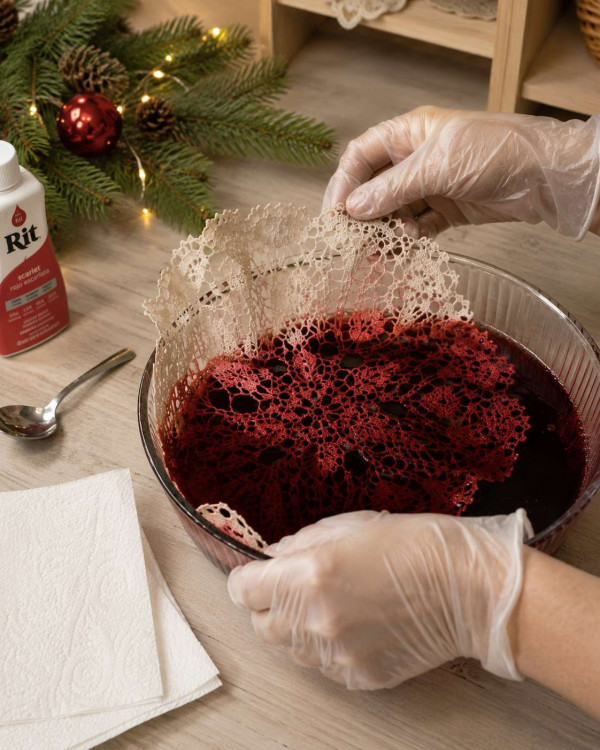
Method 1: Dyeing The Lace Red

Follow the instructions on your fabric dye packet, as different brands vary slightly.

As a general guide:

  1. Wear gloves and protect your work surface.
  2. Mix the red fabric dye according to the packet directions.
  3. Place the lace into the dye bath.
  4. Gently move it around so the colour reaches all the little openings and details.
  5. Leave it in the dye until it reaches the shade you like.
  6. Rinse according to the dye instructions.
  7. Let the lace dry completely before stiffening.

For a deep Christmas red, you may need to leave the lace in the dye bath a little longer. Keep in mind that lace often looks darker when wet and slightly lighter once dry.

Method 2: Painting The Lace With Watered-Down Red Paint

If you are using acrylic paint, mix:

1 part red acrylic paint to 1 part warm water

Stir until smooth. The mixture should be thin enough to soak into the lace but not so watery that the colour disappears.

Place the lace on baking paper or plastic wrap. Use a foam brush to dab the paint mixture into the lace, making sure both sides are covered. You can also dip the lace directly into the mixture and gently squeeze out the excess.

If you want a darker red, let the first coat dry and then add a second coat.

For a rustic vintage look, do not worry if the colour is slightly uneven. It gives the bowl a lovely handmade finish.

Let the lace dry before moving on to the stiffening step.

Step 4: Prepare Your Bowl Form

Choose a bowl, jar, or rounded container that matches the shape you want.

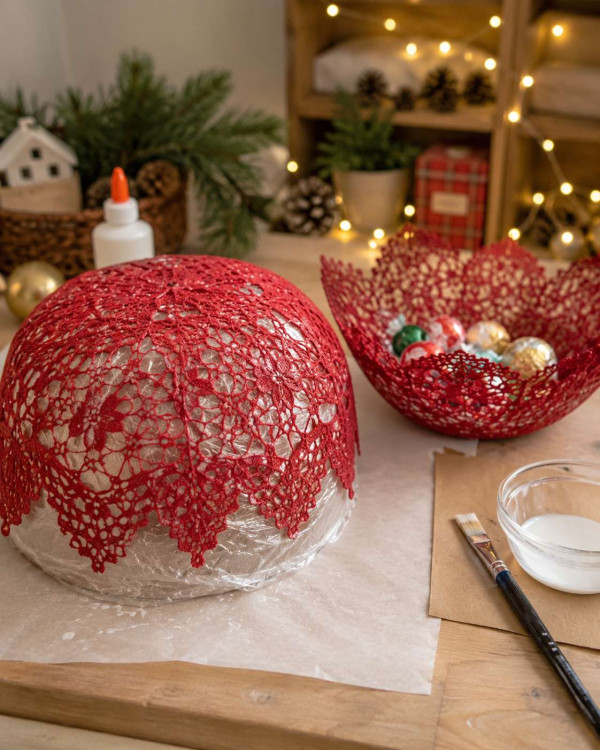
Turn the bowl upside down and cover it tightly with plastic wrap. Smooth out as many wrinkles as possible, because big folds in the plastic can leave marks in the lace.

Place the covered bowl on baking paper or newspaper. This is a gluey project, and it is much nicer to throw away a messy sheet of paper than scrape dried glue off the table later.

Step 5: Mix The Stiffener

You can use ready-made fabric stiffener or make your own with white craft glue.

For homemade stiffener, mix:

2 parts white PVA glue to 1 part warm water

For example:

  • 2 tablespoons white glue
  • 1 tablespoon warm water

Stir until smooth.

If the mixture feels too thick to soak through the lace, add a tiny splash of warm water. If it feels very runny, add a little more glue. You want the lace fully coated, but not dripping in puddles.

Step 6: Soak The Red Lace

Place the red lace into the stiffener mixture and gently press it down until it is fully saturated.

Use your fingers or a foam brush to work the stiffener through the pattern. Make sure the edges and centre are coated well, because those areas help the bowl hold its shape.

Lift the lace and let the excess drip back into the container. Do not wring it out, as that can stretch or distort the lace.

Step 7: Shape The Lace Over The Bowl

Carefully drape the wet lace over your plastic-wrapped bowl form.

Centre the lace so the pattern sits nicely. Smooth it gently with your fingers and arrange the edges so they fall evenly around the bowl.

You can create:

  • a neat scalloped edge
  • soft natural folds
  • a shallow dish shape
  • a deeper candy bowl shape
  • a fluted edge

Once you are happy with the shape, dab a little extra stiffener onto any areas that look dry.

Step 8: Let It Dry Completely

Leave the lace bowl to dry for at least 24 hours.

If your lace is thick, heavily painted, or the weather is humid, it may need 48 hours or longer. Do not rush this step. A lace bowl that is removed too early can sag, flop, or lose its shape.

Place it somewhere safe where it will not be bumped. If you have pets, put it somewhere they cannot “help.” Every crafter knows that cats and drying projects have a special and dangerous relationship.

Step 9: Remove The Lace Bowl From The Form

Once the lace is completely dry and firm, gently lift it off the bowl form.

Peel away the plastic wrap carefully. If any areas still feel soft, place the lace bowl upright and let it dry longer.

If the base is a little uneven, lightly mist just the bottom with water and press it gently onto a flat surface. Let it dry again before using.

Step 10: Add Christmas Details

Your red lace bowl can be left as it is, or you can dress it up a little.

Try adding:

  • a dry-brushed gold edge
  • tiny gold bells
  • red velvet ribbon
  • pearl beads
  • a little glitter
  • metallic wax on the raised lace areas
  • a small bow on one side
  • a dusting of faux snow
  • a clear spray sealer for extra protection

A touch of gold paint on the rim looks especially pretty for Christmas. Use a small brush and go lightly so you still see the lace detail.

Christmas Styling Ideas

These red lace bowls look beautiful in all sorts of festive settings.

Try placing one:

  • on each Christmas lunch place setting
  • beside a guest bed with wrapped chocolates
  • on a mantel with greenery and fairy lights
  • on a bathroom vanity with handmade soaps
  • in a craft stall display filled with ornaments
  • under a small battery tea light
  • beside your sewing machine for festive stitch markers and clips
  • filled with mini baubles as a centrepiece

For a vintage Christmas table, mix red lace bowls with greenery, old brass candlesticks, white plates, and linen napkins. It looks fancy without needing to actually be fancy, which is my favourite sort of decorating.

Can You Use Spray Paint Instead?

You can use spray paint, but it gives a different finish. Spray paint tends to sit more on top of the lace rather than soaking into it. It can also clog up the delicate openings if sprayed too heavily.

If you use spray paint, apply very light coats and let each coat dry before adding another. For this project, I prefer fabric dye or watered-down acrylic paint because the lace still looks soft and detailed.

Can You Make This With Crochet Doilies?

Yes, crochet doilies work beautifully for this craft. In fact, they often hold their shape very well because the cotton thread is thicker than fine lace fabric.

A crochet doily may need extra stiffener and a longer drying time, especially if it has raised stitches or a dense centre.

Troubleshooting Tips

The bowl is too soft

Brush on another coat of fabric stiffener or glue mixture and let it dry again. Make sure the lace is fully dry before judging the final stiffness.

The red colour looks patchy

If you used paint, add a second thin coat. If you used dye, the lace may contain synthetic fibres that did not absorb the dye evenly. A watered-down paint wash can help even it out.

The lace stuck to the plastic wrap

Peel slowly and gently. Next time, make sure the lace is not sitting in a thick puddle of glue at the base.

The bowl has cloudy glue marks

This usually means there was too much glue sitting on the surface. You can often disguise it with a little red paint, gold dry brushing, or glitter.

The shape is uneven

Handmade lace bowls often have a soft organic shape. If you want to adjust it, lightly mist the area with water, reshape gently, and let it dry again.

Gift Ideas For Christmas Lace Bowls

These make sweet handmade gifts, especially if you fill them with something small.

Try filling them with:

  • wrapped chocolates
  • handmade soap
  • a small candle
  • sewing notions
  • hair clips
  • earrings
  • lip balm
  • mini ornaments
  • tea bags
  • Christmas biscuits in a clear bag

Wrap the filled bowl in cellophane and tie it with ribbon for a simple handmade gift. It is the sort of present that looks thoughtful without requiring three days of emotional recovery afterward.

A Pretty Way To Use Old Doilies At Christmas

This Christmas lace bowl is a lovely way to give old doilies and lace scraps a festive second life. Whether you dye the lace a rich Christmas red or paint it with watered-down acrylic for a softer rustic finish, the result is delicate, handmade, and full of vintage charm.

It is simple enough for beginners, affordable enough to make in batches, and pretty enough to use for gifts, table décor, or craft stall stock. And best of all, it lets you turn something forgotten into something festive — which is exactly the sort of Christmas crafting I love.


Explore

books Christmas CraftGossip Giveaways Craft Inspirations Easter glass halloween Home Decor kid crafts More Crafts Patterns & Tutorials Recycled and Thrifted Ideas recycled art Recycled Clothing Recycled Jewelry Recycled kids crafts Recycled Sewing Recycling Ideas Recycling Organizing tin can

Featured Posts

Up-cycled Bottle – Christmas Song Sheet Decoration

How to make a giant pencil and adorable pencil shavings

Mini banjos and more fun recycled crafts

Toilet Paper tubes are transformed into pretty pointy stars

How to make your own foosball table

RSS feed: More Articles More Articles

  • Giant Coloring Pages for Kids and Adults: Free Printables, Posters and Classroom Ideas
  • Cozy Crochet Bauble – A Scrap-Busting Holiday Ornament
  • DIY Gift Tags Using Scrapbooking Supplies You Already Have
  • 5 Elegant Christmas Table Ideas Without Buying Flowers
  • Chaos at the Christmas Knit-Along: A Cosy Knitting Mystery to Watch
  • How To Make A Christmas Lace Bowl From An Old Doily
  • How to Sew a Christmas Stocking: An Easy Beginner Tutorial
  • 10 Handmade Christmas Necklaces That Make Sweet Holiday Gifts
  • Make-Ahead Slushie Bases: Mix Once, Chill All Week
  • Snowflake Quilt Blocks for Winter and Christmas Quilts

Copyright © 2026 · CraftGossip | Start Here | Contact Us | Link to Us | Your Editors | Privacy and affiliate policy