• Home
  • Suggest A DIY
  • DIY Newsletter

Recycled Crafts

Creative DIY Projects That Turn Trash Into Treasure

  • About CraftGossip
  • Our Network
    • Bath & Body Crafts
    • Candle Making Ideas
    • Crochet Ideas
    • Cross Stitch
    • Edible Crafts
    • Felting Patterns
    • Glass Art
    • Home & Garden Ideas
    • Indie Crafts
    • Jewelry Making
    • Kids Crafts
    • Knitting Patterns
    • Lesson Plans
    • Needlework
    • Party Ideas
    • Polymer Clay
    • Quilting Ideas
    • Recycled Crafts
    • Scrapbooking
    • Sewing Patterns
    • Card Making
    • DIY Weddings
    • Not Craft Ideas
  • Giveaways
  • Roundups
  • Store
  • Search

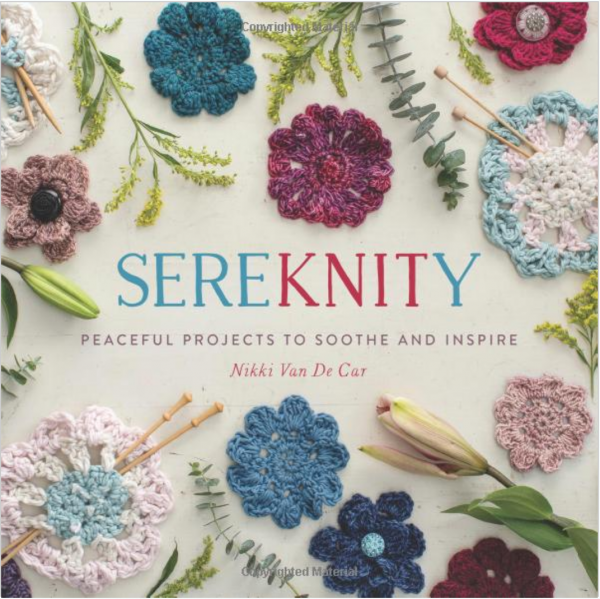
Giveaway- SereKNITy: Peaceful Projects to Soothe and Inspire

May 22, 2017 by Stefanie Girard

Giveaway- SereKNITy: Peaceful Projects to Soothe and Inspire

Leave a comment in today’s post by June 1, 2017 and you are in the running for this lovely knitting book filled with little zakka projects along with scarves and shawls.

Open to U. S. residents only please.

In today’s fast-paced world everyone is looking for ways to slow down, recharge, and appreciate the small, meaningful details of everyday life. SereKNITy: Peaceful Projects to Soothe and Inspire gives readers the perfect outlet with a collection of more than twenty-five knitting and crocheting patterns united by one all-compassing idea: finding peace.

The projects here are not the complicated sweater patterns found in traditional knitting guides, but simple, beautiful objects anyone can create. Practical crafts, like fingerless gloves and mug cozies, are featured alongside more meditative patterns, like granny squares and crocheted flowers. Each is paired with an inspirational, intention-setting prompt and falls under an overarching theme-Color, Texture, or Structure-that encourages knitters and crocheters of all skill levels to be fully present in the moment.

Fiber artist Nikki Van De Car gently guides readers to look inward as they work, releasing their anxiety as they create something beautiful. For experienced knitters and novices alike, this is meditative crafting of the very best kind.
«
»

Comments

  1. Kim Reid says

    May 23, 2017 at 8:15 pm

    I would love to try these peaceful projects in this awesome book!

  2. Marlene Gaither says

    May 23, 2017 at 8:30 pm

    Oh, how I would enjoy this lovely book! I tried knitting many years ago but I wasn’t very good at it. I might actually be able to do these projects!

  3. Carol says

    May 23, 2017 at 9:34 pm

    Wow! I mean WOW! I would so love to win this book! Keeping my fingers crossed!

  4. Elena Tucker says

    May 23, 2017 at 9:47 pm

    This book would be great to share with my knitting group!

  5. Karey says

    May 23, 2017 at 10:37 pm

    The flowers on the cover are so cute!

  6. Iryna Biehland says

    May 23, 2017 at 11:07 pm

    I love small projects. Thank you for the chance!

  7. Terry says

    May 24, 2017 at 6:07 am

    I really want/need this book! Thank you for offering it.

  8. Eleanor Billman says

    May 24, 2017 at 6:20 am

    This looks like a lovely book-perfect for summer relaxing. Thank you

  9. Patty M. says

    May 24, 2017 at 6:28 am

    Inspiration!? Sounds good to me:)

    from overcast VT,
    the Vermonster

  10. Holly W says

    May 24, 2017 at 7:05 am

    I enjoy crocheting and knitting. I like the idea of take-a-long projects. We travel out of town to see kids and grandkids and this book would be perfect.

  11. Gina Marie says

    May 24, 2017 at 7:27 am

    I love peaceful projects that I can pick up to keep my hands busy. Nothing more fun than creating beautiful things. I am relatively new to knitting. I have made a couple of baby blankets so far that came out great. I would love to win this book and give some of these patterns a try!

    Thanks for the chance to win!
    wildorchid985 at gmail dot com

  12. Patty H says

    May 24, 2017 at 7:47 am

    This looks like just what I need.

  13. Sandy says

    May 24, 2017 at 8:04 am

    Knitting is so relaxing. What a fun book to enjoy the mindfulness of knitting

  14. Mary Helene says

    May 24, 2017 at 8:38 am

    This is a wonderful idea for a book. These projects would be a great way to knit fun and easy projects.

  15. Tara says

    May 24, 2017 at 8:38 am

    I still consider myself a beginner knitter and I like to knit when traveling. This book looks like it has a lot of great little travel friendly and good get better at knitting projects. I would
    love this.

  16. dianelaces says

    May 24, 2017 at 8:55 am

    These projects look like they would be a nice change from my usual sock knitting.

  17. Karen Scott Haggas says

    May 24, 2017 at 9:28 am

    What a great way to use up some stash! Small pretty projects… This book would be lovely to win 🙂

  18. Corinne says

    May 24, 2017 at 9:29 am

    These projects would be nice for relaxing and being in the moment but also great for the feeling of accomplishment. Thank you for this giveaway!

  19. Jere says

    May 24, 2017 at 9:48 am

    I would love to have this book, thanks for the chance.

  20. Margay Roberge says

    May 24, 2017 at 10:01 am

    This looks like a fun book! I’d love to try the projects in it.

  21. Luba says

    May 24, 2017 at 10:26 am

    Looks like a lovely book! I would enjoy peaceful times working on these projects.

  22. Leslie Schucker says

    May 24, 2017 at 10:44 am

    Just picking up knitting again. Would love this opportunity!

  23. pattipanuccio says

    May 24, 2017 at 11:00 am

    a moment of zen

  24. Donna H says

    May 24, 2017 at 11:14 am

    This book looks amazing! Thanks for this great giveaway!

  25. middleagecouple says

    May 24, 2017 at 11:28 am

    I love the word play and knitting is very soothing. Hoping to win.

  26. Jess says

    May 24, 2017 at 11:34 am

    I would love this book.
    My wedding is in the fall and I am making a lot of the decorations. I would love to make so things from this book.

  27. Chris Lopez says

    May 24, 2017 at 12:13 pm

    The projects all look so lovely.

  28. From Susan says

    May 24, 2017 at 12:26 pm

    Looks beautiful to make!

  29. spierssusan says

    May 24, 2017 at 1:21 pm

    Wonderful Book-patterns look amazing! Thank you, Susan

  30. Margrett Cook says

    May 24, 2017 at 1:42 pm

    I love making prayer shawls and giving them away

  31. yolanda v says

    May 24, 2017 at 2:06 pm

    Peaceful projects…just what I need.
    I knit and crochet and would love to add this
    book to my library…

  32. Cindy S says

    May 24, 2017 at 2:10 pm

    I love the clever title of this book and the brooches on the cover are so cute!

  33. Rose Scott says

    May 24, 2017 at 3:06 pm

    This looks like a fun book I would love to win. Thank you for a great giveaway.

  34. knittingdancer says

    May 24, 2017 at 3:37 pm

    I am always looking for new patterns for quick and easy projects to use for gifts. This book would give me a lot of new ideas. Thank you.

  35. Pam Colby says

    May 24, 2017 at 4:54 pm

    Looks like a great book to try many different items that don’t take a long time to finish. Would love to have tiny projects to take with me camping!

  36. ssjmommy says

    May 24, 2017 at 5:23 pm

    I love small projects and would love to try some that are in this book.

  37. Corinne Geller says

    May 24, 2017 at 5:53 pm

    Love peaceful, meditative stitching!

  38. Audrey says

    May 24, 2017 at 6:48 pm

    I really need this book, my 5 dogs and myself are on tranquilizers!!!!

  39. Linda Grow says

    May 24, 2017 at 8:51 pm

    I love to do small and relaxing projects. This book would give me the chance to make different things. Thanks for the chance to win it.

  40. huntley52014 says

    May 24, 2017 at 9:47 pm

    You got me at the title. I almost gave up knitting because big projects got me down.

  41. Mary Sue Owens says

    May 25, 2017 at 12:10 am

    These look fun in themselves, but I can see places to join them with other items for even more fun!! :>)

  42. Stephanie Short says

    May 25, 2017 at 6:52 am

    I’d love a copy of this beautiful book, due to illness little projects are ideal to tackle .

  43. sally howard says

    May 25, 2017 at 8:00 am

    I am always looking for things to embellish. This book looks like it will fit right in. Thank you for a chance to win

  44. Deb Jankowski says

    May 25, 2017 at 8:42 am

    please pick me! I’d really love to try these patterns.

  45. Naomi Klayman says

    May 25, 2017 at 8:45 am

    Love the concept, love the fact that it’s both knit & crochet, as I enjoy both, and love the opportunity to enter for a free copy. Thanks for the giveaway!

  46. Cheryl Arnett says

    May 25, 2017 at 9:03 am

    I need some SereKNITy in my life.

  47. Donna Reed says

    May 25, 2017 at 7:01 pm

    Sounds like a great read

  48. Alice C. says

    May 26, 2017 at 10:46 am

    This sounds like a wonderful book with peaceful projects. Ahhhh.

  49. Janice Price says

    May 26, 2017 at 4:00 pm

    I am just learning to knit and would love to have your book. I know how to crochet but have been inspired to learn knitting from looking on all the projects.

  50. Kathrynn Polfer says

    May 26, 2017 at 7:39 pm

    I think I would really enjoy this book

Newer Comments »

Have you read?

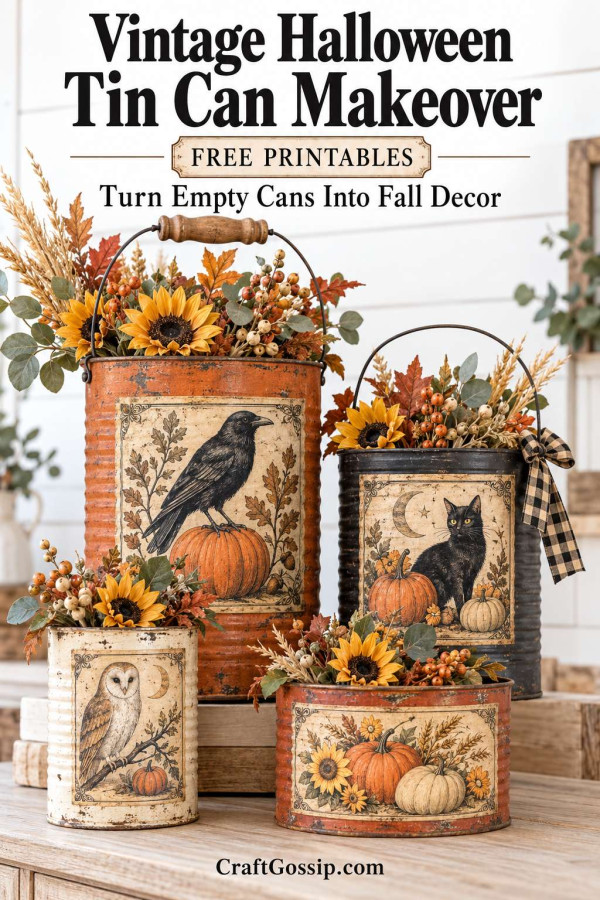
DIY Vintage Halloween Tin Can Decor With Printable Autumn Artwork – Free Printable

Before you put that empty food can in the recycling, have a look at its decorating potential. With a little rusty-orange paint, a vintage-style printable and a few autumn flowers, it can become a charming piece of Halloween decor.

This upcycled tin can project has that lovely primitive farmhouse look: weathered colour, softly aged paper and a simple wire handle. It looks especially good filled with sunflowers, muted foliage and berry stems.

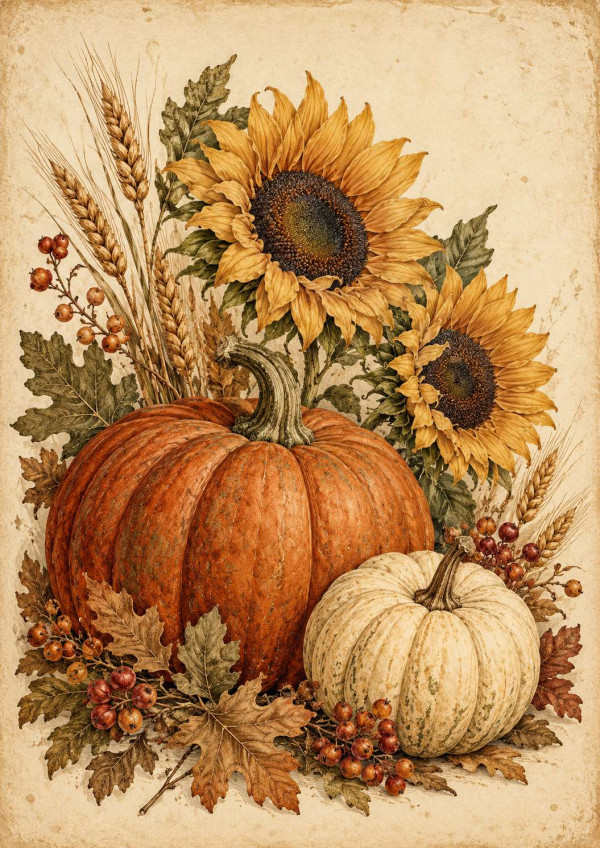
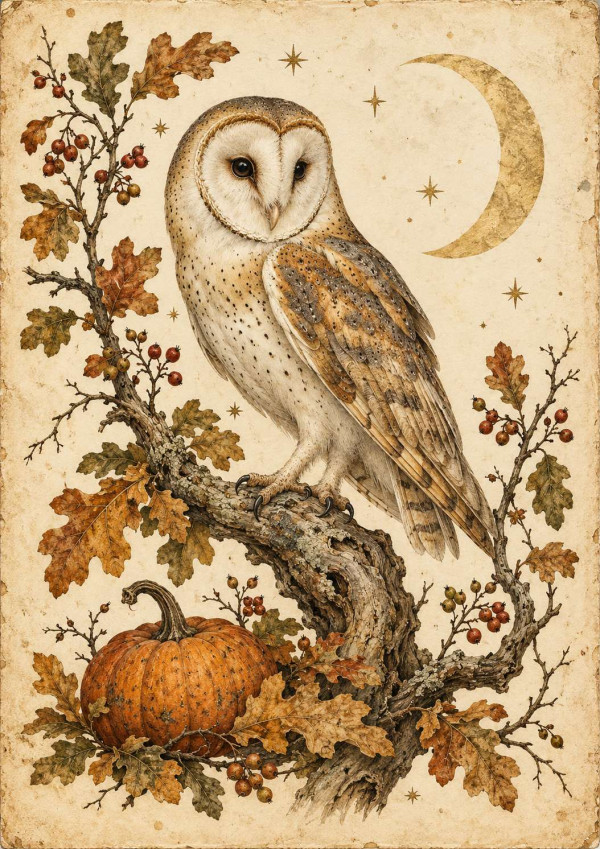
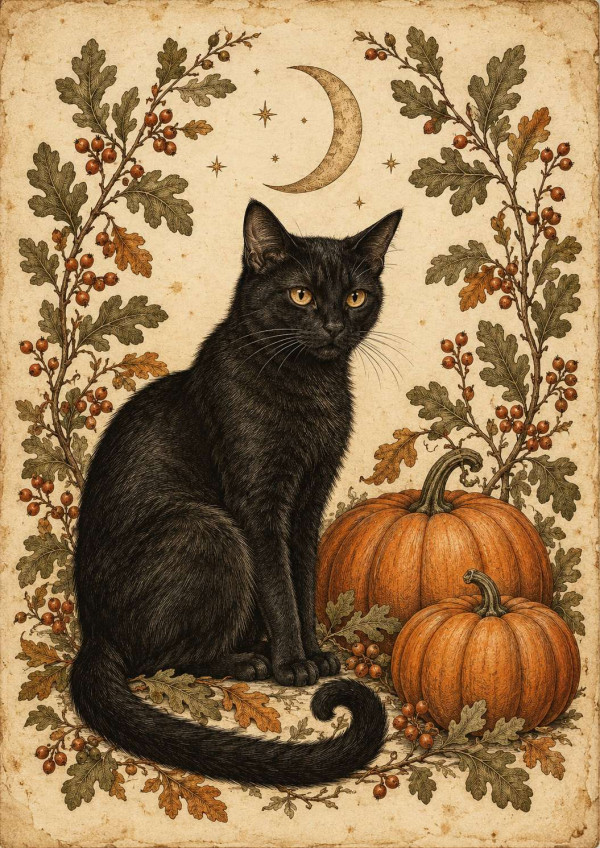
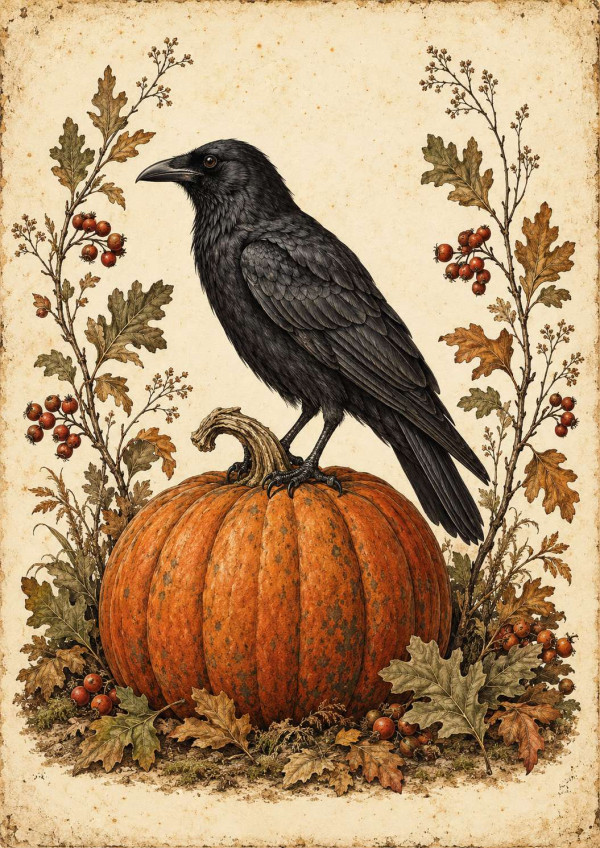
The printable does much of the decorating here. Choose a crow perched on a pumpkin, a black cat beneath a crescent moon, an autumn owl or a harvest arrangement of pumpkins and sunflowers.

I like a seasonal craft that starts with something already in the kitchen. It leaves a little more of the craft budget available for the supplies we somehow convince ourselves are essential. Another ribbon roll, perhaps.

Choose Your Vintage Fall Printable

There are four coordinating designs to use for this project:

  • Crow and pumpkin: A classic primitive Halloween look.
  • Black cat and pumpkins: A slightly more playful Halloween version.
  • Owl and crescent moon: Lovely for woodland-inspired autumn decorating.
  • Pumpkins and sunflowers: A harvest design that works beyond Halloween.

Print your chosen design smaller than a full page so it fits the front of your can. You want a visible painted border around the image, with room above and below it.

The parchment background is part of the artwork, so ordinary white paper will still give you an aged-paper appearance.

What You Will Need

  • A clean, empty metal food can with a smooth, safe rim
  • One vintage Halloween or fall printable
  • Plain matte printer paper, approximately 80 to 100 gsm
  • Metal-compatible primer
  • Compatible burnt-orange or terracotta paint
  • Dark brown and charcoal acrylic paint
  • Matte decoupage medium, such as Mod Podge Matte
  • Compatible clear acrylic spray sealer if needed for your printed ink
  • Soft paintbrush
  • Small sponge
  • Scissors
  • Ruler
  • Optional brown distress ink
  • Optional pliable craft wire, approximately 1.2 to 1.5 mm thick
  • Wire cutters and pliers
  • Drill and suitable metal drill bit, if adding a handle
  • Clamp and scrap wood for supporting the can while drilling
  • Eye protection
  • Optional predrilled wooden bead or short wooden tube for a handle grip
  • Faux autumn flowers, leaves and berry stems
  • A small piece of dry floral foam
  • Optional checked ribbon, raffia or twine

Skill level: Beginner, with adult tool use for the optional handle
Making time: Approximately 1 hour, plus drying and curing
Display: Indoors
Finished size: Depends on your can

A larger food can gives you more room for the artwork and flowers. A standard soup can works too, but keep the arrangement smaller and lighter.

How to Make Vintage Halloween Tin Can Decor

1. Clean and Check the Can

Remove the label and wash away food residue and grease.

Remove adhesive residue using a method suitable for the metal, then wash again and dry thoroughly.

Check the rim carefully. Use a can with a smooth edge, ideally opened with a safety-style can opener. Discard cans with sharp edges, loose metal or serious corrosion.

Ribbon around the rim is decorative and does not make a sharp edge safe.

2. Make the Handle Holes Before Painting

Skip this step if you prefer a simple tabletop container without a handle.

Mark two opposite points approximately 1.5 to 2 cm below the top rim. Position them so the front artwork will sit between the handle attachments.

Secure the can against a supported piece of scrap wood. Wear eye protection and drill slowly using a suitable metal bit. Do not hold the can loosely in your hand while drilling.

Remove sharp burrs with an appropriate small file and clean away all metal shavings.

3. Prime the Metal

Follow the preparation instructions for your metal primer.

Apply a thin coat and allow it to dry as directed. Priming helps the paint adhere to the smooth can rather than peeling away when handled.

Protect your work surface and follow the ventilation instructions for your chosen products.

4. Paint the Rusty-Orange Base

Paint the outside burnt orange, terracotta or a muted pumpkin shade.

Apply thin coats, allowing each one to dry. Paint the visible rim as well, keeping the finish neat.

For a deeper primitive look, use a dark brown base beneath the orange and allow small areas to remain visible.

This is a painted rust effect. There is no need to deliberately corrode the metal.

5. Size and Print the Artwork

Measure the usable height of the can between its upper and lower rims.

Reduce the artwork to leave approximately 1 to 2 cm of painted space above and below it, adjusting for your can’s proportions.

Keep the image proportions locked when resizing. Print a quick draft first if you are unsure about the fit.

Cut out the image and hold it against the can before applying adhesive. The paper should curve around the front without overlapping the handle holes.

Use lightweight matte paper rather than heavy cardstock, which is harder to shape around a curved surface.

6. Check the Printed Ink

Let the print dry fully, then test a spare printed scrap with your decoupage medium.

Some inkjet prints bleed when brushed with a water-based product. If yours does, protect it with a compatible clear acrylic spray sealer, following the label instructions and allowing it to dry completely.

Test the sealed scrap again before treating the main image. Laser prints may be easier to work with, but they should still be checked.

7. Decoupage the Image Onto the Can

Brush a thin, even layer of decoupage medium over the area where the picture will sit.

Position the paper carefully, then smooth gently from the centre outward. Use clean fingers or a soft tool, avoiding excessive pressure.

Work the paper into the can’s contours without stretching or scrubbing it. A ribbed can may leave gentle ridges beneath the image, which suits the vintage finish.

Allow it to dry according to the medium’s instructions. Avoid repeatedly lifting the paper once it begins to soften.

8. Seal the Printable

Once the image is adhered and dry, brush a thin coat of matte decoupage medium over it, extending slightly beyond the edges.

Use gentle strokes and avoid repeatedly brushing one area.

Let the coat dry before adding another if your product recommends it. Follow the stated curing time before handling the finished surface extensively.

9. Add the Aged Details

Use a nearly dry sponge to dab small amounts of dark brown paint around the upper rim, lower edge and selected areas of the orange surface.

Add a little charcoal sparingly for depth.

To soften the boundary around the printable, lightly stipple brown paint beside its edges. Practise on scrap paper first and keep the main illustration clear.

Brown distress ink is another option for the paper edges, but check its compatibility with your finish. Some inks remain reactive under water-based sealers.

Build the ageing gradually. You can always add another little mark, but removing a large muddy patch is considerably less enjoyable.

10. Fit the Decorative Wire Handle

Cut enough wire to form an arch above the can, with approximately 5 to 7 cm extra at each end for securing it.

If using a predrilled wooden grip, thread it onto the wire before bending the arch. Centre it at the top.

Feed one wire end through each side hole from outside to inside. Bend and secure the ends into closed loops with pliers, keeping cut ends tucked away from the opening.

Check that the wire cannot pull straight back through the holes.

Treat this as a decorative handle. Carry the finished arrangement by supporting the can’s base, especially once it is filled.

11. Arrange the Autumn Flowers

Place a snug piece of dry floral foam inside the can. It should sit securely without forcing the metal outward.

Start with a few taller foliage stems, then add one or two sunflowers and smaller berry sprigs.

Keep the flowers balanced so the can remains stable. Position the fullest part of the arrangement above the rim, leaving the printable visible.

Use faux or dried materials. This decorated can is intended for a dry arrangement.

12. Add the Finishing Touches

Tie a small checked bow, raffia bundle or piece of twine near one handle attachment.

Keep the embellishments modest so they do not cover the artwork.

Let all finishes cure before placing the can on furniture. Small felt pads beneath the base can help protect the surface.

Ideas for Styling Your Finished Can

The crow or black-cat version looks lovely on a Halloween mantel beside a few small pumpkins. The harvest design suits a dining-room sideboard or an autumn entryway table.

Pair it with these wooden pumpkin blocks made from scrap timber for a display that mixes painted wood, aged paper and flowers.

A coordinating fabric bow can connect it with our simple plaid fall wreath. For a larger decorating project, these rustic wooden porch pumpkins carry the same country-style feel into an outdoor display.

A Few Mistakes Worth Avoiding

  • Printing the image too large: Leave enough painted space around it to show the finish.
  • Using thick paper: Lightweight paper follows the can’s curve more easily.
  • Skipping the ink test: A spare scrap is much less upsetting to smudge than your carefully cut image.
  • Applying thick glue layers: Thin, even coats are easier to smooth and dry.
  • Overloading the flowers: A top-heavy arrangement can tip.
  • Adding water directly: Keep this version for dry decorations and indoor use.

Make a Coordinating Set

Try three cans in different sizes, using the crow, owl and harvest artwork.

Repeat the same paint colours, but vary the flowers slightly. One might have a sunflower, another a few wheat stems and the third a small spray of autumn leaves.

They do not need to match perfectly. A little variation makes the collection feel gathered over time, which is rather the point of vintage-inspired decorating.

An empty can, a printed picture and a few leftover stems can become something surprisingly lovely. And when autumn decorating starts with the recycling bin, there is considerably less reason to feel guilty about that extra ribbon.

Explore

books Christmas CraftGossip Giveaways Craft Inspirations Easter glass halloween Home Decor kid crafts More Crafts Patterns & Tutorials Recycled and Thrifted Ideas recycled art Recycled Clothing Recycled Jewelry Recycled kids crafts Recycled Sewing Recycling Ideas Recycling Organizing tin can

Featured Posts

Giveaway- Epic Cosplay Costumes: A Step-by-Step Guide to Making and Sewing Your Own Costume Designs

9 fun glow-in-the-dark projects great for summer fun

Paint Pour Designs Using a Recycled Sink Strainer

Recycled Film Canisters

Winner: Horizon Group Craft Supplies and a copy of the book Art Lab for Little Kids

RSS feed: More Articles More Articles

  • 10 Craft Gifts for Tweens Who Have Outgrown Kids’ Kits
  • Spooky Season Sweater Embroidery Design – Etsy Review
  • 5 FREE Bats and Moons in Windows SVG Die Cut Files for Halloween
  • The Forest Valley Shawl – Crochet Pattern
  • DIY Pinecone Bouquet: Easy Painted Pinecone Flowers for Fall Decor
  • Etsy Feature – Raven Pottery Slab-Building Template
  • DIY Milk Jug Halloween Skulls – Recycled Porch Decor
  • Make One Christmas Gift for Everyone: How to Save Money With Bulk Craft Supplies
  • Crocheting Christmas Gifts? Make This Supply Checklist Before You Buy More Yarn
  • DIY Faux Candy Apples: Easy Glossy Fall Decorations

Copyright © 2026 · CraftGossip | Start Here | Contact Us | Link to Us | Your Editors | Privacy and affiliate policy