• Home
  • Suggest A DIY
  • DIY Newsletter

Recycled Crafts

Creative DIY Projects That Turn Trash Into Treasure

  • About CraftGossip
  • Our Network
    • Bath & Body Crafts
    • Candle Making Ideas
    • Crochet Ideas
    • Cross Stitch
    • Edible Crafts
    • Felting Patterns
    • Glass Art
    • Home & Garden Ideas
    • Indie Crafts
    • Jewelry Making
    • Kids Crafts
    • Knitting Patterns
    • Lesson Plans
    • Needlework
    • Party Ideas
    • Polymer Clay
    • Quilting Ideas
    • Recycled Crafts
    • Scrapbooking
    • Sewing Patterns
    • Card Making
    • DIY Weddings
    • Not Craft Ideas
  • Giveaways
  • Roundups
  • Store
  • Search

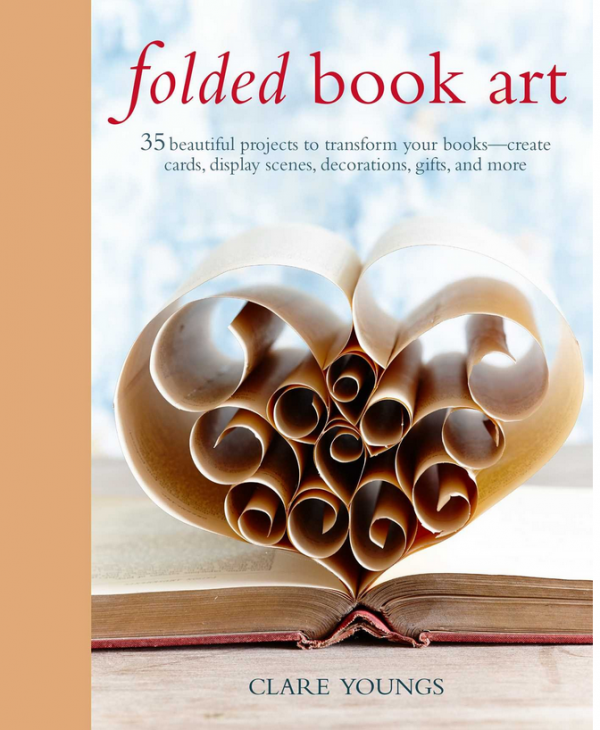
Giveaway- Folded Book Art: 35 beautiful projects to transform your books?create cards, display scenes, decorations, gifts, and more

March 28, 2017 by Stefanie Girard

Giveaway- Folded Book Art: 35 beautiful projects to transform your books?create cards, display scenes, decorations, gifts, and more

Leave a comment in today’s post by April 6th, 2017 and you are in the running for this beautiful book filled with projects made with recycled books, book pages and covers.

Open to U. S. residents only please.

More about the book from CICO Publishing:

“Create a fantastic world of delight with these 35 inspiring projects—all made from old books!

Follow Clare Youngs‘ simple step-by-step projects to make a huge variety of creative book art projects. In the first chapter, Folding Books, get folding and make a beautiful bird, a sailor’s knot, and a shining star, they look impressive but are deceptively simple to make. In Chapter 2, Making Scenes, you will learn how to cut and glue splendid scenes such as tiny paper mushrooms and ferns under a glass bell jar, a fairytale castle, and a tiger in the jungle, all of which would make great gifts, or just keep and display them all yourself! Chapter 3, Refashioned Pages, has ideas for transforming the pages cut from books—make greeting cards, a botanical print lampshade, and hanging birds. All the projects have helpful step-by-step instructions and illustrations so all you need are a few old books and you are ready to start!”

Want more book folding projects? Join our Book Folding Facebook group for free designs and more.
«
»

Comments

  1. Cathy Burgett says

    March 28, 2017 at 10:08 pm

    My little girl and I would have so much fun creating the items in this book.

  2. Barbara Moore says

    March 28, 2017 at 10:27 pm

    Now this sounds like something that would really keep you busy having fun!

  3. Aimee Wyne says

    March 28, 2017 at 10:36 pm

    What a fun and creative way to recycle books!

  4. Leta says

    March 28, 2017 at 10:48 pm

    I love paper art. This book looks very inspiring.

  5. Chris says

    March 29, 2017 at 1:07 am

    I love paper art projects so this is a perfect book for me.

  6. Eleanor says

    March 29, 2017 at 2:33 am

    Intriguing! This will be fun to play with. Thanks for this give away away?.

  7. jenna says

    March 29, 2017 at 5:56 am

    How cool… Would love to work on these… Thanks for having a lovely giveaway 😀

  8. Teresa says

    March 29, 2017 at 8:02 am

    Sounds interesting

  9. Gwendolyn Jordan says

    March 29, 2017 at 11:00 am

    I love paper art

  10. Lorraine Mastalski says

    March 29, 2017 at 11:05 am

    I would love to give this a try. Looks very interesting.

  11. 3stairs says

    March 29, 2017 at 11:06 am

    I love books, and this would be another way to enjoy them!

  12. Lyn Instefjord says

    March 29, 2017 at 11:12 am

    Love being able to recycle books into something beautiful.

  13. Nicki Slater says

    March 29, 2017 at 11:14 am

    I’ve been dying to try this at home!

  14. Cari Hearns says

    March 29, 2017 at 11:21 am

    I would love this book, book folding has become a new passion for me!

  15. maria clarke says

    March 29, 2017 at 11:25 am

    i love the paper art

  16. Sue Ambrose says

    March 29, 2017 at 11:26 am

    Clever, beautiful way to up cycle!

  17. LAURA CLINE says

    March 29, 2017 at 11:31 am

    I started collecting old books from the local flea markets after I first saw a book art installation. The printed word is so beautiful. What a great giveaway!

  18. Denise Bryant says

    March 29, 2017 at 11:39 am

    This looks like fun to try! I love the heart piece shown! I’d also love to try some of these ideas in cardmaking! Thanks for the chance to win the book!

  19. Kristi says

    March 29, 2017 at 11:40 am

    Sounds like a lot of fun, my daughter would love to try this.

  20. Denise Penn says

    March 29, 2017 at 11:43 am

    Have seen examples of this and would love to learn how to do it!

  21. Patty M. says

    March 29, 2017 at 11:55 am

    Oh good. Ideas to get those books off the shelf that I will never read again!

    from winter-white VT,
    the Vermonster

  22. Nancy Lewis says

    March 29, 2017 at 12:00 pm

    I love paper art . They are so neat, and a great way to recycle.

  23. Chava Schwartz says

    March 29, 2017 at 12:30 pm

    This will be awesome and fun.

  24. Connie says

    March 29, 2017 at 12:40 pm

    I am always looking for new “art” for my granddaughters and I to learned together. They are so eager to learn and intrigued with what they can create. Thank you.

  25. Barb Macaskill says

    March 29, 2017 at 1:01 pm

    This is something I have always wanted to try. I have seen some pretty ai creations using book pages and always think to myself that I want to learn how to do that. I’ve watched videos about how to do it but never seem able to figure it out! Maybe this book is what I need to teach me this craft! Fingers crossed! Thanks for the chance to make a dream come true!
    ????

  26. Holly Young says

    March 29, 2017 at 1:12 pm

    Oh what an awesome giveaway! I would love to win this!

  27. Rebecca P says

    March 29, 2017 at 1:30 pm

    Looks like a really great book!

  28. Susan Iwasa says

    March 29, 2017 at 1:41 pm

    I love origami and quilling. This book looks like a creative way of adding even more elements with paper. I would to try it out.

  29. Carla Hundley says

    March 29, 2017 at 2:15 pm

    Awesome book and
    I’m hoping to win!
    Carla from Utah

  30. Barbara Leffeler says

    March 29, 2017 at 2:15 pm

    I have some books I would love to recycle.

  31. Donna says

    March 29, 2017 at 2:18 pm

    This looks like fun! Our library has a book sale twice a year and the last day is for free when you can take whatever you want. I’m sure I can get some books to make these fun projects with. Thanks for the chance!

  32. Angela Rose says

    March 29, 2017 at 2:26 pm

    Wow. Ibknow some book lovers who would love some handmade gifts like these.

  33. Cindy S says

    March 29, 2017 at 3:07 pm

    It will be nice to have something to do with all the books I have stored in totes!

  34. Laurie says

    March 29, 2017 at 3:21 pm

    I’ve always wondered how these sculptures were made with books. This sounds like fun!

  35. Colleen says

    March 29, 2017 at 3:31 pm

    I would love to learn how to do this!

  36. Sally bitter says

    March 29, 2017 at 3:54 pm

    This looks beautiful! I would love to learn this new craft!!

  37. Ramona-Elena Istudor says

    March 29, 2017 at 4:50 pm

    I need to have this book in order to keep up with my daughter’s creativity >)

  38. gail says

    March 29, 2017 at 4:56 pm

    Have only done a bit of origami, these ideas appeal to me.

  39. Aubrey says

    March 29, 2017 at 5:12 pm

    This would be a great stress reliever!

  40. Doris L Tolley says

    March 29, 2017 at 5:16 pm

    I just had a class on this Monday night, and would love how to do more. Fantastic new craft.

  41. Deborah says

    March 29, 2017 at 6:03 pm

    Always looking for new projects to try!

  42. Ra says

    March 29, 2017 at 6:16 pm

    This would be so amazing to do with my nephews!

  43. cheryl j soladay says

    March 29, 2017 at 6:28 pm

    I’ve got a lot of books that I could use for these projects. If I don’t win, I may order the book!

  44. Jackie Posnansky says

    March 29, 2017 at 6:29 pm

    I love paper and paper crafting! I would enjoy owning this beautiful book!

  45. Angela Arthur says

    March 30, 2017 at 9:41 am

    This would be a fantastic addition to our library!

  46. Lorraine says

    March 30, 2017 at 10:13 am

    Beautiful! Can’t wait to try this.

  47. Cathy Martin says

    March 30, 2017 at 11:17 am

    This is so cool. I love books and need to do this. I am just retiring and this would give me a new project. Thanks for the chance.

  48. Lea Gentry says

    March 30, 2017 at 7:37 pm

    Would love love love to use the ideas and instructions in this book with my grandmother’s books!

  49. Cecelia says

    March 30, 2017 at 8:18 pm

    Thank you for the opportunity to win this book.

  50. Linda says

    March 30, 2017 at 8:24 pm

    My grand kids and I would love this book.

Newer Comments »

Have you read?

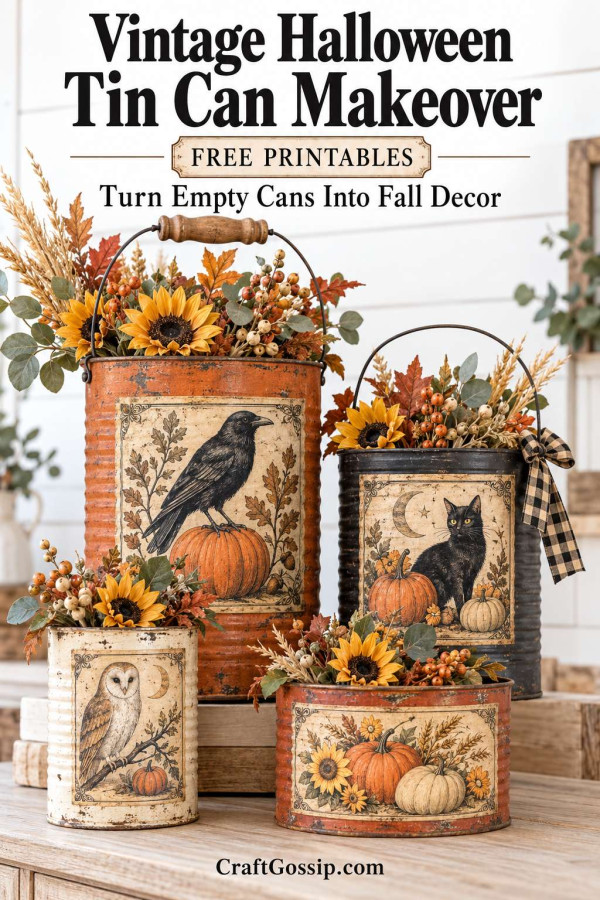
DIY Vintage Halloween Tin Can Decor With Printable Autumn Artwork – Free Printable

Before you put that empty food can in the recycling, have a look at its decorating potential. With a little rusty-orange paint, a vintage-style printable and a few autumn flowers, it can become a charming piece of Halloween decor.

This upcycled tin can project has that lovely primitive farmhouse look: weathered colour, softly aged paper and a simple wire handle. It looks especially good filled with sunflowers, muted foliage and berry stems.

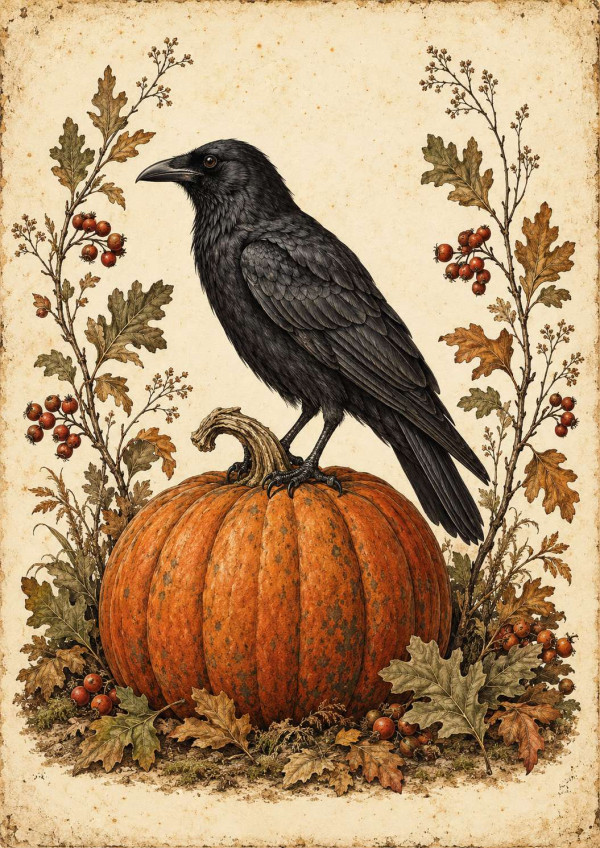
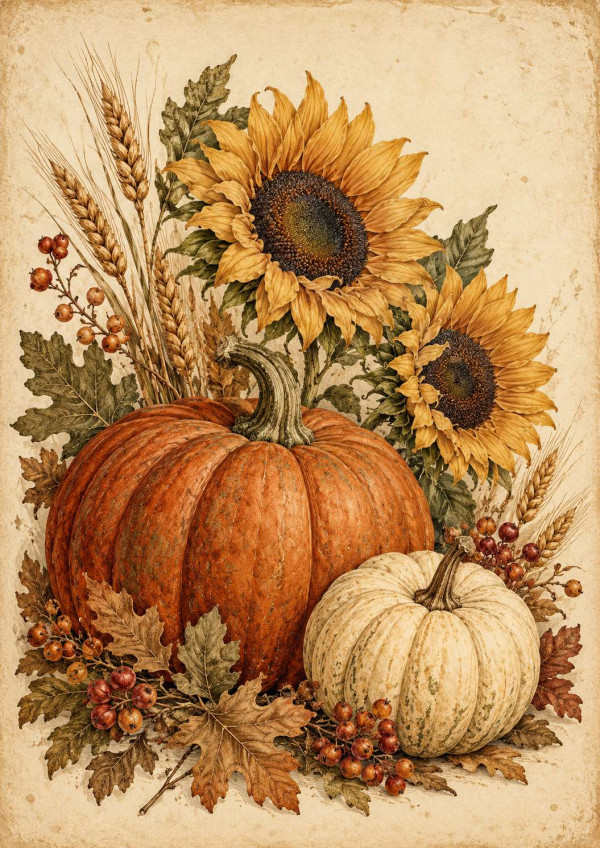
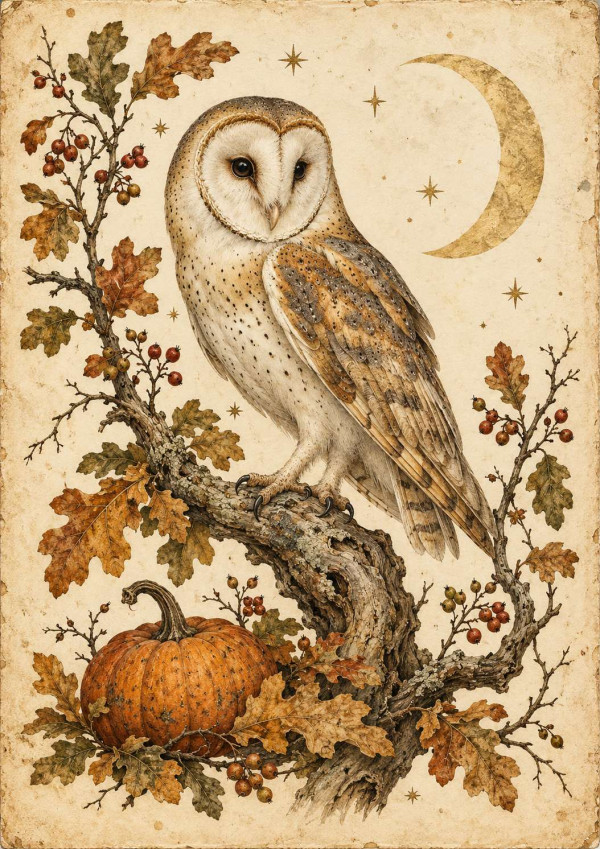
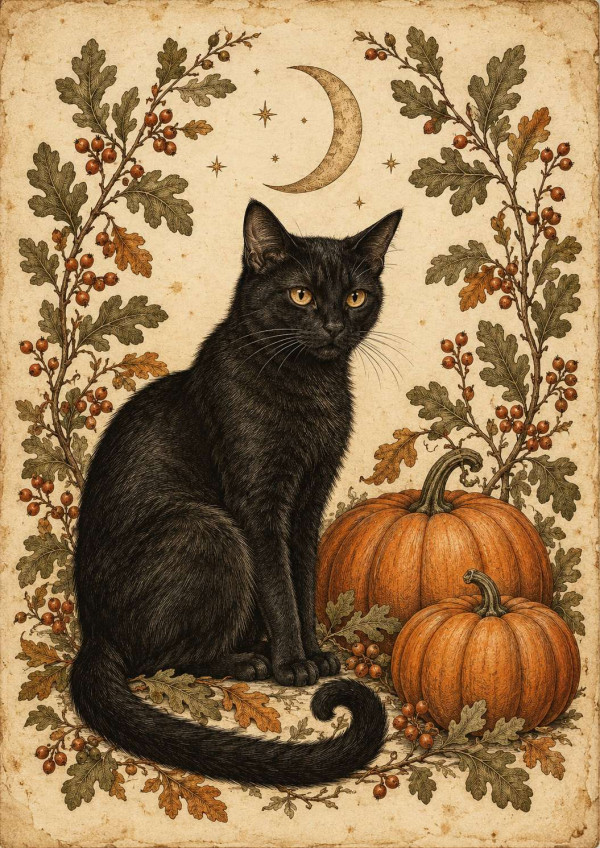
The printable does much of the decorating here. Choose a crow perched on a pumpkin, a black cat beneath a crescent moon, an autumn owl or a harvest arrangement of pumpkins and sunflowers.

I like a seasonal craft that starts with something already in the kitchen. It leaves a little more of the craft budget available for the supplies we somehow convince ourselves are essential. Another ribbon roll, perhaps.

Choose Your Vintage Fall Printable

There are four coordinating designs to use for this project:

  • Crow and pumpkin: A classic primitive Halloween look.
  • Black cat and pumpkins: A slightly more playful Halloween version.
  • Owl and crescent moon: Lovely for woodland-inspired autumn decorating.
  • Pumpkins and sunflowers: A harvest design that works beyond Halloween.

Print your chosen design smaller than a full page so it fits the front of your can. You want a visible painted border around the image, with room above and below it.

The parchment background is part of the artwork, so ordinary white paper will still give you an aged-paper appearance.

What You Will Need

  • A clean, empty metal food can with a smooth, safe rim
  • One vintage Halloween or fall printable
  • Plain matte printer paper, approximately 80 to 100 gsm
  • Metal-compatible primer
  • Compatible burnt-orange or terracotta paint
  • Dark brown and charcoal acrylic paint
  • Matte decoupage medium, such as Mod Podge Matte
  • Compatible clear acrylic spray sealer if needed for your printed ink
  • Soft paintbrush
  • Small sponge
  • Scissors
  • Ruler
  • Optional brown distress ink
  • Optional pliable craft wire, approximately 1.2 to 1.5 mm thick
  • Wire cutters and pliers
  • Drill and suitable metal drill bit, if adding a handle
  • Clamp and scrap wood for supporting the can while drilling
  • Eye protection
  • Optional predrilled wooden bead or short wooden tube for a handle grip
  • Faux autumn flowers, leaves and berry stems
  • A small piece of dry floral foam
  • Optional checked ribbon, raffia or twine

Skill level: Beginner, with adult tool use for the optional handle
Making time: Approximately 1 hour, plus drying and curing
Display: Indoors
Finished size: Depends on your can

A larger food can gives you more room for the artwork and flowers. A standard soup can works too, but keep the arrangement smaller and lighter.

How to Make Vintage Halloween Tin Can Decor

1. Clean and Check the Can

Remove the label and wash away food residue and grease.

Remove adhesive residue using a method suitable for the metal, then wash again and dry thoroughly.

Check the rim carefully. Use a can with a smooth edge, ideally opened with a safety-style can opener. Discard cans with sharp edges, loose metal or serious corrosion.

Ribbon around the rim is decorative and does not make a sharp edge safe.

2. Make the Handle Holes Before Painting

Skip this step if you prefer a simple tabletop container without a handle.

Mark two opposite points approximately 1.5 to 2 cm below the top rim. Position them so the front artwork will sit between the handle attachments.

Secure the can against a supported piece of scrap wood. Wear eye protection and drill slowly using a suitable metal bit. Do not hold the can loosely in your hand while drilling.

Remove sharp burrs with an appropriate small file and clean away all metal shavings.

3. Prime the Metal

Follow the preparation instructions for your metal primer.

Apply a thin coat and allow it to dry as directed. Priming helps the paint adhere to the smooth can rather than peeling away when handled.

Protect your work surface and follow the ventilation instructions for your chosen products.

4. Paint the Rusty-Orange Base

Paint the outside burnt orange, terracotta or a muted pumpkin shade.

Apply thin coats, allowing each one to dry. Paint the visible rim as well, keeping the finish neat.

For a deeper primitive look, use a dark brown base beneath the orange and allow small areas to remain visible.

This is a painted rust effect. There is no need to deliberately corrode the metal.

5. Size and Print the Artwork

Measure the usable height of the can between its upper and lower rims.

Reduce the artwork to leave approximately 1 to 2 cm of painted space above and below it, adjusting for your can’s proportions.

Keep the image proportions locked when resizing. Print a quick draft first if you are unsure about the fit.

Cut out the image and hold it against the can before applying adhesive. The paper should curve around the front without overlapping the handle holes.

Use lightweight matte paper rather than heavy cardstock, which is harder to shape around a curved surface.

6. Check the Printed Ink

Let the print dry fully, then test a spare printed scrap with your decoupage medium.

Some inkjet prints bleed when brushed with a water-based product. If yours does, protect it with a compatible clear acrylic spray sealer, following the label instructions and allowing it to dry completely.

Test the sealed scrap again before treating the main image. Laser prints may be easier to work with, but they should still be checked.

7. Decoupage the Image Onto the Can

Brush a thin, even layer of decoupage medium over the area where the picture will sit.

Position the paper carefully, then smooth gently from the centre outward. Use clean fingers or a soft tool, avoiding excessive pressure.

Work the paper into the can’s contours without stretching or scrubbing it. A ribbed can may leave gentle ridges beneath the image, which suits the vintage finish.

Allow it to dry according to the medium’s instructions. Avoid repeatedly lifting the paper once it begins to soften.

8. Seal the Printable

Once the image is adhered and dry, brush a thin coat of matte decoupage medium over it, extending slightly beyond the edges.

Use gentle strokes and avoid repeatedly brushing one area.

Let the coat dry before adding another if your product recommends it. Follow the stated curing time before handling the finished surface extensively.

9. Add the Aged Details

Use a nearly dry sponge to dab small amounts of dark brown paint around the upper rim, lower edge and selected areas of the orange surface.

Add a little charcoal sparingly for depth.

To soften the boundary around the printable, lightly stipple brown paint beside its edges. Practise on scrap paper first and keep the main illustration clear.

Brown distress ink is another option for the paper edges, but check its compatibility with your finish. Some inks remain reactive under water-based sealers.

Build the ageing gradually. You can always add another little mark, but removing a large muddy patch is considerably less enjoyable.

10. Fit the Decorative Wire Handle

Cut enough wire to form an arch above the can, with approximately 5 to 7 cm extra at each end for securing it.

If using a predrilled wooden grip, thread it onto the wire before bending the arch. Centre it at the top.

Feed one wire end through each side hole from outside to inside. Bend and secure the ends into closed loops with pliers, keeping cut ends tucked away from the opening.

Check that the wire cannot pull straight back through the holes.

Treat this as a decorative handle. Carry the finished arrangement by supporting the can’s base, especially once it is filled.

11. Arrange the Autumn Flowers

Place a snug piece of dry floral foam inside the can. It should sit securely without forcing the metal outward.

Start with a few taller foliage stems, then add one or two sunflowers and smaller berry sprigs.

Keep the flowers balanced so the can remains stable. Position the fullest part of the arrangement above the rim, leaving the printable visible.

Use faux or dried materials. This decorated can is intended for a dry arrangement.

12. Add the Finishing Touches

Tie a small checked bow, raffia bundle or piece of twine near one handle attachment.

Keep the embellishments modest so they do not cover the artwork.

Let all finishes cure before placing the can on furniture. Small felt pads beneath the base can help protect the surface.

Ideas for Styling Your Finished Can

The crow or black-cat version looks lovely on a Halloween mantel beside a few small pumpkins. The harvest design suits a dining-room sideboard or an autumn entryway table.

Pair it with these wooden pumpkin blocks made from scrap timber for a display that mixes painted wood, aged paper and flowers.

A coordinating fabric bow can connect it with our simple plaid fall wreath. For a larger decorating project, these rustic wooden porch pumpkins carry the same country-style feel into an outdoor display.

A Few Mistakes Worth Avoiding

  • Printing the image too large: Leave enough painted space around it to show the finish.
  • Using thick paper: Lightweight paper follows the can’s curve more easily.
  • Skipping the ink test: A spare scrap is much less upsetting to smudge than your carefully cut image.
  • Applying thick glue layers: Thin, even coats are easier to smooth and dry.
  • Overloading the flowers: A top-heavy arrangement can tip.
  • Adding water directly: Keep this version for dry decorations and indoor use.

Make a Coordinating Set

Try three cans in different sizes, using the crow, owl and harvest artwork.

Repeat the same paint colours, but vary the flowers slightly. One might have a sunflower, another a few wheat stems and the third a small spray of autumn leaves.

They do not need to match perfectly. A little variation makes the collection feel gathered over time, which is rather the point of vintage-inspired decorating.

An empty can, a printed picture and a few leftover stems can become something surprisingly lovely. And when autumn decorating starts with the recycling bin, there is considerably less reason to feel guilty about that extra ribbon.

Explore

books Christmas CraftGossip Giveaways Craft Inspirations Easter glass halloween Home Decor kid crafts More Crafts Patterns & Tutorials Recycled and Thrifted Ideas recycled art Recycled Clothing Recycled Jewelry Recycled kids crafts Recycled Sewing Recycling Ideas Recycling Organizing tin can

Featured Posts

How to make a recycled paper tube wreath

How to use silicone molds to make translucent sparkly shapes

20 fun, cute and some silly felt projects

How to make an owl from a recycled beanie

How to make an ombre felt letterboard

RSS feed: More Articles More Articles

  • Book Review: Knit an Heirloom Blanket
  • Fall Sensory Ideas for Kids
  • How To Stamp Your Nails – Nail Stamping Review
  • DIY Hanging Witch Hat Lights With a Magical Waterfall Glow
  • DIY Halloween Sock Candy Favours: A Sweet Gift With Cosy Socks
  • 15 Easy DIY Halloween Treat Bag Ideas for Candy and Non-Candy Gifts
  • 10 Handmade Cards with Autumn Leaves
  • Easy Fonts to Add to Your Cross Stitch
  • 10 Cat-Themed Scrapbook Layout Templates for Single-Page Designs (Perfect for 2–3 Photos of Your Favourite Feline)
  • Patchwork Blanket Knitting Patterns

Copyright © 2026 · CraftGossip | Start Here | Contact Us | Link to Us | Your Editors | Privacy and affiliate policy