• Home
  • Suggest A DIY
  • DIY Newsletter

Recycled Crafts

Creative DIY Projects That Turn Trash Into Treasure

  • About CraftGossip
  • Our Network
    • Bath & Body Crafts
    • Candle Making Ideas
    • Crochet Ideas
    • Cross Stitch
    • Edible Crafts
    • Felting Patterns
    • Glass Art
    • Home & Garden Ideas
    • Indie Crafts
    • Jewelry Making
    • Kids Crafts
    • Knitting Patterns
    • Lesson Plans
    • Needlework
    • Party Ideas
    • Polymer Clay
    • Quilting Ideas
    • Recycled Crafts
    • Scrapbooking
    • Sewing Patterns
    • Card Making
    • DIY Weddings
    • Not Craft Ideas
  • Giveaways
  • Roundups
  • Store
  • Search

Giveaway: Crafter’s Market 2016: How to Sell Your Crafts and Make a Living

March 1, 2016 by Stefanie Girard

Screen Shot 2016-03-01 at 7.28.07 AM

Giveaway: Crafter’s Market 2016: How to Sell Your Crafts and Make a Living

Leave a comment in today’s post by March 10, 2016 and you are in the running for this great crafter’s resource.

Open to U. S. residents only please.

More about the book from the publisher:

“The single resource to make your craft your career!

Crafter’s Market 2016 is the perfect start to your crafting career. This comprehensive guide will introduce you to a whole new world of possibilities for marketing your craft. Editor Kerry Bogert, author of Totally Twisted and Rustic Wrappings and knitting, crochet and jewelry acquisitions editor for Interweave, will help you start or expand your business with completely updated resources, such as:

  • More than 400 new listings for complete, up-to-date contacts and guidelines for submissions for a total of more than 1,400 craft market resources, including craft shows, magazines, book publishers, online marketplaces and more!
  • Markets for a variety of crafts, including quilting, sewing, knitting, crochet, papercraft and jewelry making.
  • Informative, inspirational articles on hosting creative retreats, managing your time on the internet, growing your business through Pinterest, how to handle custom orders and setting up and utilizing e-Newsletters.
  • Interview with successful craft professional Carter Seibels Singh on establishing her successful small business, Woman Shops World, on Etsy.

Whether you’re looking to expand your online presence or you’re just beginning to think about how to turn your weekend hobby into a side business, Crafter’s Market 2016 is the complete resource for crafting professionals.”
«
»

Comments

  1. Margay says

    March 1, 2016 at 11:22 am

    Wow, this sounds like a good book to have!

  2. Uli Day says

    March 1, 2016 at 11:24 am

    Something that I would like to explore, thanks for the opportunity.

  3. Mary Helene says

    March 1, 2016 at 11:34 am

    I have a small craft business and would love to have this book.

  4. Pinkie says

    March 1, 2016 at 11:40 am

    Looks like great information

  5. Barbara says

    March 1, 2016 at 11:57 am

    This book sounds like something that I definitely need to have. Hope I win it.

  6. fotojennic says

    March 1, 2016 at 12:00 pm

    oh i would love to browse the tips in this book. Selling feels like an unreachable dream at times.

  7. Laurel says

    March 1, 2016 at 12:01 pm

    I’d love to have all this great knowledge and expertise to help me in a new venture!

  8. Donna R says

    March 1, 2016 at 12:03 pm

    I would love to quit my day job and market my crafts! Sounds amazing!

  9. Clemencia says

    March 1, 2016 at 12:04 pm

    Oh my goodness this is exactly what I need, thank you so much for the giveaway ????

  10. Carol Murphy says

    March 1, 2016 at 12:14 pm

    The business part is the area I need to give much more attention. I would love the support this book offers! Thank you in advance!

  11. Sandy says

    March 1, 2016 at 12:33 pm

    I would love this book. It would come in handy as I start my business for the fall season!

  12. Sue Miller says

    March 1, 2016 at 12:39 pm

    Getting ready to open an Etsy shop. I would love this book.

  13. pattipanuccio says

    March 1, 2016 at 12:46 pm

    You can never have to many books.

  14. Frankie Griffin says

    March 1, 2016 at 12:52 pm

    Ooh, I would love to win a copy of Crafters Market 2016. Both of my daughters and myself like to create items and this book looks like it would help us tremendously as we try to sell some of our pieces of art.

  15. audrajo says

    March 1, 2016 at 1:09 pm

    I sure could use this book.

  16. LILLIAN A STEWART says

    March 1, 2016 at 1:21 pm

    This book sounds like a dream come true for me. I have a terminally ill husband at home, on hospice, so I do not get out much at all. I have been making jewelry and other things until it is in every nook and cranny of my place because I do not know the first thing on how to go about selling it. This would be a WONDERFUL thing for me to have.

  17. KatieS says

    March 1, 2016 at 1:23 pm

    I’m getting ready to start a craft business and I’d love to have this book.

  18. Vivian says

    March 1, 2016 at 1:27 pm

    I would absolutely love to have a copy of this book!

  19. Shelby Morris says

    March 1, 2016 at 1:57 pm

    I would love to win this book! I am thinking about trying to sell my crafts.

  20. Kimberly D says

    March 1, 2016 at 2:12 pm

    Hope to start my craft business within the next year. This book would come in very handy!

  21. SL capela says

    March 1, 2016 at 2:16 pm

    This could come in very handy right about now

  22. Anne in NC says

    March 1, 2016 at 2:16 pm

    I could really use this! Thanks for the giveaway!

  23. cal8007 says

    March 1, 2016 at 2:21 pm

    My craft room is full of crafts I’ve made; this book should help me clean up – both ways!!

  24. Sheri Taylor says

    March 1, 2016 at 2:48 pm

    Sheri in MN says ,

    This book sounds exactly what I’ve been searching for. Health caused me to let. A lucrative craft business shut down. ,2 yrs later I am bouncing back and want to get my crafts going and out there to the public.

  25. Joan says

    March 1, 2016 at 2:54 pm

    What a great way to get me get rid of things that are in my craft room. Joan

  26. Lauren says

    March 1, 2016 at 3:02 pm

    This would really help out with my jewelry business! Thanks for the opportunity!

  27. Laurie Carlson says

    March 1, 2016 at 3:19 pm

    Essential for living the Dream. Must. Have. Thank you!

  28. Dawn Woolf says

    March 1, 2016 at 3:25 pm

    I just started selling my crafts and this book looks like it would help me get on the right track. Thanks so much for the chance to win!

  29. Elena Tucker says

    March 1, 2016 at 3:47 pm

    This book looks like a fabulous resource. I love Kerry’s other books

  30. Donna J. says

    March 1, 2016 at 4:37 pm

    Would love a chance to win this book. I am in the crafting business and have been for some time!

  31. Kristen says

    March 1, 2016 at 5:02 pm

    I would love to win this book! 🙂

  32. Pat Schwab says

    March 1, 2016 at 6:25 pm

    Hi, this sounds like a great resource to have. I would love to own this. Thanks

  33. mlsjewel says

    March 1, 2016 at 8:39 pm

    Can never have enough books like this. Thanks

  34. Karey says

    March 1, 2016 at 10:40 pm

    This looks like a good book for tips on how to get off the ground!

  35. Denise Jordan says

    March 1, 2016 at 11:32 pm

    I have so many great ideas, but seem to fail every time I try to sell them. I would love to have this book!

    Thank you for offering it for all of us to hope to receive it.

  36. Renee V. says

    March 2, 2016 at 12:46 am

    It’s been my dream to turn my crafting into a business for so long now! This would be an amazing book to read, thanks for the giveaway!!!!

  37. Leanna says

    March 2, 2016 at 2:04 am

    I would love to win a copy of Crafters Market 2016! I have a 7 month old and another on the way…. I could use the money!

  38. Susan Riddle says

    March 2, 2016 at 8:22 am

    Making a living doing what I love – that would be awesome!

  39. scrapnsew says

    March 2, 2016 at 11:24 am

    Thank you for chance to win, as a disabled widow, I would love to learn from this book how to augment my limited income.

  40. Jessica Steede says

    March 2, 2016 at 12:39 pm

    I would love the help with getting my own craft items sold.

  41. nancir says

    March 2, 2016 at 12:41 pm

    I have a craft/sewing business and would find this book really useful.

  42. Lanna says

    March 2, 2016 at 1:04 pm

    Adding to the list of hopeful winners. I am newly retired and getting back into my needlework and crafting I did before I started working full time 23 yrs ago. This would be a nice addition to my knowledge of selling my creations.

  43. Joan says

    March 2, 2016 at 1:06 pm

    Great book to get me started. Thank you.

  44. aj says

    March 2, 2016 at 3:09 pm

    What a neat book! We’ve been looking to expand our craft business, so this would help immensely!

  45. Joyce says

    March 2, 2016 at 3:27 pm

    Sounds like a wonderful resource to help start my shop. Thanks

  46. Henriette says

    March 2, 2016 at 5:31 pm

    This book looks like a winner! I hope i win…

  47. Angelina Fuoco says

    March 2, 2016 at 8:45 pm

    I have just started a business selling stick ponies. They originally started as a fundraiser and I consigned the left over ones so I didn’t have to store them. Then the store that I consigned with asked if I would keep a steady supply and now I have begun my own business. It is o exciting and am also so lost. I would love this book.

  48. Lin Shultz says

    March 3, 2016 at 7:45 am

    I would love to have this book. I’ve been crafting for years and would like to turn it into a business.

  49. Marie says

    March 3, 2016 at 8:02 am

    Thank you for offering this great resource as a giveaway!

  50. Adrienne says

    March 3, 2016 at 10:09 am

    I would love to read this book. Thanks for the opportunity!

Newer Comments »

Have you read?

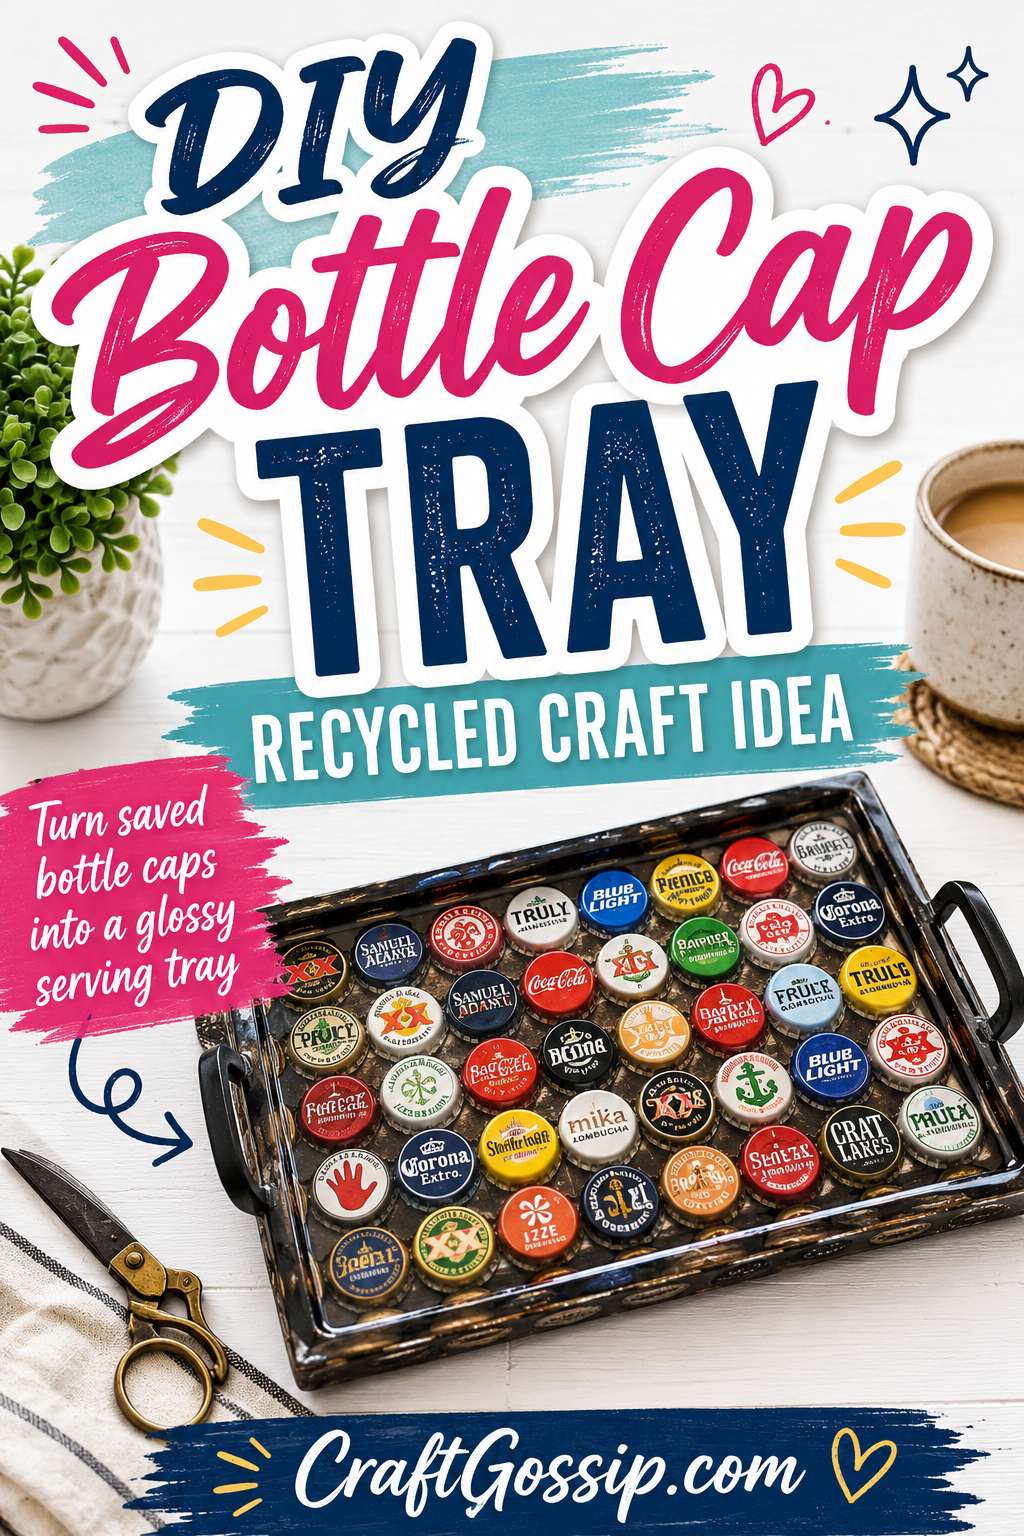
How To Make A Recycled Bottle Cap Tray With Resin

There are some recycled craft supplies that quietly collect in jars for years, waiting for their big moment. Buttons do it. Wine corks do it. And bottle caps? Oh, bottle caps are absolutely guilty.

If you have a stash of beer bottle caps, soda caps, kombucha caps or colourful metal drink caps, this recycled bottle cap tray is a brilliant way to turn them into something useful, bold and full of personality. Instead of hiding them in a jar “for someday,” you can set them into an old tray, seal them under resin, and create a sturdy serving tray for drinks, snacks, craft supplies, coffee tables, outdoor entertaining or a home bar.

This project is especially good if you like recycled crafts that look like they have a bit of story behind them. You can use caps collected from holidays, parties, favourite drinks, local breweries, family gatherings or even a special event. A tray made from saved bottle caps has far more character than something plain from a shop shelf.

And if you are already in a bottle-cap crafting mood, you might also like the Recycled Crafts section on CraftGossip or the recycled craft ideas on CraftBits for more ways to turn everyday bits and pieces into something worth keeping.

Why Bottle Caps Work So Well In Resin Trays

Bottle caps are perfect for resin craft projects because they are shallow, colourful and sturdy. Once they are glued into a tray and covered with clear resin, they create a smooth wipeable surface while still keeping all that lovely colour and texture visible underneath.

You can make the finished tray look playful, rustic, retro, masculine, coastal, bar-style, colourful or surprisingly polished depending on the caps you use and how you arrange them.

Beer bottle caps give a vintage pub or home-bar feel. Soda caps look bright and cheerful. Matching caps can look neat and graphic. Mixed caps feel collected and relaxed. And if you use caps with interesting designs inside, you can place them open-side up so the artwork shows.

This is also a great way to rescue a tired tray. Scratched, dated, chipped or slightly ugly trays are perfect candidates because the bottle caps and resin will completely transform the base.

Supplies You Will Need

An old tray with raised sides
Metal bottle caps
Epoxy resin suitable for craft use
Strong clear glue or industrial craft adhesive
Spray paint or acrylic paint for the tray
Primer, optional but useful
Sandpaper
Ruler or measuring tape
Disposable gloves
Mixing cups and stir sticks for resin
Craft heat tool or small torch for bubbles
Drop cloth or plastic table cover
Masking tape
A level surface for curing
Optional: clear spray sealer, decorative handles, felt pads for the base

For this project, Amazon is useful for epoxy resin kits, disposable gloves, mixing cups, stir sticks, craft heat tools, strong glue and spray paint. If you want a more decorative look, Etsy can be a good place to find vintage beer caps, unusual bottle caps or handmade tray handles, but this project works best when you use what you already have.

Choosing The Right Tray

The best tray for this project has raised sides. That edge is important because it keeps the resin contained while it cures.

Wooden trays, metal trays and sturdy plastic trays can all work, but wooden trays are often the easiest to paint and prepare. Make sure the tray is solid, flat and not warped. Resin needs a level surface, so a twisted or uneven tray will cause the resin to pool in one corner.

A tray with a flat base is easiest. If the bottom has a deep curve or raised pattern, the caps may not sit neatly.

Before you start, clean the tray well. Remove dust, grease, old stickers and anything that might stop the paint or glue from sticking. If the tray has a glossy finish, lightly sand it so the new paint has something to grip.

How Many Bottle Caps Do You Need?

The number of bottle caps depends on the size of your tray and how closely you arrange them.

As a rough guide:

Small tray: 40–60 caps
Medium tray: 70–100 caps
Large tray: 120+ caps

The competitor project used 99 bottle caps for its tray, which gives a good idea of how quickly caps disappear once you start filling a surface.

Before gluing anything, lay your caps inside the tray and test the layout. This is the part where you realise your “huge collection” may only cover half the tray. Very humbling.

If you are short on caps, you can leave a painted border around the edge, space the caps out slightly, or combine caps with small tiles, coins, buttons or flat glass gems.

Preparing The Bottle Caps

Wash the bottle caps in warm soapy water and dry them completely. Sticky drink residue and resin are not friends.

Check for bent or damaged caps. Slight dents are fine and can add character, but badly crushed caps may not sit flat. If needed, place a cap on a scrap piece of wood and gently flatten it with a hammer.

Decide whether you want the printed side facing up or the open side facing up. Printed side up gives a cleaner bottle-cap look. Open side up can show hidden branding, colours or little designs inside the caps.

If you are using beer caps, try arranging them by colour, brand, country, drink type or memory. This is where the tray can become a bit of a conversation piece.

Paint The Tray First

Once your tray is clean and lightly sanded, paint it before adding the caps.

Spray paint gives a smooth finish, especially on metal or wooden trays. Acrylic paint works too, especially if you already have some in your craft cupboard.

Choose a colour that works with your caps. Black makes bright caps pop. White or cream gives a cleaner modern look. Navy, forest green or charcoal can make beer caps look more grown-up and home-bar friendly. Metallic paint can make the tray feel more polished.

Let the paint dry fully before moving on. Do not rush this part. If the paint is still soft when you add glue or resin, the finish can lift or wrinkle.

Arrange Your Bottle Caps

Lay the bottle caps into the tray before gluing them down.

You can arrange them in neat rows, a diagonal pattern, circles, colour blocks, a rainbow, random scatter style, or even initials or a simple shape if you have enough colours.

Take a quick photo of the layout before moving anything. This is such a simple step, but it saves a lot of muttering later when you accidentally bump the tray and everything shifts.

A tight layout looks more mosaic-like, while a spaced layout lets more of the painted tray show through. Both work, so choose the look you prefer.

Glue The Bottle Caps Down

Once you are happy with the layout, remove the caps section by section and glue them in place.

Use a strong clear glue and apply enough to hold each cap firmly. Press each cap down and keep working across the tray.

Let the glue dry completely before adding resin. Overnight drying is best. If the caps are not firmly attached, they can float or shift when the resin is poured, and nobody wants to chase bottle caps through sticky resin.

For extra security, place a few heavy books over a protective sheet on top of the caps while the glue dries. Just make sure the glue is not squeezing up and sticking to the protective layer.

Resin Safety Before You Pour

Resin can give a beautiful glossy finish, but it does need sensible handling.

Work in a well-ventilated area. Wear gloves. Cover your table. Read the instructions on your specific resin kit before mixing. Resin brands vary, and the ratio and curing time matter.

Do not guess measurements. Resin usually needs very accurate mixing to cure properly. If the ratio is wrong or the mixture is not stirred well enough, the finish can stay sticky.

Keep children and pets away from the resin area while you work and while the tray cures.

This is not the craft to do in a rush ten minutes before dinner. Give yourself time and space.

Pour The Resin

Place the tray on a perfectly level surface. This matters. If the surface is not level, the resin will settle unevenly.

Mix the resin according to the package instructions. Stir slowly and scrape the sides and bottom of the mixing cup so both parts combine properly.

Pour the resin slowly over the bottle caps, letting it spread between the gaps. Use a stir stick to guide it into corners if needed. You want enough resin to cover the bottle caps and create a smooth tray surface.

Do not overfill the tray. Resin can creep up the sides or spill if you add too much.

Once poured, use a craft heat tool or small torch to remove bubbles. Keep the heat moving and do not hold it in one spot too long. The competitor article also notes using a craft heat tool to help remove tiny resin bubbles.

Let The Tray Cure Properly

Once the resin is poured, leave the tray alone on a level surface.

Cover it with a large box or plastic storage tub to keep dust, pet hair and wandering insects out of the resin while it cures. Make sure the cover does not touch the resin.

Most resin needs at least 24 hours to cure, but some brands take longer. Follow your product instructions.

Do not poke it. I know it is tempting. Do not do it.

Once cured, the surface should be firm, smooth and glossy.

Finishing Touches

After the resin has cured, check the tray edges.

If there are any rough resin drips, carefully trim or sand them according to your resin product’s instructions. Add felt pads to the bottom of the tray to protect tables.

If your tray handles look tired, replace them with new ones or wrap them with twine, leather cord or fabric strips.

You can also add a clear sealer to painted outer edges if the tray will be used outdoors or around drinks.

Design Ideas For Your Bottle Cap Tray

A bottle cap tray can go in lots of different directions.

For a home bar tray, use beer caps and paint the tray black, charcoal or deep green.

For a retro kitchen tray, use colourful soda caps and a bright painted base.

For a patio tray, use mixed caps and a weathered wood tray.

For a Father’s Day gift, collect caps from favourite beers or drinks and add a simple masculine colour palette.

For a travel memory tray, use caps collected from trips, breweries or special events.

For a coastal look, mix blue, white and silver caps with a pale painted tray.

For a craft room tray, use colourful caps and keep it on your desk for scissors, glue sticks, pens and washi tape.

What Can You Use The Finished Tray For?

This tray is practical as well as decorative.

Use it as:

A drinks tray
A coffee table tray
A home bar tray
A patio serving tray
A craft supply tray
A desk organiser
A Father’s Day gift
A handmade housewarming gift
A barbecue serving tray
A game-room or man-cave accessory
A display tray for candles or plants

If you are using it for food or drinks, keep food on plates or napkins rather than directly on the resin surface unless your resin product specifically says it is food-safe. Many craft resins are decorative only.

Troubleshooting Resin Tray Problems

If your resin has lots of bubbles, you may have stirred too fast or skipped the heat tool step. Stir slowly and use gentle heat after pouring.

If bottle caps float, they were not glued down firmly enough. Let the glue cure overnight before resin.

If the resin cures sticky, the mixture may not have been measured or stirred correctly. Follow the resin ratio exactly.

If dust lands in the resin, cover the tray while it cures.

If resin pools to one side, your surface was not level. Use a small level before pouring.

If caps show through above the resin, you may need a second thin pour after the first layer cures.

More Bottle Cap Craft Ideas

Once you start saving bottle caps, there are plenty of ways to use them.

CraftGossip has an older roundup of crafts to use your extra bottle caps, which is a useful internal link for anyone who has more caps than tray space.

CraftBits also has a cheerful Bottle Cap Daisy Garden Wall Art project, which would pair nicely with this tray for a recycled craft cluster. You can also browse the wider CraftBits recycled crafts category for more projects using bottles, tins, jars and other saved bits from around the house.

And if you want a matching garden-style project, a recycled bottle cap planter would make a lovely companion piece to this tray.

Why This Project Is Worth Making

A recycled bottle cap tray is one of those projects that feels both useful and personal. You are not just decorating a tray; you are turning a pile of little saved pieces into something practical.

It is thrifty, colourful, sturdy, and easy to customise for different people or rooms. It also makes a great handmade gift for someone who loves entertaining, craft beer, garden parties, retro décor or recycled crafts.

So if you have an old tray waiting for a makeover and a jar of bottle caps that has been quietly judging you from the shelf, this is their moment.

Give them some glue, a glossy coat of resin, and a second life as something worth serving drinks on.

Explore

books Christmas CraftGossip Giveaways Craft Inspirations Easter glass halloween Home Decor kid crafts More Crafts Patterns & Tutorials Recycled and Thrifted Ideas recycled art Recycled Clothing Recycled Jewelry Recycled kids crafts Recycled Sewing Recycling Ideas Recycling Organizing tin can

Featured Posts

How to knit a tiny sweater for a card with toothpicks

Happy New Year! 30 Days to Zero Waste

How to make a recycled canning jar lid pumpkin

Nature Play: What Sticks, Stones, and Mud Teach That Screens Can’t

Natural Blue Eggs Used As Succulent and Air Planters

RSS feed: More Articles More Articles

  • Single and Loving It Spaghetti: Easy Bolognese for One
  • DIY Fire Pit: 10 Backyard Ideas You Can Make on a Budget
  • Crochet Christmas Dove Ornaments With a Printable Gift Poem
  • 5 Christmas Ornament Quilt Patterns That Add Instant Holiday Charm
  • 15 Christmas Cards Using Patterned Paper Scraps
  • 10 Christmas Stocking Knitting Patterns Worth Bringing Out Every Year
  • 8 DIY Wooden Bathroom Over-the-Toilet Shelf Ideas That Make Small Spaces Work Harder
  • 10 Easy Air-Dry Clay Ideas for Kids with a Fall Theme
  • Grinch Gunk Bath Slime – A Silly, Skin-Safe Christmas Soak for Kids
  • 14 Quick Handmade Gifts To Sew Before Christmas

Copyright © 2026 · CraftGossip | Start Here | Contact Us | Link to Us | Your Editors | Privacy and affiliate policy