• Home
  • Suggest A DIY
  • DIY Newsletter

Recycled Crafts

Creative DIY Projects That Turn Trash Into Treasure

  • About CraftGossip
  • Our Network
    • Bath & Body Crafts
    • Candle Making Ideas
    • Crochet Ideas
    • Cross Stitch
    • Edible Crafts
    • Felting Patterns
    • Glass Art
    • Home & Garden Ideas
    • Indie Crafts
    • Jewelry Making
    • Kids Crafts
    • Knitting Patterns
    • Lesson Plans
    • Needlework
    • Party Ideas
    • Polymer Clay
    • Quilting Ideas
    • Recycled Crafts
    • Scrapbooking
    • Sewing Patterns
    • Card Making
    • DIY Weddings
    • Not Craft Ideas
  • Giveaways
  • Roundups
  • Store
  • Search

Fun way to feature an enamel pin from the Craft Gossip Shop on a necklace charm

May 17, 2022 by Stefanie Girard

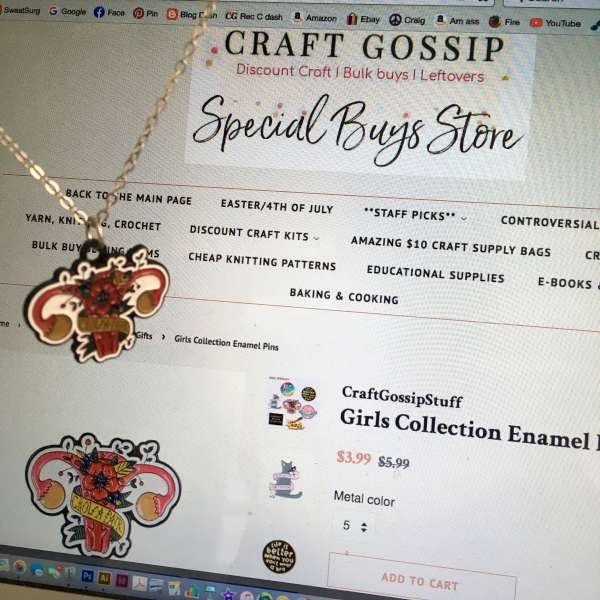
I scored this timely “Grow a Pair” ovary pin on the Craft Gossip Shop. I loved the design and I want to wear it all the time so I wanted to convert it into a pendant for a necklace. I did this by 3d printing a charm that I can pin the pin to an then string it onto a chain.
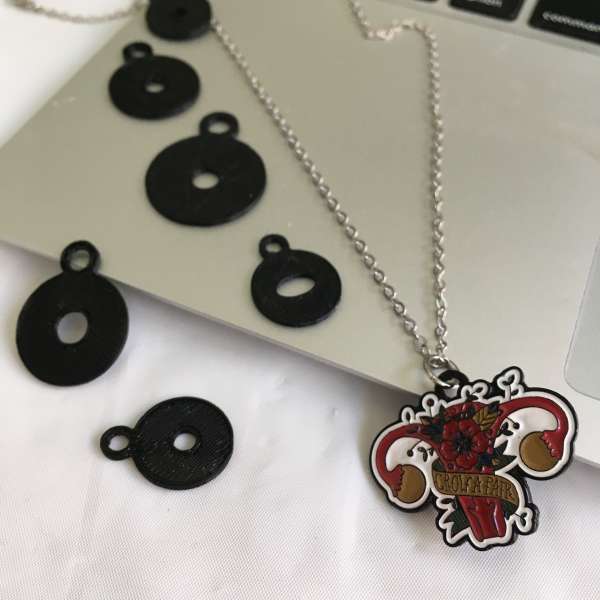
Here is the template I used to 3d print. As you can see I tried al lot of different sizes and proportions of the outside, inside and loop size. If you are interested in the file leave a comment and I’ll figure out how to upload the .stl file. I should also say I added a tiny piece of tape between the charm and the “stopper” so it didn’t spin around.

«
»

Comments

  1. LynneM (akascrapchick) says

    May 18, 2022 at 5:09 pm

    The 3d print file for the charm would be wonderful!

Have you read?

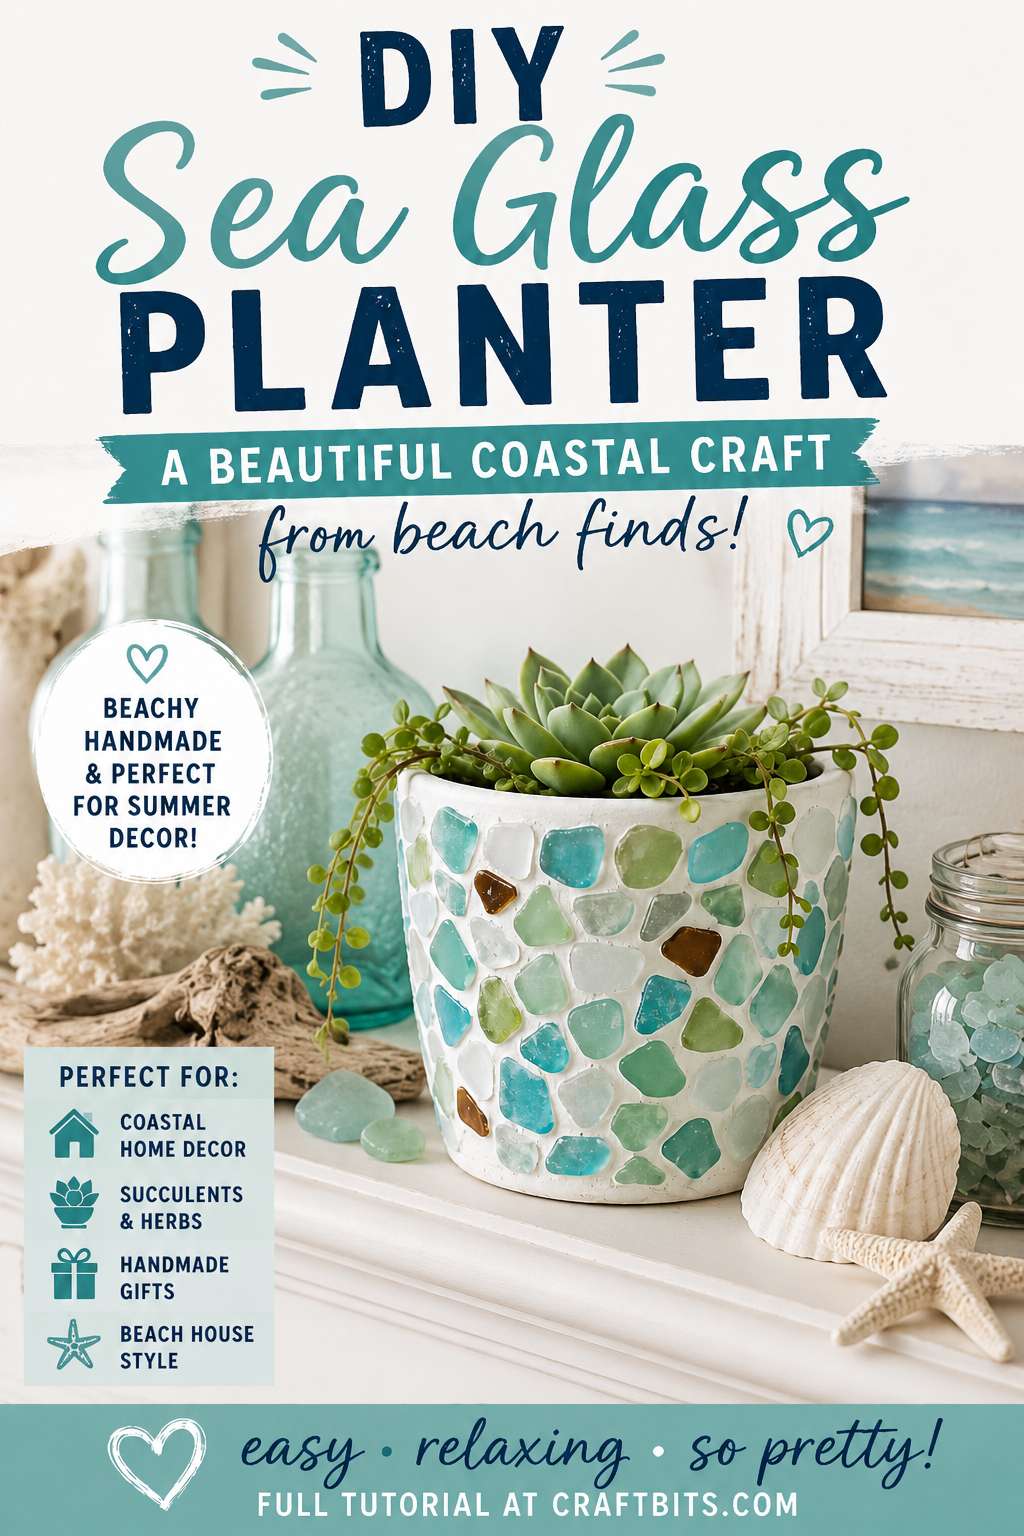
DIY Sea Glass Planter: A Coastal Terracotta Pot Makeover

There is something about sea glass that makes every crafter a little bit feral at the beach. You start off casually walking along the sand, and before you know it, you’re bent over like a treasure hunter, filling your pockets with tiny frosted bits of blue, green, white, and brown glass while pretending this is “just a relaxing walk.”

This DIY sea glass planter is a lovely way to turn those beach finds into something useful and pretty for your home. It takes a plain terracotta pot and gives it a coastal mosaic-style makeover using sea glass, glue, and air-dry clay or grout-style filler. The finished pot looks beautiful with succulents, herbs, trailing greenery, or even a faux plant if you are blessed with the opposite of a green thumb.

It is a perfect summer craft, beach house decor project, handmade gift idea, or weekend craft for anyone who loves coastal decorating. And if you don’t have a jar of real sea glass tucked away from holidays past, you can absolutely use craft-store sea glass, tumbled glass, flat glass vase filler, or even broken pottery pieces for a recycled twist.

If you enjoy coastal-inspired crafts, you might also like this Dollar Tree beach shell nautical planter over on CraftBits, or this pretty recycled china and sea glass angel project if you have odd pieces of pottery waiting for their second life.

Why Make A Sea Glass Planter?

A sea glass planter is one of those crafts that looks far more expensive than it actually is. Once the glass is attached and the gaps are filled, the pot has that lovely handmade mosaic look without needing proper tile-cutting tools or complicated grout work.

It is also a sweet memory craft. You can use sea glass collected from a holiday, a favourite beach walk, or a special family trip. Every little piece becomes part of the story, which is much nicer than leaving it sitting in a jar on a shelf for the next ten years. Not that I would ever do that, obviously.

This project works well for:

Coastal home decor
Beach house styling
Summer patio decorating
Succulent planters
Handmade housewarming gifts
Mother’s Day gifts
Garden club craft days
Upcycled terracotta pot projects
Memory crafts using collected beach finds

Supplies You Will Need

Plain terracotta pot
White outdoor paint or chalk-style outdoor paint
Paintbrush
Sea glass, tumbled glass, or flat glass vase filler
Strong adhesive suitable for glass and terracotta
Air-dry clay, tile grout, or outdoor filler
Clay tool, craft stick, or old butter knife
Damp cloth or sponge
Clear outdoor sealer
Disposable gloves
Small plant, succulent, herb, or faux greenery

A good strong craft adhesive makes a big difference here. Hot glue is not the best choice for this project because it can loosen, especially if the planter gets warm or damp. Look for a glue designed for glass, ceramic, terracotta, or mixed surfaces. E6000-style adhesive or a strong outdoor craft glue is usually a better option.

For supplies, Amazon is handy for craft sea glass, outdoor sealers, terracotta pots, and strong adhesives. If you want a more unusual colour mix, Etsy can also be a lovely place to find small batches of tumbled sea glass or recycled glass pieces from independent sellers.

Before You Start

Wash and dry your terracotta pot before painting. Terracotta can be dusty, and that powdery surface can stop paint and glue from bonding properly.

If your sea glass has sand or salt on it, give it a rinse and let it dry completely. Real sea glass is beautiful, but it is not always perfectly flat, so take a few minutes to sort your pieces by size before gluing. The flatter pieces are easiest to use around the main body of the pot, while smaller odd-shaped pieces are useful for filling gaps near the rim and base.

You may also want to do a quick layout test before gluing anything down. This saves you from the classic crafter’s mistake of using all the best blue pieces in the first five minutes and then being left with twelve awkward brown bits and regret.

Step One: Paint The Terracotta Pot

Paint the outside of your terracotta pot with white outdoor paint. You can also paint the inside rim if it will be visible once the plant is added.

White is a good base colour because it helps the sea glass colours look fresh and bright, especially pale aqua, green, and frosted white pieces. If you want a moodier coastal look, you could use soft grey, sandy beige, muted blue, or even a pale seafoam green.

Apply two thin coats rather than one thick coat. Let the paint dry fully between coats.

If this planter will be used outdoors, make sure the paint is suitable for exterior use. Terracotta absorbs water, so proper paint and sealing help your finished planter last longer.

Step Two: Plan Your Sea Glass Layout

Lay your sea glass pieces out on the table and sort them roughly by colour and size.

You can create a random beachy mosaic, arrange the colours in soft rows, make an ombre effect from darker blue to pale aqua, or keep it simple with mixed frosted glass all over.

For a more polished look, leave a small gap between each piece so the filler can show through like grout. If the pieces are too close together, it becomes harder to press the air-dry clay or filler neatly between them.

If you like garden projects and handmade planters, you might also enjoy this simple cement plant pot tutorial for a more industrial-style handmade planter.

Step Three: Glue The Sea Glass To The Pot

Place the pot on its side and start gluing the sea glass pieces onto the outside surface.

Work in small sections at a time. Add a dab of glue to the back of each piece of sea glass, press it onto the pot, and hold it for a few seconds until it grips. Rotate the pot as needed, allowing one section to set before moving too quickly to the next.

Start around the middle of the pot and work outward. This helps you build a balanced design without everything sliding toward the base.

Do not rush this step. Sea glass can be slippery, and terracotta pots are curved, which means some pieces will try to wander off like they have somewhere better to be. Let the glue dry properly before moving on to filling the gaps.

Step Four: Fill The Gaps

Once the sea glass is firmly attached and the glue has dried, it is time to fill the gaps.

You can use air-dry clay for a soft handmade look, or tile grout/outdoor filler for a more traditional mosaic finish. Air-dry clay is easy to work with and beginner-friendly, while grout tends to be more durable if the planter will live outdoors.

If using air-dry clay, roll small pieces into thin snakes and press them into the gaps between the sea glass. Use your fingers, a clay tool, craft stick, or old butter knife to smooth the clay around the pieces.

If using grout or filler, apply it carefully according to the product directions, pressing it between the glass pieces and wiping away excess from the surface before it sets.

Keep a damp cloth nearby and gently clean the tops of the sea glass as you go. It is much easier to wipe it while the filler is still soft than to scrape it off later.

Step Five: Smooth And Clean The Surface

Once the gaps are filled, go over the whole planter and smooth any rough areas.

Use a damp sponge or cloth to clean the sea glass pieces so they shine through clearly. Be gentle. You do not want to lift the filler out of the gaps.

Check around the top rim and bottom edge of the pot. These areas often need a little extra tidying because they are the places most likely to look messy if the glass pieces are uneven.

Let the planter dry completely. Air-dry clay may need a full day or more depending on thickness and humidity. Grout and outdoor filler will have their own drying and curing times, so follow the instructions on the packaging.

Step Six: Seal The Finished Planter

For indoor decorative use, sealing is helpful but not always essential. For outdoor use, sealing is strongly recommended.

Use a clear outdoor sealer suitable for terracotta, clay, or mosaic-style crafts. Apply it lightly and evenly, making sure the filler and painted areas are protected.

Avoid sealing the inside of the pot if you are planting directly into it unless the sealer is plant-safe. An easy option is to keep your plant in a plastic nursery pot and sit it inside the decorated planter. That way the sea glass pot acts more like a decorative cover, and you do not have to worry as much about soil, drainage, or water damage.

What Plants Work Best?

Succulents look especially pretty in a sea glass planter because they suit the coastal look and do not need heavy watering. Small trailing plants also look gorgeous because they soften the edges of the pot.

Good options include:

Succulents
Small cactus plants
Trailing string of pearls
Baby tears
Small herbs
Faux greenery
Air plants in a small insert pot

If you are gifting the planter, a faux succulent is a safe choice. Nobody wants to give a handmade gift that comes with plant-parent pressure.

Tips For A Better Finish

Use flatter sea glass pieces where possible. They attach more easily and sit better on the curved pot.

Avoid very thick glass pieces near the bottom edge or the pot may not sit flat.

Let the glue dry fully before filling the gaps. If the glass shifts while you are adding clay or grout, the finished surface can look uneven.

Use outdoor paint and sealer if the planter will sit on a patio or porch.

Keep the decorated pot out of constant heavy rain unless you have used outdoor-rated products.

Use a plastic liner pot inside the planter if you are worried about moisture.

Choose a simple colour palette if you want a more elegant coastal look. Aqua, white, and pale green always look fresh together.

Variations To Try

Make a blue and white sea glass planter for a classic beach cottage look.

Use only green glass for a soft garden-inspired pot.

Mix sea glass with tiny shells for extra texture.

Use broken china pieces for a cottagecore mosaic planter.

Create a mini version using small terracotta pots for party favours or table settings.

Make a set of three pots in different sizes for a windowsill herb garden.

Add a band of sea glass around the rim only if you want a quicker version.

Use a thrifted ceramic pot instead of terracotta for a recycled craft project.

For another small clay project with a natural handmade feel, have a look at this crystal pinch pot tutorial. It would pair beautifully with a coastal craft table or summer workshop theme.

Troubleshooting

If the glass keeps sliding, the pot may be too upright or the glue may need more time to grab. Lay the pot on its side and work in smaller sections.

If the filler looks messy, use a damp cloth to clean the glass before the filler fully dries.

If the pot feels too rough, lightly smooth the filler once dry and seal it afterward.

If the glass colours look dull, clean the surface thoroughly and use a clear sealer to bring back a little shine.

If you do not have enough sea glass, decorate just the top half of the pot or create a scattered design instead of covering the entire surface.

Handmade Gift Idea

A DIY sea glass planter makes a lovely handmade gift, especially for someone who loves beach decor, gardening, succulents, or coastal colours. Add a small plant, wrap the pot with raffia or cotton ribbon, and tuck in a handwritten tag.

You could also make this as a memory gift using sea glass collected from a family beach holiday. That gives it a little story, and handmade gifts with a story are always the ones people keep.

This is the sort of craft that feels relaxed, pretty, and useful all at once. It does not need to be perfect, either. In fact, the slightly uneven pieces are what make it look handmade rather than mass-produced. A few wonky bits just prove a real person made it, probably while drinking tea and wondering why craft glue is always either missing or glued shut.</span

Explore

books Christmas CraftGossip Giveaways Craft Inspirations Easter glass halloween Home Decor kid crafts More Crafts Patterns & Tutorials Recycled and Thrifted Ideas recycled art Recycled Clothing Recycled Jewelry Recycled kids crafts Recycled Sewing Recycling Ideas Recycling Organizing tin can

Featured Posts

How to dye buttons

How to make curvy fabric mini flags

How to make a recycled wine bottle dispenser

Between a rock and an Artist’s Canvas

Up-cycled Bottle – Christmas Song Sheet Decoration

RSS More Articles

  • Cross Stitch Forum Asks for Proof Stitches Aren’t AI
  • Embroidery Keychain Laser Cut Pattern
  • 6 FREE Pumpkin and Sunflower Fall Printables
  • Book Review: Best Dressed Crab and Friends – Knitted Sea Creatures With an Ocean of Outfits
  • Free Crochet Spider Web Pattern: Easy Halloween Decoration for Beginners
  • Sewing Pattern – DIY Beach Towel Bag
  • How to Make a Junk Journal from Start to Finish (Beginner-Friendly Guide)
  • Math Centers to Help Kids Learn
  • How to Color on Kraft Cardstock with Alcohol Markers for a Halloween Card
  • Cricut Maker 5 First Look: What’s New and Is It Worth the Upgrade?

Copyright © 2026 · CraftGossip | Start Here | Contact Us | Link to Us | Your Editors | Privacy and affiliate policy