 Here is a link to the blog Mar de Sonhos, a blog that is in English and Portuguese that features this interesting recycled cd mandala. I can tell you how cool it is that crafts don’t have a language barrier!
Comments
Have you read?
25 Creative Ways to Repurpose Old Suitcases: Easy DIY Vintage Luggage Ideas You’ll Actually Use
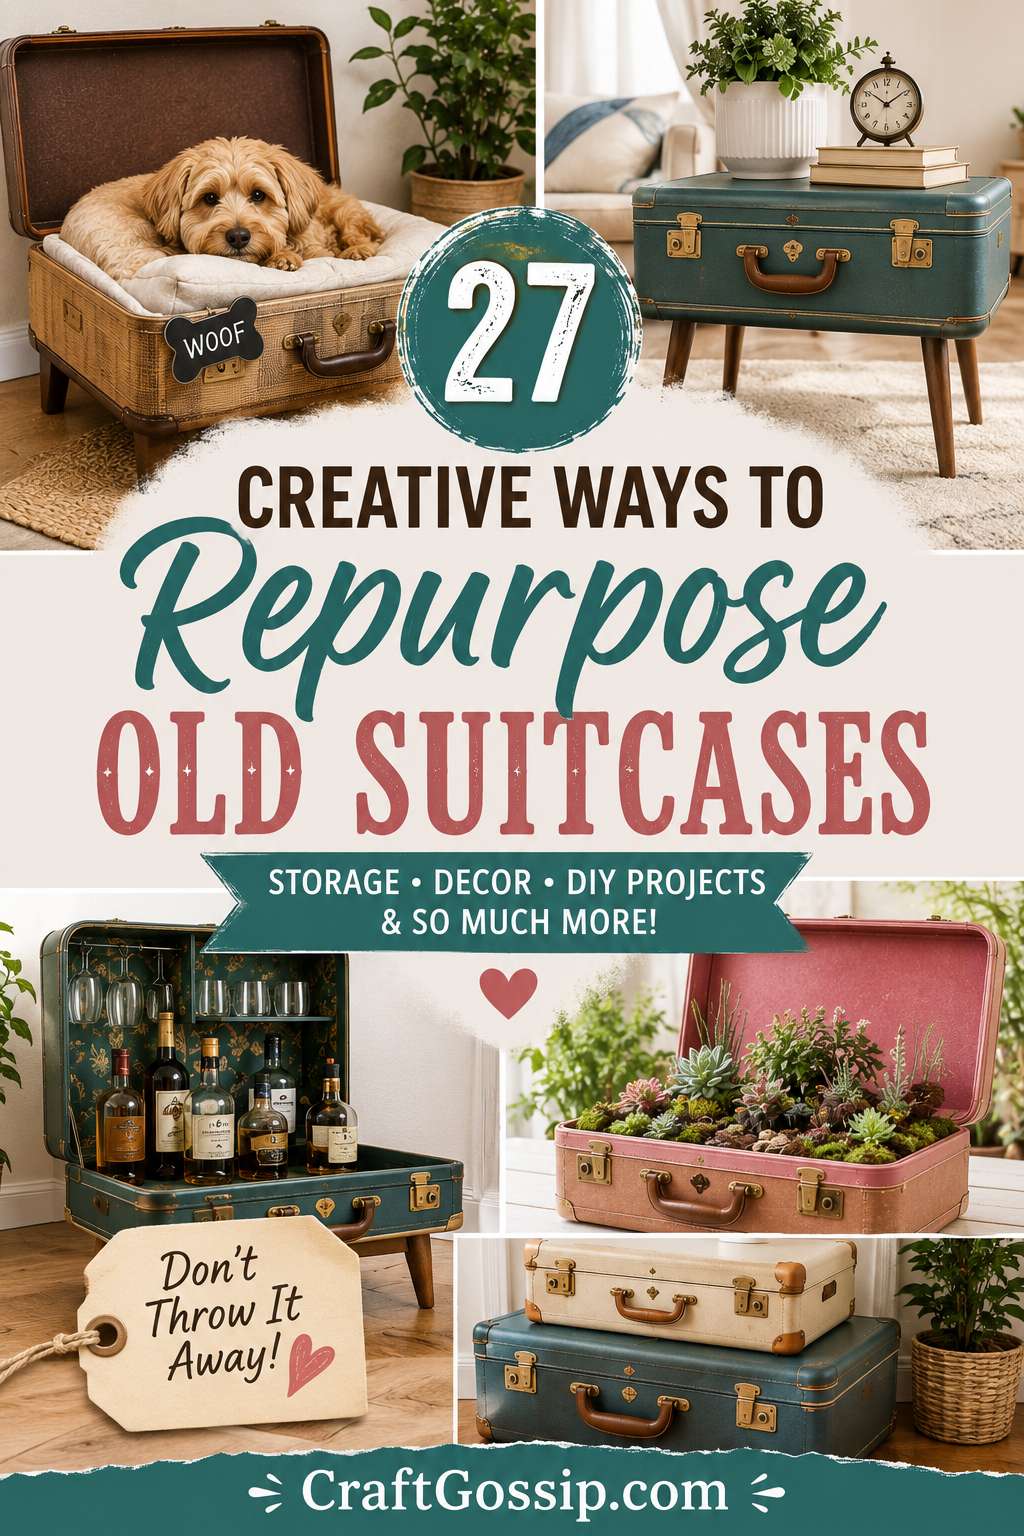
If you’re anything like me, you probably can’t walk past a vintage suitcase at an op shop without wondering if it deserves one more adventure. There’s something about those worn leather handles, faded travel stickers, and sturdy old clasps that makes them far too charming to send to landfill.
I have a soft spot for old luggage because it tells a story. Every scratch and sticker hints at holidays, train journeys, family road trips, or perhaps someone’s honeymoon decades ago. Even when a suitcase is no longer practical for travelling, it’s often still perfectly useful as a decorative piece or clever storage solution.
The wonderful thing about repurposing old suitcases is that almost anyone can do it. Some projects require nothing more than a good clean, while others become weekend DIY transformations complete with paint, timber legs, wallpaper lining or a few decorative handles. Vintage suitcases work beautifully with farmhouse, cottagecore, industrial, shabby chic and modern eclectic decorating styles.
According to the U.S. Environmental Protection Agency, reducing waste by reusing household items helps keep useful materials out of landfill and reduces demand for new products. Giving an old suitcase a second life is both sustainable and surprisingly budget-friendly.
Whether you’ve rescued one from Grandma’s attic, picked one up at a thrift store, or simply have an old suitcase gathering dust in the garage, here are some of my favourite ways to transform it into something beautiful and practical.
1. Turn It Into A Stylish Coffee Table
One of the most popular vintage suitcase projects.
Simply attach wooden legs or modern hairpin legs to the bottom, leaving the lid functional for hidden storage. It’s perfect for magazines, blankets or board games.
Best for: Hard-shell vintage suitcases.
2. Create A Pet Bed
One of my absolute favourites.
Remove the lid (optional), add short timber legs and a custom cushion and your dog or cat suddenly has the most Instagram-worthy bed in the house.
3. Make A Bedside Table
Stack two or three matching suitcases beside the bed.
Not only do they look beautiful, but they provide hidden storage for books, spare blankets and chargers.
4. Children’s Dress-Up Trunk
Paint the exterior in bright colours and fill it with costumes, hats and accessories.
It becomes both toy storage and part of imaginative play.
5. Vintage Blanket Storage
Keep seasonal quilts, crochet blankets or knitted throws neatly stored inside.
Unlike plastic tubs, vintage luggage actually adds character to the room.
6. Portable Craft Storage
This might be my favourite practical use.
Store:
- knitting projects
- crochet supplies
- embroidery hoops
- quilting fabric
- sewing notions
- scrapbooking supplies
Everything stays together and looks beautiful sitting on a shelf.
7. Fairy Garden
Fill the open suitcase with soil, moss, miniature furniture and tiny plants to create an enchanting fairy garden.
Perfect for patios or covered porches.
8. Indoor Succulent Garden
Vintage suitcases make stunning indoor planters.
Simply add a waterproof liner before planting.
9. Wall Shelf
Cut the suitcase in half (or use only the base) and mount it to the wall.
Instant vintage shelving with plenty of personality.
10. Entryway Welcome Display
Stand an old suitcase beside your front door.
Decorate it seasonally with flowers, lanterns, pumpkins or Christmas décor.
11. Mini Home Bar
Line the inside with wallpaper or peel-and-stick vinyl.
Add shelves and bottle holders for a beautiful portable cocktail cabinet.
12. Memory Box
Instead of storing treasured keepsakes in plastic tubs, dedicate an old suitcase to:
- family photos
- baby clothes
- travel souvenirs
- handwritten letters
- Christmas decorations
13. Vintage Wedding Card Box
Decorate the suitcase with flowers and signage.
Guests simply place cards through a slot cut into the lid.
14. Dollhouse
One of the cutest children’s projects.
Each half becomes a room complete with wallpaper, miniature furniture and tiny accessories.
15. Portable Sewing Station
Fit the inside with pockets, elastic holders and removable trays.
Close the lid when you’re finished and carry everything away.
16. Plant Stand
Turn the suitcase into an elevated planter by adding timber legs.
Beautiful on verandahs or patios.
17. Hidden Charging Station
Hide power boards and charging cables inside while feeding cords through discreet holes.
No more cable clutter.
18. Hallway Bench
Attach a padded upholstered cushion to the lid and sturdy legs underneath.
You now have extra seating with hidden storage.
19. Christmas Decoration Storage
Vintage suitcases are ideal for storing fragile ornaments.
The rigid sides help protect delicate decorations year after year.
20. Bathroom Towel Storage
Roll towels neatly inside and leave the suitcase partially open for display.
A lovely cottage-style look.
21. Picnic Hamper
Replace the lining with washable fabric.
Add compartments for plates, cutlery and glasses.
Perfect for romantic picnics.
22. Portable Library
Store children’s favourite books inside.
The suitcase becomes a travelling reading corner.
23. Vinyl Record Storage
Vintage suitcases are almost the perfect size for LP collections.
A practical solution that also suits retro décor.
24. Seasonal Display Box
Open the lid and decorate inside with:
- pumpkins
- Easter décor
- Christmas villages
- dried flowers
- vintage books
Swap decorations throughout the year.
25. Photography Prop
Old suitcases remain one of the most popular styling props for:
- newborn photography
- vintage weddings
- market stalls
- retail displays
26. Garden Tool Storage
Keep hand trowels, gloves, seed packets and twine together in one portable gardening case.
Great for greenhouse storage too.
27. Upcycled Side Table With Storage
Paint the exterior, replace the lining with patterned fabric and add modern furniture legs.
You end up with a completely unique side table that nobody else owns.
How To Clean A Vintage Suitcase Before Upcycling
Before starting any project:
- Vacuum the interior thoroughly.
- Wipe down the exterior with warm water and mild soap.
- Remove mildew using diluted white vinegar.
- Polish leather with leather conditioner.
- Replace damaged lining if necessary.
- Allow everything to dry completely before decorating.
If you discover mould that has deeply penetrated the suitcase, it’s best to avoid using it for fabric or clothing storage.
Where To Find Vintage Suitcases
Some of the best places include:
- thrift stores
- antique markets
- garage sales
- estate sales
- Facebook Marketplace
- charity shops
- flea markets
Don’t worry too much about scratches or faded finishes—they often add character and can easily become part of the finished design.
Unlike many quick list posts, the real beauty of repurposing old suitcases is that they combine storage, sustainability, and vintage style in one project. Whether you transform yours into a pet bed, coffee table, planter, bedside cabinet or craft organiser, you’ll be preserving a little piece of history while creating something genuinely useful.
If you’re hunting for more creative upcycling inspiration, you might also enjoy:
- Upcycled furniture tutorials on CraftGossip
- Vintage home décor projects on CraftBits
- DIY storage ideas using reclaimed materials
wow perfect cd’s mandala … wow .. great idea
Very clever 🙂
What fun! I’d been saving my CDs as scarecrows for the garden but this would be great for the children to do…it could be Garden Art and kill two birds with one stone, sorry CD ha! ha!
What a great idea. I love this mandala, it looks great and I never would have clicked that it was CD’s unless I had read it!
Do you have directions of how you did this? how are they held together, especially the middle one? Are those center designs made of rolled up magazines? Thanks!
I think your recycled CD mandala is amazing. I would like to include it in a book I am writing about mandalas, which will be published July 2012 by Jessica Kingsley Publishers. I am an art therapist at The University Medical Center at Princeton, Princeton, NJ. Would you consider giving me permission to include the photo and a description (you would provide) of how to create it? You would, of course, be referenced.
Thank you-
Susan Buchalter