• Home
  • Suggest A Craft
  • DIY Newsletter

Recycled Crafts

Creative DIY Projects That Turn Trash Into Treasure

  • About CraftGossip
  • Our Network
    • Bath & Body Crafts
    • Candle Making Ideas
    • Crochet Ideas
    • Cross Stitch
    • Edible Crafts
    • Felting Patterns
    • Glass Art
    • Home & Garden Ideas
    • Indie Crafts
    • Jewelry Making
    • Kids Crafts
    • Knitting Patterns
    • Lesson Plans
    • Needlework
    • Party Ideas
    • Polymer Clay
    • Quilting Ideas
    • Recycled Crafts
    • Scrapbooking
    • Sewing Patterns
    • Card Making
    • DIY Weddings
    • Not Craft Ideas
  • Giveaways
  • Roundups
  • Store
  • Search

9 fun glow-in-the-dark projects great for summer fun

May 31, 2018 by Stefanie Girard

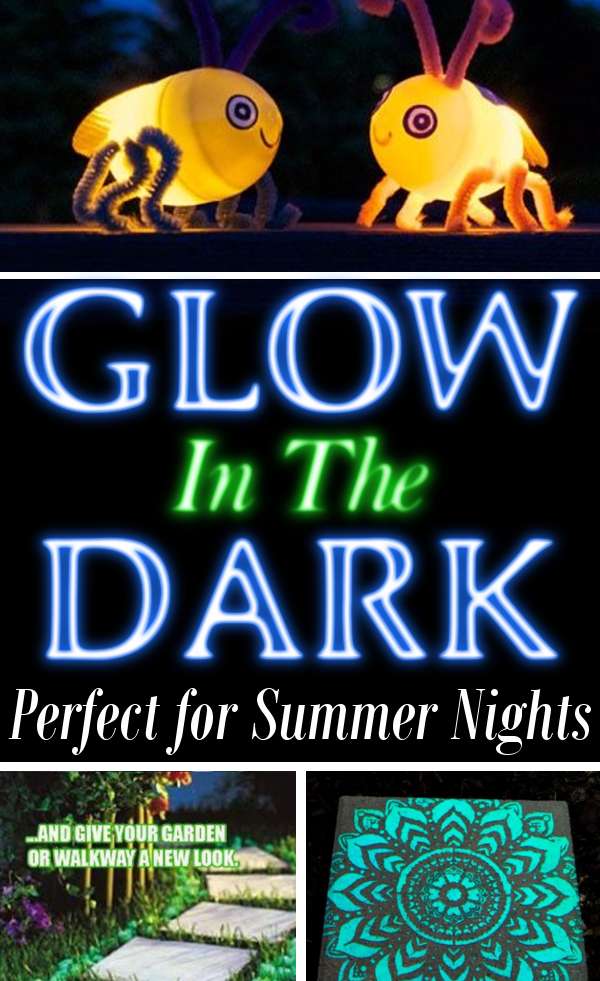
I love glow-in-the-dark projects, especially for summer as the nights are warm and being outside can be so festive. Why not make the yard really fun? Pop on over to the blog DIY Home Sweet Home for a great list of glow-in-the-dark projects that are super easy and fun to do.

Glow-in-the-dark projects are a fun way to add some whimsy and magic to your summer nights. Whether you’re entertaining guests or spending time with family, these projects can transform your backyard into a glowing wonderland. Thanks to the blog DIY Home Sweet Home, we’ve compiled a list of 10 easy and fun glow-in-the-dark projects that you can try at home.

Glow-in-the-Dark Planters
Brighten up your plants by painting your planters with glow-in-the-dark paint. The effect will be subtle during the day, but at night, your planters will glow and give off an otherworldly glow.

Glowing Pathways
Create a glowing pathway by lining your walkway with rocks painted with glow-in-the-dark paint. You can also paint the stones with arrows or other symbols to help guide your guests.

DIY Glow-in-the-Dark Bowling
Create a fun and easy bowling game using glow-in-the-dark water bottles and a glow-in-the-dark ball. You can play this game with family and friends for hours of fun.

Glow-in-the-Dark Mason Jars
Transform your Mason jars into glowing lanterns with some glow-in-the-dark paint. These jars are perfect for adding ambiance to any outdoor space.

Glow-in-the-Dark Slime
Create glow-in-the-dark slime with your kids for some fun sensory play. You can use it to create fun shapes or just to play with in the dark.

Glowing Balloons
Create a magical atmosphere by filling balloons with glow sticks and helium. You can release them into the night sky or use them to light up your backyard.

DIY Glow-in-the-Dark Bubbles
Add some fun to your bubble blowing by adding glow-in-the-dark paint to the solution. Your bubbles will glow and create a mesmerizing effect as they float around.

Glow-in-the-Dark Ping Pong
Create a fun and challenging game by adding glow-in-the-dark paint to your ping pong balls. You can play this game with friends and family for hours of fun.

Glowing Terrariums
Create glowing terrariums by adding glow-in-the-dark pebbles to the bottom of your terrarium. The effect will be subtle during the day, but at night, your terrariums will come to life with a soft glow.

DIY Glow Stick Lanterns
Create easy and inexpensive lanterns by attaching glow sticks to the inside of plastic cups. You can hang them from trees or string them up around your outdoor space for a fun and festive atmosphere.

Need Glow in the dark paint? Check out these Supplies. Glow-in-the-dark paint is a fun way to make creative nighttime crafts and light paths for visibility.


Related Posts:

  • 45 amazing ways to reuse and recycle old playing cards
  • Perfect recycled tea cup for a Barbie party
«
»

Comments

  1. DIY Home Sweet Home says

    June 5, 2018 at 6:25 pm

    Thank you for sharing!!

Have you read?

How To Make A Milk Carton Village – A Recycled Craft for Kids

Ready to turn your recycling bin into a colorful, miniature village? Grab those empty milk cartons and let’s create a town filled with tiny houses, shops, and even a school or bakery! This craft is perfect for kids of all ages and encourages imagination, storytelling, and eco-friendly creativity.

 What You’ll Need:

  • Empty milk or juice cartons (washed and dried)

  • Paints or markers

  • Paintbrushes

  • Craft glue or glue stick

  • Scissors (adult supervision recommended)

  • Colored paper or old magazines

  • Bottle caps, buttons, or plastic lids (for windows or decorations)

  • Sticks, straws, or skewers (for flag poles or chimneys)

  • Optional: glitter, stickers, washi tape, cotton balls (for snow or clouds!)

 Step-by-Step Instructions:

Step 1: Clean and Prep the Cartons
Make sure your milk or juice cartons are washed and completely dry. Remove any plastic lids or caps and keep them for decorations!

Step 2: Plan Your Village
Decide how many buildings you want to make. Each milk carton becomes a house, shop, or whatever your imagination dreams up. Arrange them side by side or in a circle like a real village square.

Step 3: Cut Out Doors and Windows
With the help of an adult, carefully cut small door and window shapes into your cartons. You can also glue cut-out shapes from colored paper if you’d rather not cut into the carton.

Step 4: Paint and Decorate
Use paint or markers to bring your buildings to life. Make brick patterns, colorful siding, or roof tiles. Let each child choose their own theme – rainbow bakery, monster house, fairy home, or tiny fire station!

Step 5: Add the Roofs
You can paint the top pointy part of the carton like a roof, or glue on cardboard triangles to create overhangs. Want to add a chimney? Glue a straw or cardboard roll on top!

Step 6: Make Flags and Signs
Cut small flags from recycled plastic or paper and tape them to straws or sticks. Glue your flags to the rooftops. You can even create tiny signs for each building – “Toy Store,” “Library,” or “Super Cat’s House.”

Step 7: Build Your Village
Place all the finished buildings together on a large piece of cardboard, tray, or table. Use bottle caps for stepping stones, cotton balls for bushes or clouds, and draw roads with marker.

Step 8: Play!
Now that your village is built, use little toys, action figures, or LEGO people to live in your new town. Create stories and adventures—your Milk Carton Village is officially open!

 Learning Bonus:

This craft is not just fun—it also teaches recycling, fine motor skills, creative thinking, and storytelling. Plus, it’s a great group activity for playdates, classrooms, or family craft nights.

Let your kids’ imaginations run wild—and remember, no two villages need to look the same. Each one tells its own story!

Explore

books Christmas CraftGossip Giveaways Craft Inspirations Easter glass halloween Home Decor kid crafts More Crafts Patterns & Tutorials recycled art Recycled Clothing Recycled Jewelry Recycled kids crafts Recycled Sewing Recycled Tutorials Recycling Ideas Recycling Organizing tin can

RSS More Articles

  • Knit a Stunning Shawl That Wears Like a Collar
  • How to Make a Summer Pocket Mini Scrapbook Album
  • Book Review: This is How a Ball Rolls
  • A Sweet Top to Show Off Colorful Yarns
  • Egyptian Eye Throw – Crochet Pattern
  • Easy to make fall garland
  • Fancy Pumpkin Cross Stitch Patterns
  • DMC Orange Punch Needle Pattern
  • How To Make A Milk Carton Village – A Recycled Craft for Kids
  • Easy Sleeveless Top – Free Crochet Pattern

Copyright © 2025 · CraftGossip | Start Here | Contact Us | Link to Us | Your Editors | Privacy and affiliate policy