
• Home
  • Suggest A DIY
  • DIY Newsletter

Recycled Crafts

Creative DIY Projects That Turn Trash Into Treasure

  • About CraftGossip
  • Our Network
    • Bath & Body Crafts
    • Candle Making Ideas
    • Crochet Ideas
    • Cross Stitch
    • Edible Crafts
    • Felting Patterns
    • Glass Art
    • Home & Garden Ideas
    • Indie Crafts
    • Jewelry Making
    • Kids Crafts
    • Knitting Patterns
    • Lesson Plans
    • Needlework
    • Party Ideas
    • Polymer Clay
    • Quilting Ideas
    • Recycled Crafts
    • Scrapbooking
    • Sewing Patterns
    • Card Making
    • DIY Weddings
    • Not Craft Ideas
  • Giveaways
  • Roundups
  • Store
  • Search

8 Crafts To Make With Old Sheet Music

August 19, 2015 by Larissa Coleman

Music is a universal language that speaks to the soul. For many people, it’s an integral part of their lives. Whether you’re a musician, music lover, or simply appreciate the beauty of musical notes and lyrics, sheet music is a classic piece of decor that can add a touch of nostalgia and elegance to any space.

Sheet music has been used for many years to inspire creativity and artistic expression. From song lyrics to sheet music notes, it’s a treasure trove of inspiration for crafting. It’s versatile and can be used in many different ways to create unique and personalized decor items.

In this article, we’ve compiled a list of 8 different crafts that can be made using old sheet music or copies of such. Each craft is unique and will add a touch of musical charm to any space.

The first craft on our list is a paper wreath made from sheet music. This is a simple yet elegant way to add a touch of musical charm to your home decor. All you need is a foam wreath form, some sheet music, and a hot glue gun. Cut the sheet music into strips and then wrap them around the wreath form, securing them in place with hot glue.

Another great craft to make with sheet music is a set of DIY paper flowers. These flowers can be used to create a centerpiece, a bouquet, or simply placed in a vase. All you need is some sheet music, a pair of scissors, and some floral wire. Cut the sheet music into strips and then fold them accordion-style. Twist the floral wire around the center of the folded paper to create a stem, and then carefully unfold the paper to create the petals.

Other crafts include sheet music coasters, decoupage furniture, wall art, and more. These crafts are all great ways to add a touch of musical charm to your home decor and make use of old sheet music in a fun and creative way.

In conclusion, sheet music is a classic piece of decor that can add a touch of nostalgia and elegance to any space. Whether you’re a musician or simply love music, there are many different crafts that can be made using old sheet music or copies of such. From paper wreaths to DIY paper flowers, the possibilities are endless. So why not try making one of these crafts and see how it can add a touch of musical charm to your home?

Love working with recycled items? Check out this amazing recycled Crafts book.
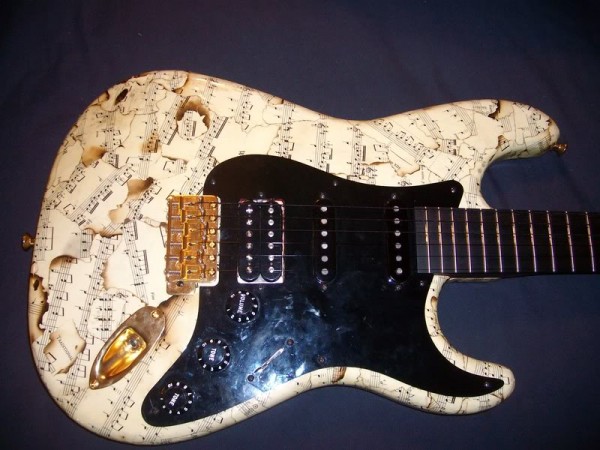
 

guitar

1- Decoupaged Guitar from Unofficial Warmoth
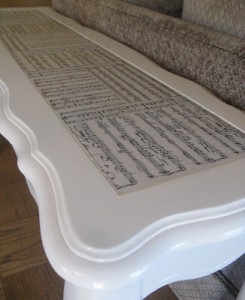
table

2- Sheet Music Sofa Table from A Diamond In The Stuff
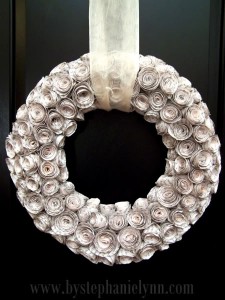
wreath

3- Rosebud Wreath from By Stephanie Lynn
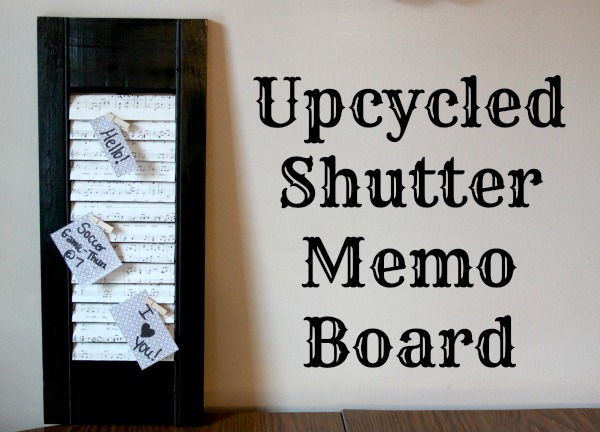
shutter

4- Sheet Music Shutter Memo Board from Saved By Love Creations
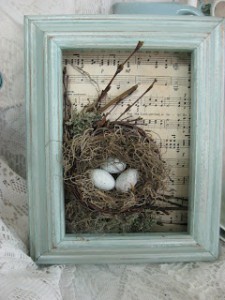
shadowbox

5- Birds Nest Shadowbox from Treasures From The Heart
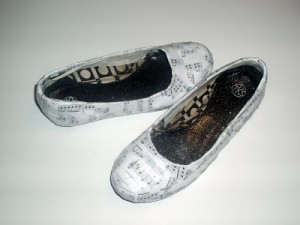
shoes

6- Sheet Music Shoes from Tales of a Trophy Wife
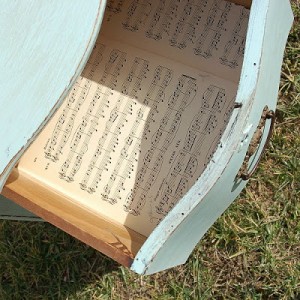
drawers

7- Lined Drawers from Vintage Junky

coaster

8- Sheet Music Decoupaged Coasters from An Oregon Cottage

 

«
»

Comments

  1. barb says

    February 25, 2020 at 7:05 pm

    Thank you for featuring my framed bird nest on your page.
    Barb at Treasures from the Heart.

Have you read?

How To Clean Up And Restore A Vintage Singer Sewing Machine Table

There is something so lovely about an old Singer sewing machine table, even when it looks like it has spent the last 40 years sulking in a shed. The beautiful cast iron base, the little drawers, the worn timber top — it all has potential. But before you start styling it with cotton stems and lace runners, it needs a proper clean, strip, sand, and refresh.

This tutorial walks through how to clean up a vintage Singer sewing machine table, remove grime, strip back old stain or varnish, and prepare it for a fresh finish. It is perfect if you have found one at a garage sale, inherited one from family, or rescued one from the “too good to throw away” pile.

Supplies You Will Need

You will need:

  • Drop cloth or plastic sheeting
  • Rubber gloves
  • Eye protection
  • Dust mask or respirator
  • Old rags
  • Soft brush or toothbrush
  • Bucket of warm soapy water
  • Mild dish soap
  • Mineral spirits or methylated spirits
  • Wood cleaner or sugar soap
  • Paint scraper or plastic scraper
  • Chemical paint and varnish stripper
  • Steel wool, preferably fine grade
  • Sandpaper in 80, 120, 180, and 220 grit
  • Mouse sander or orbital sander
  • Detail sanding pads
  • Wood filler if needed
  • Tack cloth
  • Wood stain, furniture wax, or clear polyurethane
  • Rust remover or wire brush for the metal base
  • Black metal paint or wax if restoring the treadle base

A good mouse sander, sanding sheets, gloves, and furniture stripper are easy to find on Amazon, and if you restore vintage pieces often, they are worth keeping in your DIY stash. Rather annoyingly, this is one of those projects where you think, “I’ll just wipe it down,” and three hours later you are emotionally attached to a drawer knob.

Step 1: Take Photos Before You Start

Before removing anything, take clear photos from every angle. Photograph the drawers, hinges, knobs, treadle base, screws, and any markings.

This helps you remember where everything goes later, especially if you remove the drawers or metal hardware. Vintage sewing tables often have odd little screws and fittings, and they are not always easy to replace.

Step 2: Remove Loose Dirt And Dust

Start with the dry mess first. Use a soft brush, old paintbrush, or vacuum with a brush attachment to remove dust, cobwebs, and loose dirt from:

  • The tabletop
  • Drawer fronts
  • Inside the drawers
  • Around the treadle mechanism
  • The cast iron base
  • Under the table

Do not wet the wood straight away. Old dirt can turn muddy and smear into the grain, which makes the cleaning stage harder.

Step 3: Remove Drawers And Hardware

Carefully remove the drawers and any knobs, handles, hinges, or loose fittings.

Place screws and small hardware pieces in a labelled container or zip bag. If the knobs are original and in good condition, keep them. Original hardware gives these old Singer tables so much charm.

If the drawers are stuck, do not yank them. Gently wiggle them side to side and check for old swelling, broken runners, or hidden screws.

Step 4: Wash The Wood Gently

Mix warm water with a small amount of mild dish soap. Dip a rag into the water, wring it out very well, and wipe the wood.

The rag should be damp, not dripping. Too much water can swell old timber or lift veneer.

For stubborn grime, use a toothbrush around the drawer edges and carved details. Wipe dry immediately with a clean towel.

For very greasy or sticky areas, use sugar soap or a wood-safe cleaner, then wipe again with clean water and dry thoroughly.

Step 5: Clean The Cast Iron Base

The black Singer treadle base is often covered in dust, rust, old oil, and mystery shed grime.

Use a dry brush first, then wipe with a damp rag and mild soap. For rust spots, use fine steel wool or a wire brush. Be gentle around any raised Singer lettering or decorative details.

If the metal is badly rusted, you can use a rust remover, but test it in a small spot first. Once clean and dry, you can refresh the metal later with black metal paint, stove polish, or furniture wax, depending on the look you want.

Step 6: Check The Wood Before Stripping

Once the table is clean, inspect the surface.

Look for:

  • Deep water rings
  • Black stains
  • Cracked veneer
  • Peeling varnish
  • Loose joints
  • Missing chunks of timber
  • Areas where the old stain is uneven

If the tabletop has veneer, be very careful with sanding. Veneer is thin, and it is painfully easy to sand right through it. Ask me how I know — actually, don’t. Some lessons are best left in the shed.


Step 7: Apply Paint And Varnish Stripper

To strip down the old stain or varnish, work outside or in a very well-ventilated area.

Put on gloves, eye protection, and a respirator if recommended by the stripper label.

Brush the chemical stripper onto the wooden areas you want to strip. Apply a generous coat and let it sit according to the product directions. Usually, the old varnish will begin to bubble, wrinkle, or soften.

Do not rush this part. Let the stripper do the hard work.

Step 8: Scrape Away The Old Finish

Use a plastic scraper or blunt paint scraper to gently lift off the softened finish.

Scrape with the grain of the wood, not against it. Avoid digging into the timber.

For drawer edges, corners, and carved areas, use fine steel wool or a small detail brush.

Wipe the surface clean with rags as you go. You may need to repeat the stripper process if the finish is thick or patchy.

Step 9: Neutralise And Clean The Surface

Some strippers need to be neutralised or cleaned off with mineral spirits, methylated spirits, or water, depending on the product.

Follow the instructions on your stripper tin exactly. This step matters because leftover stripper can interfere with your new stain or finish.

Once cleaned, allow the wood to dry completely. Overnight is best.


Step 10: Sand The Wood Smooth

Start sanding once the wood is fully dry.

Use this sanding order:

  • 80 grit for rough areas or stubborn old finish
  • 120 grit to smooth the surface
  • 180 grit for refining
  • 220 grit for final smoothing

Always sand with the grain. Use a detail sanding pad for drawer edges and corners.

If the table has veneer, skip the aggressive sanding and start with 120 or 180 grit instead. Light hands, lots of patience.

Wipe away sanding dust with a tack cloth or slightly damp rag.

Step 11: Treat Deep Stains

Some stains may remain even after stripping and sanding.

For dark water stains or black marks, you can try oxalic acid wood bleach. This is commonly used for removing dark stains from timber, but it must be handled carefully and used according to the product directions.

For lighter marks, extra sanding may help. For deep character marks, you may choose to leave them. Vintage furniture does not need to look brand new. A few scars can be part of the story.

Step 12: Repair Small Damage

Fill small cracks, holes, or missing chips with stainable wood filler.

Let it dry, then sand smooth with 180 or 220 grit.

If there are loose drawer joints, reglue and clamp them before finishing. Do not stain over wobbly repairs and hope for the best. Furniture has a way of embarrassing us later

.

Step 13: Choose Your Finish

Now comes the fun part. You can finish the table in several ways.

For a natural vintage look, use furniture wax or Danish oil. This gives a soft, aged finish and keeps the table looking authentic.

For a richer colour, apply wood stain in a walnut, oak, or cedar tone. Wipe it on with a rag, let it penetrate, then wipe away the excess.

For a more durable surface, especially if using the table as an entry table or side table, apply clear polyurethane or furniture varnish.

If you want a farmhouse-style makeover, you could paint the wooden cabinet and leave the Singer metal base black. Chalk paint works well for this look, but I would

still keep some of the old character showing.

Step 14: Refresh The Metal Base

Once the wood is sorted, return to the metal treadle base.

You can:

  • Leave it rustic and simply wax it
  • Paint it matte black
  • Dry-brush it with metallic wax
  • Use black stove polish for an aged iron look

If the Singer lettering is raised, lightly highlight it with metallic wax to make it stand out.

Let the metal dry fully before reassembling.

Step 15: Reassemble The Table

Replace drawers, knobs, screws, and hardware.

Check that the drawers slide smoothly. If they stick, rub a little candle wax along the drawer runners.

Stand back and admire it. This is the part where you suddenly start wondering if you need more vintage sewing tables. You probably do not. But also… maybe you do.

Styling Ideas For The Finished Singer Table

Once restored, a vintage Singer sewing machine table works beautifully as:

  • An entryway table
  • A hallway display piece
  • A sewing room side table
  • A plant stand
  • A cottage-style bedside table
  • A farmhouse décor feature
  • A craft room storage piece

Style it with old bobbins, folded linens, a small lamp, framed family photos, or vintage sewing notions. You can often find charming vintage sewing accessories on Etsy if you want to keep the display feeling authentic without raiding your grandmother’s sewing basket.

Extra Tips Before You Start

Test every cleaner, stripper, stain, and finish in a hidden area first.

Do not soak old wood.

Do not over-sand veneer.

Keep original hardware whenever possible.

Work slowly. These old pieces have already lasted decades, so there is no need to rush the makeover in one afternoon.

And most importantly, decide early whether you want a fully restored look or a rustic rescued look. Both can be beautiful, but they require slightly different levels of sanding and finishing.

A vintage Singer sewing machine table is one of those pieces that can go from forgotten and filthy to absolutely charming with a bit of elbow grease. It is practical, nostalgic, and full of character — which is exactly the sort of furniture rescue project I love most.


Explore

books Christmas CraftGossip Giveaways Craft Inspirations Easter glass halloween Home Decor kid crafts More Crafts Patterns & Tutorials recycled art Recycled Clothing Recycled Jewelry Recycled kids crafts Recycled Sewing Recycled Tutorials Recycling Ideas Recycling Organizing tin can

Featured Posts

How to make a recycled can clock

How to recycle a solid room divider into a chicken wire display frame

A gallery of great ways to alter thrifted paintings

How to make a recycled egg carton witch decoration for Halloween

Cardigan Remake

RSS More Articles

  • Sewing Pattern Saturday Review: Sleepy Pleated Pants Sewing Pattern
  • Make Unpoppable Bubbles You Can Play with Inside
  • Vintage Men’s Fatigue Cap Knitting Pattern – A Clever Beanie And Cowl In One
  • Free Crochet Pattern – Mesh Towel and Washcloth Set Pattern
  • Simplicity Quilt Kit – Handmade Sweetness Review
  • 20+ Bee Digital Stamps and Die Cut Files
  • Designer Spotlight: Yellow Birdie Stitches
  • Freebie Friday – Printable Buttons and Ribbons For Junk Journals
  • Free Felting Tutorial Friday: How to Needle Felt Long Animal Fur
  • Play with Texture and Embroidery in this Intarsia Knit Shawl

Copyright © 2026 · CraftGossip | Start Here | Contact Us | Link to Us | Your Editors | Privacy and affiliate policy