• Home
  • Suggest A Craft
  • DIY Newsletter

Recycled Crafts

Creative DIY Projects That Turn Trash Into Treasure

  • About CraftGossip
  • Our Network
    • Bath & Body Crafts
    • Candle Making Ideas
    • Crochet Ideas
    • Cross Stitch
    • Edible Crafts
    • Felting Patterns
    • Glass Art
    • Home & Garden Ideas
    • Indie Crafts
    • Jewelry Making
    • Kids Crafts
    • Knitting Patterns
    • Lesson Plans
    • Needlework
    • Party Ideas
    • Polymer Clay
    • Quilting Ideas
    • Recycled Crafts
    • Scrapbooking
    • Sewing Patterns
    • Card Making
    • DIY Weddings
    • Not Craft Ideas
  • Giveaways
  • Roundups
  • Store
  • Search

15 clever beware of dog signs

February 15, 2017 by Stefanie Girard

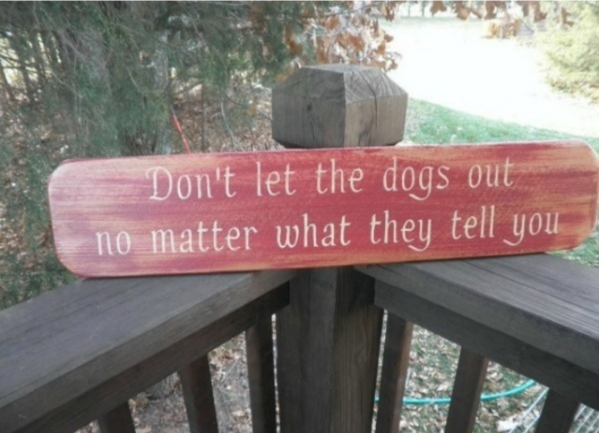
Lots of us like to make our own inspirational signs. Why not make some functional ones as well? Check out this great collection of funny and clever beware of dog signs at Bark Post Stories most of which are made on scrap wood. I bet these signs would be fun to use as inspiration to make and give as gifts to new dog owners.

Looking for more things to hand-make and DIY for your dog? Check out some of our favorite things to make for dogs. Owning a dog can be very expensive and not only does making your own dog beds, coats and toys seem like fun, it is also a great way to save money on pet supplies too.  One of our puppy’s favorite homemade dog toy is a soda bottle ½ filled with rice. It is noisy, it flips and spins and has a spout for him to grab. 

Looking for more sewing patterns for your fur baby doggies? Check out these sewing patterns over on Etsy.

No Sew Easy Dog Bed – Quick and easy to make, you will want this soft and fluffy dog bed for every room, if you are looking for more DIY dog beds check out these articles for making your own dog beds.

DIY Dog Shampoo for sensitive skin – Even doggies have allergies and this recipe is for dogs with sensitive skin. 

Recycled TShirt – Dogs Tugga Toy This project was featured in Moderndog magazine and was so fun to make, the best part was ripping up all the old t-shirts. Such a great way to recycle.

Recycled Dog Collar – Pickup old shirts from thrift stores and make fun collars in different colors and sizes. Make sure to measure your dog’s neck before heading out so you know what size to shirt to buy. 

Check out this article on 15 dog toys you can make at home. 

No Sew Dog Wrap –  Made from old human track pants, very affordable to make.

Peppermint Dog Soap –  Stinky dogs are gone, peppermint is soothing and antibacterial too.

Dry Pet Shampoo – Sometimes they haven’t even dried from their bath before they are dirty again, this shampoo helps to brush out the grime.

Dog Cakes – Perfect for dog parties and doggie friend playdates

Dog Biscuits– 16 yummy dog treats you can make yourself at home in the kitchen.

Looking for pet supplies, toys, food, or gift ideas? Check these out.

Related Posts:

  • Teaching Kids About Recycling: Fun Activities to…
  • How to make recycled clothes pin puppets
«
»

Comments

  1. Mihai Pintilie says

    February 16, 2017 at 5:48 am

    This is so fun! Love it all!

Have you read?

DIY Kids Craft Project – Upcycled Cardboard Box Sandcastle

kids-upcycled-cardboard-sandcastle

Looking for a creative way to keep the kids entertained this summer without spending a fortune? Turn your trash into treasure with this fun Recycled Sandcastle Craft Project! Using cardboard boxes, plastic lids, glue, and a bit of imagination, kids can build their very own sandcastle kingdom – no beach required!


What You’ll Need:

  • Cardboard boxes (cereal, tissue, shipping boxes – any size)

  • Toilet paper rolls or paper towel tubes

  • Plastic lids (yogurt containers, jar tops, etc.)

  • Paper or plastic straws, twigs, or sticks

  • Scrap plastic, paper, or fabric for flags

  • Craft glue or a hot glue gun (with adult supervision)

  • Scissors

  • Sand or beige paint (optional for decoration)

  • Markers, stickers, or leftover craft supplies to decorate

Step-by-Step Instructions:

Step 1: Gather and Prep Your Recyclables

Head to your recycling bin and pull out clean items that could work as castle parts—boxes for walls, tubes for towers, and lids for turrets. Cut down the boxes into smaller sections if needed, and make sure everything is dry and ready to work with.

Step 2: Plan Your Castle Layout

Before gluing anything down, lay out your castle design on a flat surface. Decide where the towers, walls, and “gate” will go. You can make it symmetrical, or go wild with a quirky kingdom layout!

Step 3: Glue the Main Structure Together

Use craft glue (or hot glue if you’re working with older kids or want faster drying). Start attaching the boxes and tubes together to form the base of your sandcastle. Stack tubes on top of boxes to create turrets. Use plastic lids as domes or roof tops.

Step 4: Add Decorative Elements

This is where the fun begins! Use:

  • Bottle caps as windows or shields

  • Buttons as faux stones

  • Cutout shapes from scrap cardboard for castle doors or battlements (those square-topped castle walls!) Get creative with what you’ve got – there’s no wrong way to build your dream castle.

Step 5: Make and Add Flags

Cut small triangles or flags from scrap plastic, fabric, or colored paper. Tape or glue these to the tops of straws, sticks, or twigs. Then, glue them onto the tops of towers or castle corners. You can even personalize each flag with a coat of arms or your child’s initials!

Step 6: Add the “Sand” Effect (Optional)

For an authentic look, brush glue over the castle and sprinkle it with craft sand. No sand on hand? Use beige paint, or mix some flour with a pinch of cinnamon for a sandy texture.

Step 7: Let it Dry and Display!

Let everything dry completely—especially if you’ve used a lot of glue. Then proudly display your recycled sandcastle on a shelf, or use it as part of imaginative play time.

Bonus Ideas:

  • Build a whole sandcastle village and connect them with paper bridges.

  • Make tiny “people” out of clothespins or paper scraps.

  • Add fairy lights inside for a magical castle glow at night.

This project is a fantastic way to keep little hands busy and teach kids the value of reusing materials. Plus, it’s just plain fun! Whether you’re doing this at home, in a classroom, or at a summer camp, your recycled sandcastles are sure to be a hit.

Explore

books Christmas CraftGossip Giveaways Craft Inspirations Easter glass halloween Home Decor kid crafts mason jar More Crafts Patterns & Tutorials recycled art Recycled Clothing Recycled Jewelry Recycled Sewing Recycled Tutorials Recycling Ideas Recycling Organizing tin can

RSS More Articles

  • Unlock the Secrets of Stunning Stitches: Why The Geometry of Hand-Sewing Will Transform Your Craft Forever
  • Summer Math Games for Kids
  • A Children’s Book About A Quilt Maker – Perfect Gift Idea
  • DIY Kids Craft Project – Upcycled Cardboard Box Sandcastle
  • How to Make a Taylor Swift Inspired Card
  • 20 Wheelchair Friendly Sewing Patterns
  • Create a Stunning DIY Headboard That Will Completely Transform Your Bedroom
  • Matariki Magic: Fun and Meaningful Activities for Kids to Celebrate the Maori New Year
  • D&D Cross Stitch Patterns
  • 12 Summer Vibes Scrapbook Layout Ideas

Pick Your Blog

  • Sewing
  • Knitting
  • Quilting
  • Crochet
  • Home & Garden
  • Recycled Crafts
  • Scrapbooking
  • Card Making
  • Polymer Clay
  • Cross-Stitch
  • Edible Crafts
  • Felting
  • Glass Art
  • Indie Crafts
  • Kids Crafts
  • Jewelry Making
  • Lesson Plans
  • Needlework
  • Bath & Body
  • Party Ideas
  • Candle Making
  • DIY Weddings
  • Not Craft
  • Free Craft Projects

Copyright © 2025 · CraftGossip | Start Here | Contact Us | Link to Us | Your Editors | Privacy and affiliate policy