• Home
  • Suggest A Craft
  • DIY Newsletter

Recycled Crafts

Creative DIY Projects That Turn Trash Into Treasure

  • About CraftGossip
  • Our Network
    • Bath & Body Crafts
    • Candle Making Ideas
    • Crochet Ideas
    • Cross Stitch
    • Edible Crafts
    • Felting Patterns
    • Glass Art
    • Home & Garden Ideas
    • Indie Crafts
    • Jewelry Making
    • Kids Crafts
    • Knitting Patterns
    • Lesson Plans
    • Needlework
    • Party Ideas
    • Polymer Clay
    • Quilting Ideas
    • Recycled Crafts
    • Scrapbooking
    • Sewing Patterns
    • Card Making
    • DIY Weddings
    • Not Craft Ideas
  • Giveaways
  • Roundups
  • Store
  • Search

Recycle VHS tapes into pretty flowers or Christmas present bows

November 20, 2009 by Stefanie Girard

VHS_crafts15_lg 
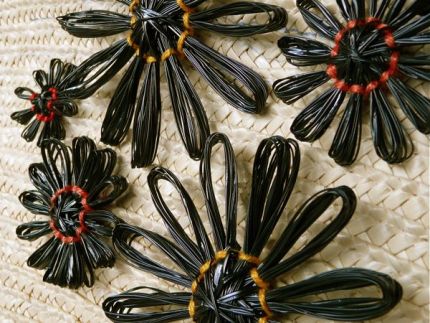
These cute flowers are made with VHS tape! How cool is that? Well when I saw this I thought that these would make great recycled bows from holiday gifts. Pop on over to CraftStylish for a ton of ideas on recycling a VHS tape and here for the flower tutorial. Just make sure you don’t recycle your wedding video:)

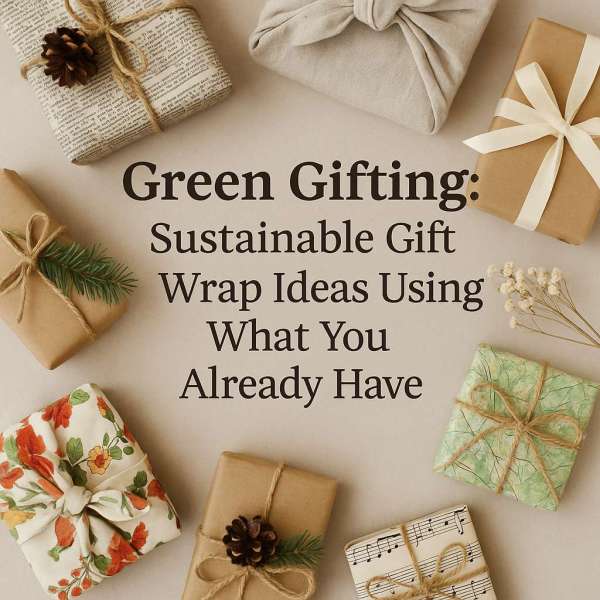
Great collection of pretty gift wrapping ideas

How to make a stamp, gift wrap paper and a homeschool geometry lesson

How to make recycled fabric and paper garland gift wrap

Cute and easy ways to wrap gifts

Related Posts:

  • Teaching Kids About Recycling: Fun Activities to…
  • 45 amazing ways to reuse and recycle old playing cards
«
»

Comments

  1. Ruki says

    January 17, 2010 at 10:38 am

    Hey, if anyone needs to get rid of their vhs tapes, I’d gladly take them off your hands. Using them to create a bookcase. And if anyone wants the tape inside, I could give them to you. 🙂

  2. Colleen says

    July 16, 2013 at 9:40 pm

    Wow that was unusual. I just wrote an incredibly long
    comment but after I clicked submit my comment didn’t appear. Grrrr… well I’m not
    writing all that over again. Regardless, just wanted to say
    wonderful blog!

    my weblog – hard drive (Colleen)

Have you read?

How To Make A Milk Carton Village – A Recycled Craft for Kids

Ready to turn your recycling bin into a colorful, miniature village? Grab those empty milk cartons and let’s create a town filled with tiny houses, shops, and even a school or bakery! This craft is perfect for kids of all ages and encourages imagination, storytelling, and eco-friendly creativity.

 What You’ll Need:

  • Empty milk or juice cartons (washed and dried)

  • Paints or markers

  • Paintbrushes

  • Craft glue or glue stick

  • Scissors (adult supervision recommended)

  • Colored paper or old magazines

  • Bottle caps, buttons, or plastic lids (for windows or decorations)

  • Sticks, straws, or skewers (for flag poles or chimneys)

  • Optional: glitter, stickers, washi tape, cotton balls (for snow or clouds!)

 Step-by-Step Instructions:

Step 1: Clean and Prep the Cartons
Make sure your milk or juice cartons are washed and completely dry. Remove any plastic lids or caps and keep them for decorations!

Step 2: Plan Your Village
Decide how many buildings you want to make. Each milk carton becomes a house, shop, or whatever your imagination dreams up. Arrange them side by side or in a circle like a real village square.

Step 3: Cut Out Doors and Windows
With the help of an adult, carefully cut small door and window shapes into your cartons. You can also glue cut-out shapes from colored paper if you’d rather not cut into the carton.

Step 4: Paint and Decorate
Use paint or markers to bring your buildings to life. Make brick patterns, colorful siding, or roof tiles. Let each child choose their own theme – rainbow bakery, monster house, fairy home, or tiny fire station!

Step 5: Add the Roofs
You can paint the top pointy part of the carton like a roof, or glue on cardboard triangles to create overhangs. Want to add a chimney? Glue a straw or cardboard roll on top!

Step 6: Make Flags and Signs
Cut small flags from recycled plastic or paper and tape them to straws or sticks. Glue your flags to the rooftops. You can even create tiny signs for each building – “Toy Store,” “Library,” or “Super Cat’s House.”

Step 7: Build Your Village
Place all the finished buildings together on a large piece of cardboard, tray, or table. Use bottle caps for stepping stones, cotton balls for bushes or clouds, and draw roads with marker.

Step 8: Play!
Now that your village is built, use little toys, action figures, or LEGO people to live in your new town. Create stories and adventures—your Milk Carton Village is officially open!

 Learning Bonus:

This craft is not just fun—it also teaches recycling, fine motor skills, creative thinking, and storytelling. Plus, it’s a great group activity for playdates, classrooms, or family craft nights.

Let your kids’ imaginations run wild—and remember, no two villages need to look the same. Each one tells its own story!

Explore

books Christmas CraftGossip Giveaways Craft Inspirations Easter glass halloween Home Decor kid crafts More Crafts Patterns & Tutorials recycled art Recycled Clothing Recycled Jewelry Recycled kids crafts Recycled Sewing Recycled Tutorials Recycling Ideas Recycling Organizing tin can

RSS More Articles

  • Etsy Spotlight – The Thomas Boys Shirt Sewing Pattern
  • 7 FREE Back to School SVG Cut Files
  • Cozy Toes Await: Cable Crochet Slipper Boots Botties Wool Insoles Kit
  • How to Make a Sticks and Stones Quilt – Free Quilting Tutorial
  • Printable Cross Stitch Sheets Make it Easy to Cross Stitch on Clothes
  • Layered Embroidery on Watercolor Fabric: Mixed Media Magic
  • Paf – Panda Dad Free Crochet Pattern
  • How To Use Bath Salts in the Shower Without a Bath – Relaxation, Skincare, and a DIY Salt Recipe
  • How to Make Two Labubu Greeting Cards
  • DIY Fabric Twine Plant Hanger: A Stylish Way to Display Your Plants

Copyright © 2025 · CraftGossip | Start Here | Contact Us | Link to Us | Your Editors | Privacy and affiliate policy