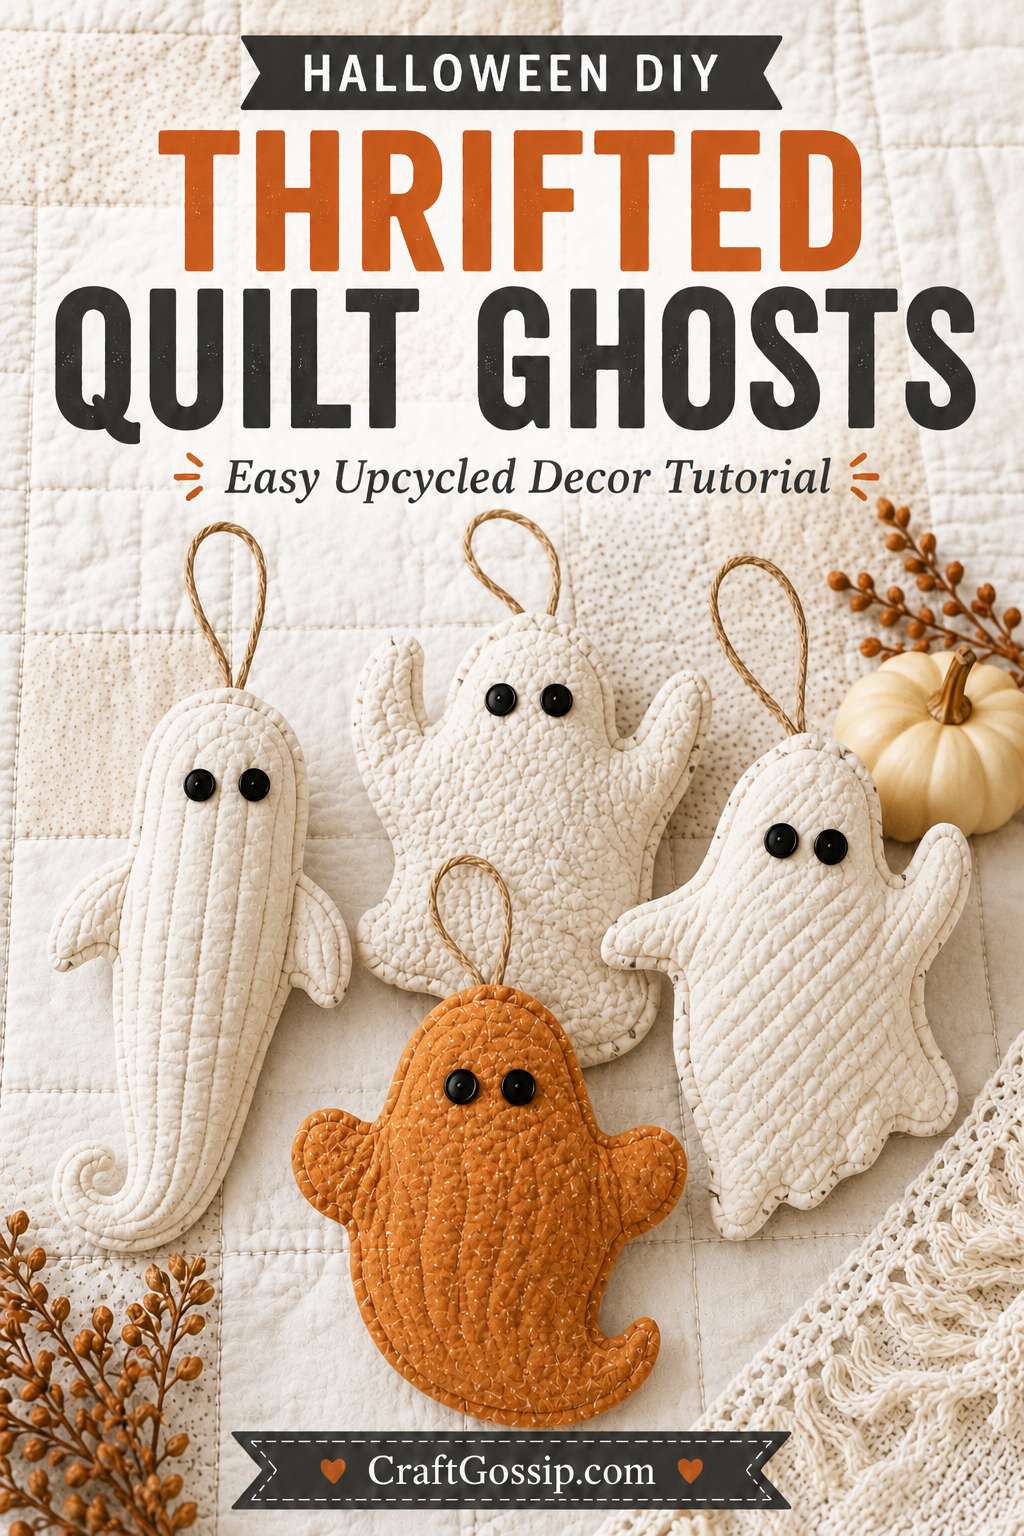
There is something especially satisfying about turning an old, slightly worn quilt into a new Halloween decoration. Thrift-store quilts often have the loveliest stitched textures, soft faded fabrics, and just enough age to make a project feel instantly cozy. Even when a quilt is too stained, damaged, or uneven to use on a bed, there are usually plenty of good sections worth saving—and these little quilted ghosts are a very sweet way to give that fabric another life.
I love Halloween crafts that feel more charming than gruesome, and these upcycled quilt ghosts fit that perfectly. They have a soft, primitive look, almost like something you might have found tucked away in an old country cupboard. The black button eyes give them just enough personality, while the different ghost shapes make the finished group feel playful rather than too polished. And honestly, a slightly wonky arm or crooked tail only makes them better. Handmade ghosts should look like they have a bit of character.
This is also a wonderfully forgiving sewing project. You do not need perfectly matched fabric, precise quilting lines, or expert-level sewing skills. In fact, older quilts with different stitched sections can make every ghost look unique. One might have a curled tail, another can be short and chubby, and another can have raised arms as though it has just spotted the fabric stash and is equally horrified and impressed.
For a little extra autumn colour, I added an orange quilted ghost among the white ones. It breaks up the neutral palette beautifully and gives the whole group a warmer Halloween feel without making the display too bright or modern. You could also make one in faded black, mustard, rust, or even a soft grey if you have quilt scraps in those colours.
These ghost decorations can be hung from cupboard handles, arranged in a basket with fabric pumpkins, added to a Halloween tree, or displayed along a mantel. They are lightweight, easy to store, and simple enough to make in batches. Once you have cut the first one, it is very tempting to keep going until you have an entire little ghost family—which, in my experience, is how most craft projects quietly turn into collections.
Best of all, this project makes good use of fabric that might otherwise have been discarded. So before passing over that damaged white quilt at the thrift store, have another look. Beneath the worn edges and mystery stains, there may be several adorable Halloween ghosts waiting to be cut out and stitched.
Materials
- Thrifted white or cream quilt
- Paper or cardboard for making templates
- Fabric scissors
- Sewing machine
- White, cream, or beige sewing thread
- Straight pins or sewing clips
- Polyester stuffing, cotton wadding, or quilt offcuts
- Large black buttons
- Hand-sewing needle
- Strong black thread
- Twine, ribbon, narrow fabric strips, or cotton cord for hanging
- Chopstick, knitting needle, or blunt turning tool
- Optional fabric marker
- Optional tea or coffee for ageing the quilt
- Optional pinking shears
Before You Begin
Choose a quilt with an interesting stitched texture. Machine-quilted coverlets, old matelassé bedspreads, candlewick quilts, and lightweight patchwork quilts all work beautifully.
Do not worry about finding a perfect quilt. In fact, this is a very good project for using one with worn edges, small holes, faded areas, or mysterious marks that have clearly survived several decades and at least one overly enthusiastic cup of tea.
Wash and dry the quilt before cutting into it. Check carefully for weakened fabric, loose threads, metal pins, or damaged seams. Avoid heavily mildewed quilts, as the smell and staining can be difficult to remove safely.
If you are using a thick quilt, you may not need much additional stuffing. A lightweight quilt may need a little more filling to help the ghosts hold their shape.
Make the Ghost Templates
Draw several ghost shapes onto paper or cardboard.
A good beginner size is approximately:
- 20–25 cm high
- 13–18 cm wide
Draw a rounded head with gently curved sides. Add two or three soft points or waves along the lower edge to form the ghost’s flowing tail.
For a more playful collection, make each ghost slightly different. Try:
- One tall and narrow ghost
- One short, rounded ghost
- One ghost with a curved tail
- One ghost with raised arms
- One slightly leaning ghost
Keep the shapes fairly simple. Tiny points and narrow arms are harder to turn and stuff, especially when working with thick quilted fabric.
Instructions
1. Cut Out the Ghost Shapes
Place the quilt flat on your work surface.
Pin the paper template to the quilt and cut around it. You will need two matching pieces for each ghost.
Try to position the template over attractive sections of quilting. Swirls, diamonds, flowers, and channel quilting all add lovely texture to the finished decorations.
If the quilt has a very bulky filling, cut carefully with sharp fabric scissors. A rotary cutter can also be useful, but scissors are often easier around curved shapes.
2. Prepare the Hanging Loop
Cut a piece of twine, cord, or narrow ribbon approximately 18–22 cm long.
Fold it in half to form a loop.
Place the loop between the two ghost pieces at the top of the head, with the loop pointing down inside the ghost and the cut ends extending slightly beyond the raw edge.
Pin the loop securely in place.
A narrow strip torn from an old cotton sheet also makes a lovely rustic hanging loop.
3. Pin the Ghost Together
Place the two quilt pieces with the right sides facing each other.
Match the edges and pin or clip around the entire shape.
Leave a turning opening approximately 6–8 cm wide along one side or near the lower edge.
For very thick quilts, sewing clips may be easier to use than pins.
4. Sew Around the Ghost
Using a sewing machine, stitch around the ghost with a 6 mm to 10 mm seam allowance.
Use a slightly longer stitch length if the quilt is thick.
Sew slowly around the curved head and lower points. Stop with the needle down whenever you need to lift the presser foot and reposition the fabric.
Backstitch at the beginning and end, leaving the turning opening unsewn.
For extra strength, stitch over the hanging-loop area twice.
5. Trim and Clip the Seams
Trim away bulky seam allowances, particularly around the curves.
Clip small notches into the inward curves without cutting through the stitching. Trim the tips of any pointed sections.
This helps the ghost turn neatly and prevents bulky lumps along the edges.
6. Turn the Ghost Right Side Out
Carefully turn the ghost through the opening.
Use a chopstick, blunt knitting needle, or turning tool to gently push out the curved head, arms, and lower points.
Do not push too firmly, as older quilt fabric may tear.
The ghost does not need to look perfectly smooth. A few bumps and crooked edges add to the handmade primitive style.
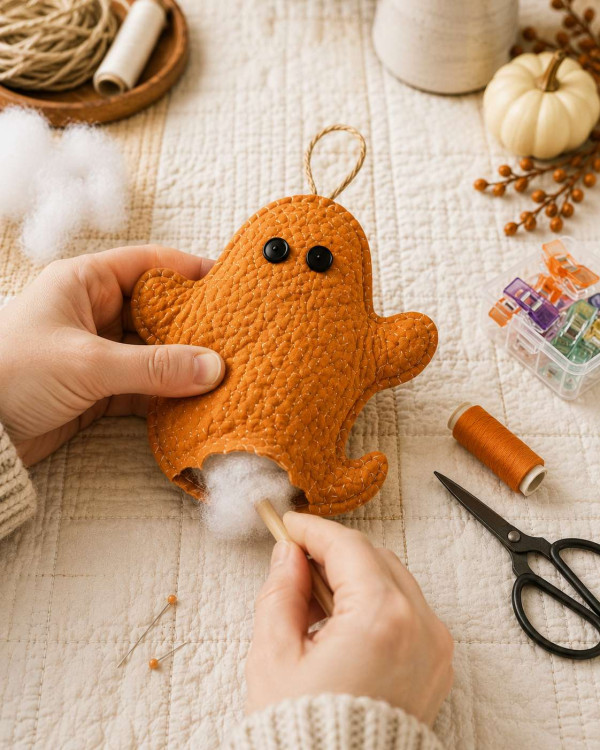
7. Add the Stuffing
Fill the ghost lightly with polyester stuffing, cotton wadding, or clean quilt offcuts.
Begin with the head and work the stuffing down into the body and lower points.
Do not overstuff it. These decorations look best when they remain soft and slightly flat rather than becoming firm like toys.
If the original quilt is already thick, you may only need a small amount of stuffing in the head and upper body.
8. Close the Opening
Turn the raw edges of the opening inward.
Hand-sew the opening closed using ladder stitch or small whip stitches.
Use matching thread so the stitching blends into the quilt.
For a deliberately primitive finish, you can sew the opening closed with visible cream embroidery thread.
9. Add the Button Eyes
Position two black buttons on the front of the ghost.
Place them slightly unevenly for a more charming handmade expression.
Sew the buttons securely in place using strong black thread. Pass the needle through the quilt several times and knot the thread firmly at the back.
The original inspiration uses large dark eyes against the pale quilted fabric, which gives the ghosts their wonderfully simple character. For this version, leave the body completely plain without adding the heart decoration.
If these ghosts will be handled by young children, replace buttons with securely embroidered eyes to avoid a choking hazard.
Optional Raw-Edge Version
For a quicker version, place the two quilt pieces with the wrong sides together and sew around the outside approximately 6 mm from the edge.
Leave an opening, stuff lightly, and stitch the opening closed.
Trim the edges with pinking shears or leave them raw so they gradually soften and fray.
This method creates a more rustic, farmhouse-style ghost and avoids having to turn thick quilted fabric through a small opening.
Optional Primitive Ageing
A bright white quilt creates a clean neutral Halloween decoration, but you can also give the ghosts an older, timeworn appearance.
Brew strong tea or coffee and allow it to cool. Lightly dab or brush it around the edges of the finished ghost, then allow it to dry completely.
Test the mixture on a scrap of quilt first. Some older fabrics absorb colour very quickly.
You can also gently rub a small amount of diluted brown fabric paint into the seams, but use a very light hand. It is surprisingly easy to go from “lovely antique quilt” to “ghost rescued from a muddy paddock.”
Display Ideas
Hang the finished quilt ghosts from:
- A Halloween tree
- Cupboard handles
- A mantel garland
- Wall hooks
- Door knobs
- A basket of fabric pumpkins
- A vintage ladder
- Twisted branches arranged in a large jug
They also look lovely tucked among neutral pumpkins, old books, dried leaves, and battery-operated candles.
For a larger display, make a whole ghost family in graduated sizes. Using several different sections of the same quilt keeps the collection coordinated while still allowing each ghost to have its own stitched texture and slightly wonky personality.
Because this project uses reclaimed bedding, every set will be completely unique—and it is a rather satisfying way to save a beautiful old quilt from becoming landfill.


Leave a Reply