• Home
  • Suggest A Craft
  • DIY Newsletter

Recycled Crafts

Creative DIY Projects That Turn Trash Into Treasure

  • About CraftGossip
  • Our Network
    • Bath & Body Crafts
    • Candle Making Ideas
    • Crochet Ideas
    • Cross Stitch
    • Edible Crafts
    • Felting Patterns
    • Glass Art
    • Home & Garden Ideas
    • Indie Crafts
    • Jewelry Making
    • Kids Crafts
    • Knitting Patterns
    • Lesson Plans
    • Needlework
    • Party Ideas
    • Polymer Clay
    • Quilting Ideas
    • Recycled Crafts
    • Scrapbooking
    • Sewing Patterns
    • Card Making
    • DIY Weddings
    • Not Craft Ideas
  • Giveaways
  • Roundups
  • Store
  • Search

The New 5-Gallon Bucket Book: Ingenious DIY Projects, Hacks, and Upcycles

July 17, 2023 by Shellie Wilson

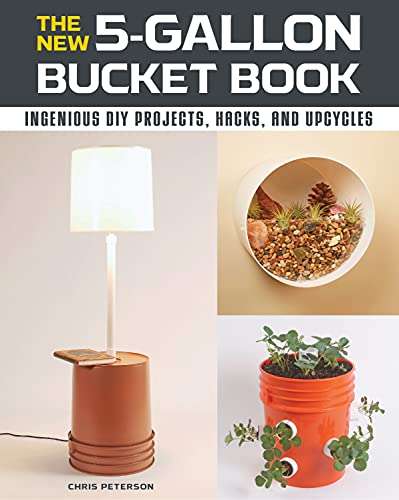
Why just reuse a bucket when you can reinvent it? The New 5-Gallon Bucket Book updates a quirky classic with 30+ new ways to take those old buckets and put them to use.

Five-gallon buckets are ubiquitous and cheap (or even free). They are right up there with some of man’s best inventions, like the wheel and sliced bread. Sure, they can be useful on their own, holding stuff or transporting stuff from place to place. But that’s no fun. Put them to use around the house, garden, or farm instead! With common tools and the instructions in this book, you’ll find 60+ ideas and projects to make today. Connect with your inner engineer as you:

Make something for around the home, like a shoe rack, trash compactor, water filter, or mousetrap.
Become more self-sufficient, with a chicken waterer, egg incubator, nesting box, or bee feeder.
Have some fun with an air cannon, beanbag toss, drum set, or washtub bass.
Get creative by dressing your kid up in a bucket costume for Halloween, making a boat anchor, or a set of music speakers.
Grow more in the garden with a sweet potato starter, rolling composter, Japanese beetle trap, vermiculture bin, or walking watering can.

As you can see, there’s no shortage of ways to put these humble and hard-working mainstays to work past their prime and keep them out of landfills. Simple step-by-step instructions, as well as parts lists and images of the completed projects, make sure you will have fun and love the results of your work.


Related Posts:

  • Upcycling or Hoarding? Why Your DIY Projects Could…
  • Teaching Kids About Recycling: Fun Activities to…
«
»

Have you read?

DIY Mason Jar Lid Sunflowers with Rustic Stems – Upcycled Farmhouse Decor

If you love sunflowers but wish they could last longer than a week in a vase, I have just the project for you. With a handful of thrifted mason jar lids, a little paint, and a dash of creativity, you can make your own DIY Mason Jar Lid Sunflowers with rustic stems — the kind that brighten your home all year long.

This project blends farmhouse charm with eco-friendly upcycling, making it perfect for crafters who love to give old materials a new life. Whether you display them in a vase, turn them into a wreath, or pop them into potted plants, these handmade sunflowers bring sunshine into any space.

Why You’ll Love This Sunflower Craft

  • Budget-friendly: Most supplies can be thrifted, recycled, or found at home. 
  • Customisable: Change the petal colour, stem style, or centre texture to suit your décor. 
  • Durable décor: Unlike fresh flowers, these won’t wilt or fade. 
  • Eco-conscious: A clever way to upcycle mason jar lids and scrap fabric. 

Supplies You’ll Need

To make your own mason jar lid sunflowers, gather these simple materials:

  • Mason jar rings (any size – thrifted or recycled) 
  • Yellow spray paint or acrylic craft paint 
  • Brown felt, burlap, or textured fabric for the flower centres 
  • Hot glue gun and glue sticks 
  • Wooden dowels, sticks, or recycled chopsticks for stems 
  • Green floral tape or green craft paint 
  • Optional: raffia, ribbon, faux greenery, grapevine wreath form 

Step-by-Step: How to Make DIY Mason Jar Lid Sunflowers with Rustic Stems

Step 1: Prep Your Mason Jar Lids

Wash and dry the lids thoroughly. If they have rust spots, give them a quick sanding for a smooth surface. This will help your paint adhere better.

Step 2: Paint the Petals

Lay out your lids on newspaper or cardboard. Spray paint them in a bright sunflower yellow. Two light coats give the best coverage.
Tip: For a more natural, layered look, dry-brush with mustard or orange tones after the base coat dries.

Step 3: Create the Sunflower Centre

Cut a circle of brown felt, burlap, or textured fabric slightly larger than the inner opening of the lid.
For extra detail, glue on small black buttons, beads, or seeds for a realistic sunflower centre.

Step 4: Assemble the Flower

Flip the lid over and hot glue the centre fabric to the back so it fills the ring’s opening.
Press firmly to make sure it’s secure — especially if you’re making these for a wreath or outdoor display.

Step 5: Add the Stem

Glue a wooden dowel, twig, or recycled chopstick to the back of the lid.
Wrap the stem in green floral tape for a smooth, finished look — or leave a twig unwrapped for a more rustic, natural style.

Step 6: Add Finishing Touches

Tie a bow of raffia or ribbon around the stem. Glue on a couple of faux leaves for extra charm.
If you’re making a bouquet, vary the stem lengths for a more natural arrangement.

Creative Ways to Use Your Mason Jar Lid Sunflowers

  • Rustic Vase Display: Arrange several sunflowers in a ceramic jug or glass mason jar. 
  • Farmhouse Wreath: Glue the flowers to a grapevine wreath form and hang on your front door. 
  • Garden Accents: Seal with an outdoor spray and stake in flower beds or planters. 
  • Gift Toppers: Make mini sunflowers for wrapping embellishments or party favours. 

 Tips for the Best Results

  • Use different jar ring sizes for varied petal shapes in your bouquet. 
  • Dry-brush the petal edges with orange paint for added depth and realism. 
  • Mix in a few “wild” stems with curled raffia or greenery for a fuller, more natural look. 

The Beauty of Upcycling

This DIY mason jar lid sunflower craft is proof that everyday items — even something as humble as a jar lid — can become something extraordinary.
It’s not just about making something pretty; it’s about crafting something with a story, saving materials from the bin, and adding a burst of joy to your home.

So next time you spot a box of old jar lids at a thrift store, don’t pass them by. Pick them up and turn them into sunshine that never fades.


Explore

books Christmas CraftGossip Giveaways Craft Inspirations Easter glass halloween Home Decor kid crafts More Crafts Patterns & Tutorials recycled art Recycled Clothing Recycled Jewelry Recycled kids crafts Recycled Sewing Recycled Tutorials Recycling Ideas Recycling Organizing tin can

RSS More Articles

  • These Viral Whiskey Cocktails Are All You Need This Fall
  • Build a Paper City with Free Printables
  • Crochet Pattern Review: Pullover Crochet Pattern by Lion Brand
  • How to Make Textured Wall Art: Easy DIY Canvas Art
  • DIY Mason Jar Lid Sunflowers with Rustic Stems – Upcycled Farmhouse Decor
  • 8 FREE Printable Thank You Teacher Cards
  • Pencil Bookmark Cross Stitch Pattern
  • Book Review: No Fear Sock Knitting
  • Your “Sustainable Fabric” Isn’t as Eco-Friendly as You Think
  • Book Review: Punch Needle Rug Hooking Handbook

Copyright © 2025 · CraftGossip | Start Here | Contact Us | Link to Us | Your Editors | Privacy and affiliate policy