• Home
  • Suggest A Craft
  • DIY Newsletter

Recycled Crafts

Creative DIY Projects That Turn Trash Into Treasure

  • About CraftGossip
  • Our Network
    • Bath & Body Crafts
    • Candle Making Ideas
    • Crochet Ideas
    • Cross Stitch
    • Edible Crafts
    • Felting Patterns
    • Glass Art
    • Home & Garden Ideas
    • Indie Crafts
    • Jewelry Making
    • Kids Crafts
    • Knitting Patterns
    • Lesson Plans
    • Needlework
    • Party Ideas
    • Polymer Clay
    • Quilting Ideas
    • Recycled Crafts
    • Scrapbooking
    • Sewing Patterns
    • Card Making
    • DIY Weddings
    • Not Craft Ideas
  • Giveaways
  • Roundups
  • Store
  • Search

The easiest no-sew interchangeable button bracelet

May 1, 2019 by Stefanie Girard

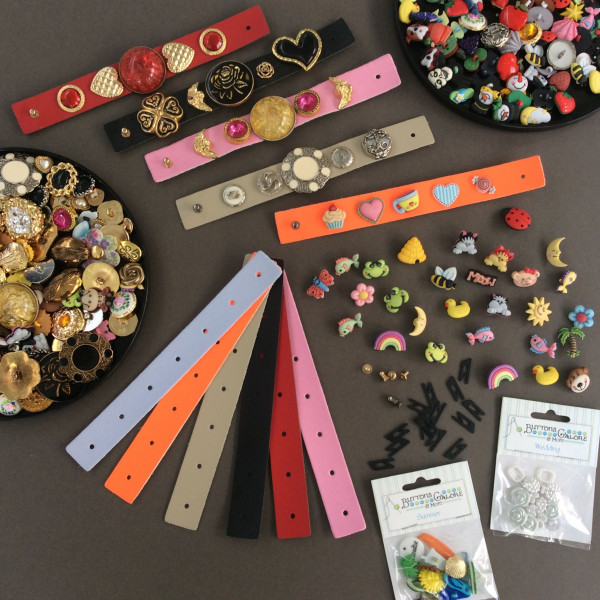
I am really excited about this new interchangeable no-sew button bracelet kit available at Buttons Galore. The possibilities are truly endless! Use the buttons that come in the kit that are beyond cute (and kid friendly) to beautiful elegant and sparkly buttons and even recycled and vintage buttons from your stash.

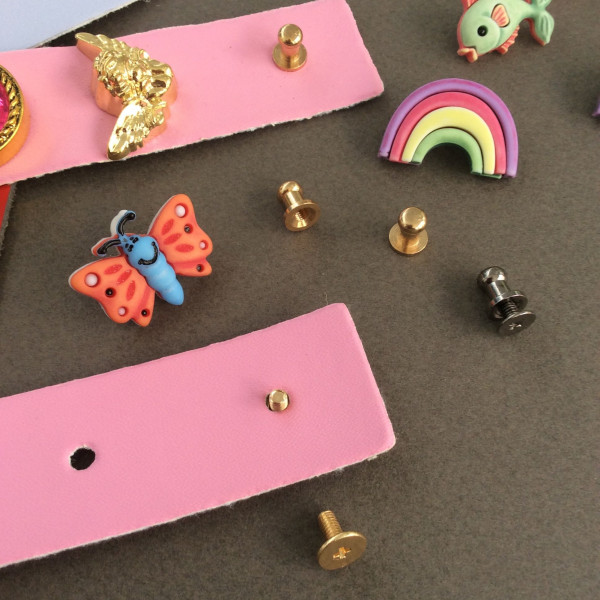
Start by screwing in the included knob closure that comes in the kit.

Place the screw part into a hole from the back to the front and then screw the knob part onto the threaded end on the top side of the faux leather cuff.

Select the buttons you would like to put on your bracelet.

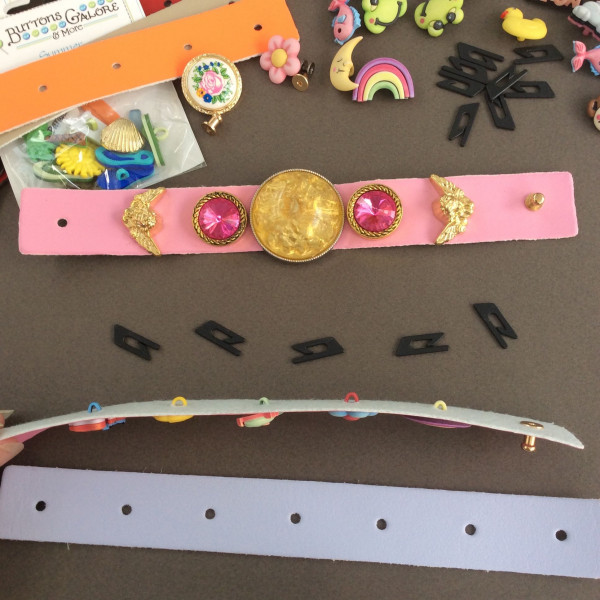
Place each button shank through each hole on the bracelet.

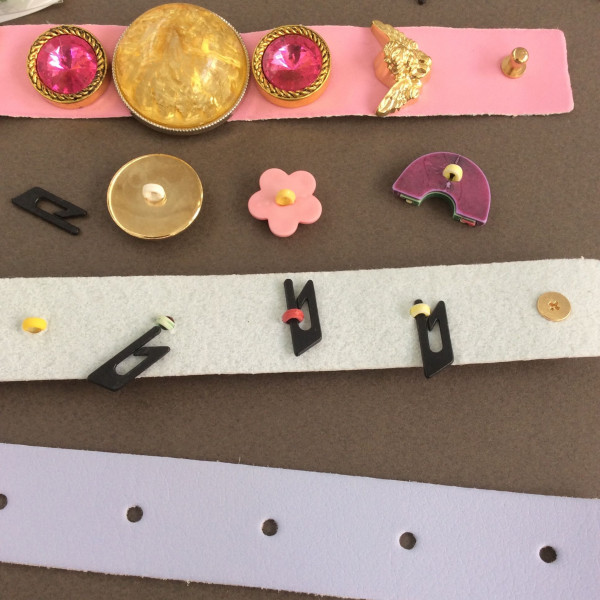
Then simply thread the straight side of the button clip through the shank and snap it into place to secure.

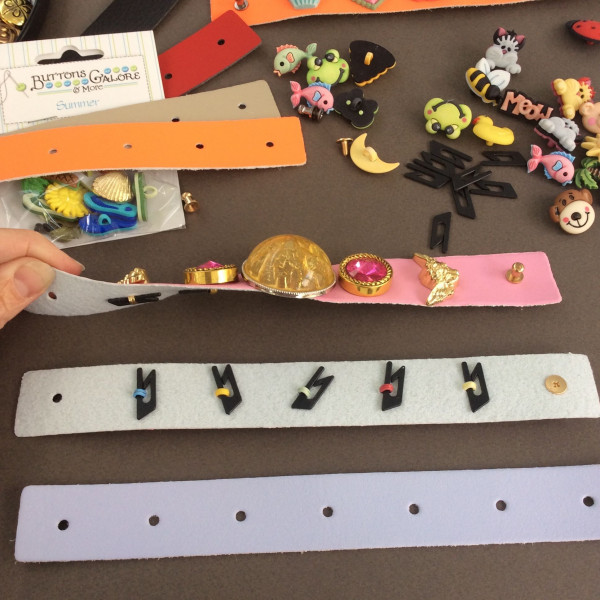
Rotate your buttons so they line up in the direction you want them to be seen.

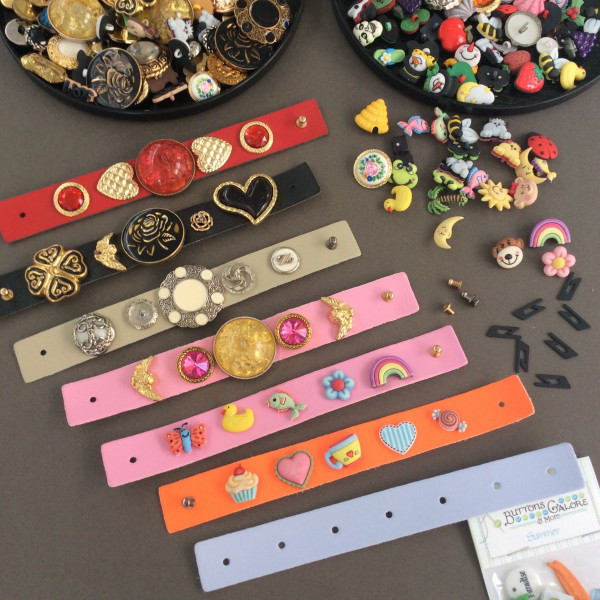
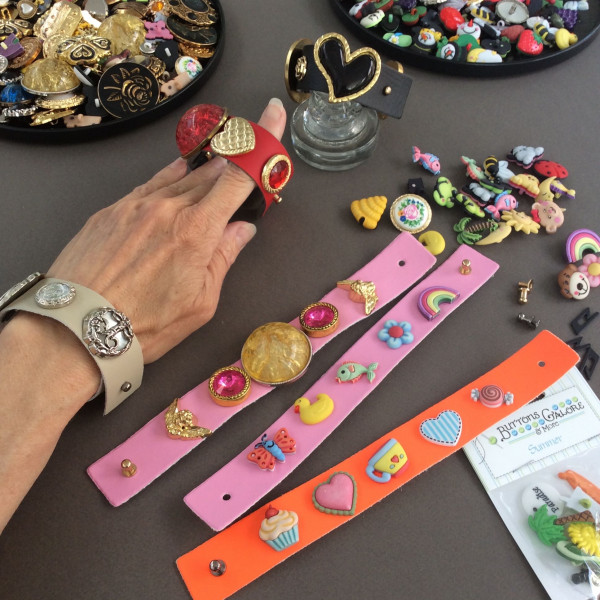
This faux leather cuff and button bracelet kit includes pretty colors like light blue, pink, orange, black, taupe, and red so they work with colorful buttons, gold and silver buttons and combinations of all of the above.

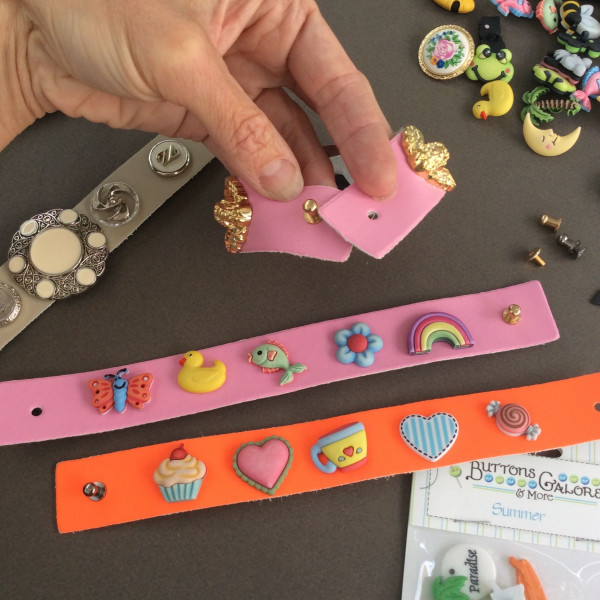
To wear the faux leather button bracelet simply wrap the cuff around your wrist and poke the knob closure through the hole at the opposite end from back to front.

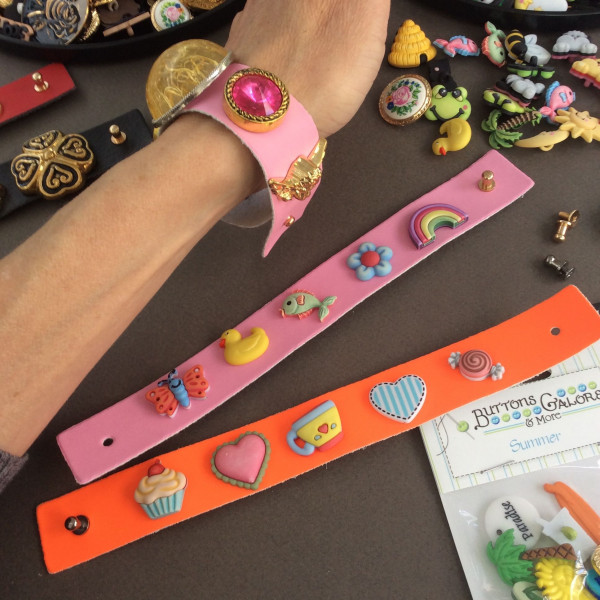
It is fun to wear several at a time in all different colors.

You can slide the clip off the button shank and change out the buttons for different looks to coordinate with different outfits or when you find a new button you want to wear.

Looking for vintage buttons? Check these out on Etsy.

This is so cool!

Related Posts:

  • Eco-Craft Fun: 25+ Sustainable Activities to Teach…
  • Turn That Old Fridge Into a Backyard Showstopper –…
«
»

Have you read?

Build Big Memories on a Budget: DIY Cubby House Using Recycled Pallets

There’s something special about a cubby house. For kids, it’s more than just a backyard structure—it becomes a pirate ship, a secret hideaway, a miniature home, or a quiet spot to read and imagine. And for parents or grandparents, it’s a chance to create something meaningful that encourages outdoor play and creativity.

I recently came across a fantastic step-by-step guide from the team over at Bunnings Workshop that shows exactly how to build a DIY cubby house using recycled pallet timber. It’s a simple yet incredibly rewarding project that turns discarded timber into a charming play space your kids will absolutely love.

What I really appreciate about this project is how accessible it is. It doesn’t require a big budget or expensive materials. By using pallet timber, you not only save money but also help reduce waste—making it a great example of sustainable DIY. The cubby design is solid and safe, with a layout that leaves room for personal touches like paint, planters, or even a chalkboard wall.

This is the kind of project that can grow with your children. You might start with a basic structure and then add onto it as their play evolves—maybe a little deck area, a set of stairs, or some creative decor like a mini letterbox or curtains. It’s also a great opportunity for families to work together. Even young children can help with painting or handing over tools, making it a fun and collaborative experience.

The Bunnings Workshop tutorial provides a clear guide with a materials list, tool requirements, and helpful photos throughout. Whether you’re an experienced builder or a DIY beginner, the instructions are easy to follow and adaptable to different backyard sizes.

If you’ve been looking for a weekend project that adds charm to your outdoor space and creates long-lasting memories, this might be just the thing. Building a cubby house is a wonderful way to connect with your kids, encourage imagination, and spend time outdoors—without needing to buy another plastic playhouse.

You can explore the full project and instructions here:
DIY Cubby House Using Recycled Pallet Timber – Bunnings Workshop

If you do give it a go, I’d love to hear how it turns out. Share your cubby house photos and ideas—I know many readers would be inspired to see how each one takes on its own unique personality.

Book Review – DIY Wood Pallet Projects: 35 Rustic Modern Upcycling Ideas to Personalize Your Space

Painted pallets make an arena

Winner-DIY Wood Pallet Projects book

Explore

books Christmas CraftGossip Giveaways Craft Inspirations Easter glass halloween Home Decor kid crafts mason jar More Crafts Patterns & Tutorials recycled art Recycled Clothing Recycled Jewelry Recycled Sewing Recycled Tutorials Recycling Ideas Recycling Organizing tin can

RSS More Articles

  • Chats on Needlework by Emily Leigh Lowes – A Vintage Stitcher’s Treasure Trove
  • Designer Spotlight: Haunted Frames
  • Press Bubble Animals Crochet Kit with keychain
  • Build Big Memories on a Budget: DIY Cubby House Using Recycled Pallets
  • 12 Handmade Stamped Card Ideas Featuring Bears
  • How To Sew a Banner from felted wool sweaters
  • A Sweet Skater Dress to Knit
  • Printable Animal Flash Cards
  • 20 Cowl Crochet Patterns For Winter Gifting
  • Master the Art of Polka Dots with This Easy Painting Tutorial!

Copyright © 2025 · CraftGossip | Start Here | Contact Us | Link to Us | Your Editors | Privacy and affiliate policy