• Home
  • Suggest A DIY
  • DIY Newsletter

Recycled Crafts

Creative DIY Projects That Turn Trash Into Treasure

  • About CraftGossip
  • Our Network
    • Bath & Body Crafts
    • Candle Making Ideas
    • Crochet Ideas
    • Cross Stitch
    • Edible Crafts
    • Felting Patterns
    • Glass Art
    • Home & Garden Ideas
    • Indie Crafts
    • Jewelry Making
    • Kids Crafts
    • Knitting Patterns
    • Lesson Plans
    • Needlework
    • Party Ideas
    • Polymer Clay
    • Quilting Ideas
    • Recycled Crafts
    • Scrapbooking
    • Sewing Patterns
    • Card Making
    • DIY Weddings
    • Not Craft Ideas
  • Giveaways
  • Roundups
  • Store
  • Search

smART Sketcher and cell phone are the easiest way to transfer images

July 19, 2020 by Stefanie Girard

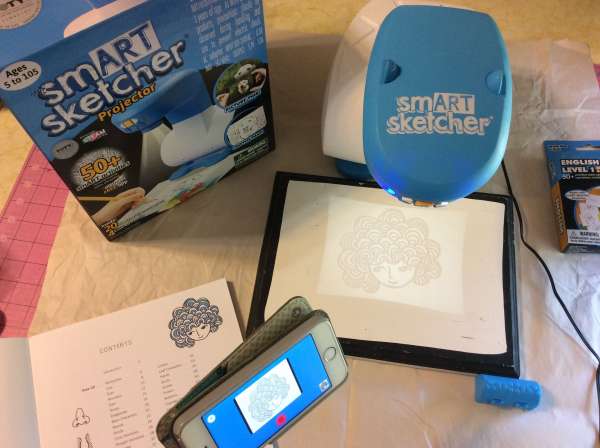
Today I have a fun new device to tell you about and show you how easy and fast it is to use. Meet the smART Sketcher. All you do is download the smARTt Sketcher App and you are ready to take a picture of anything and project it onto any surface to trace. But wait it gets even better!! Included in the App it will automatically convert a colored photograph into a black and white line drawing. So cool!
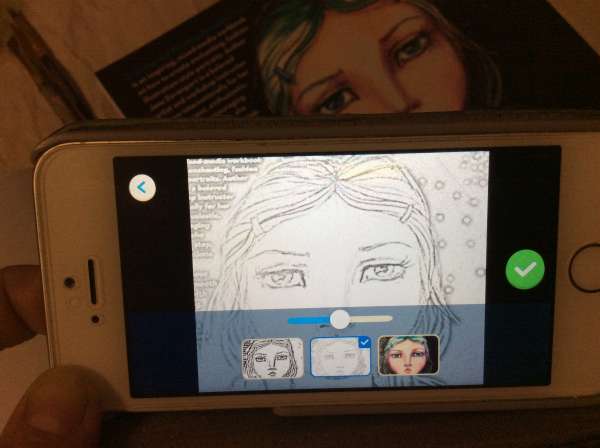
There are also lot of art and educational goodies as well available at the smART Sketcher website for all ages.
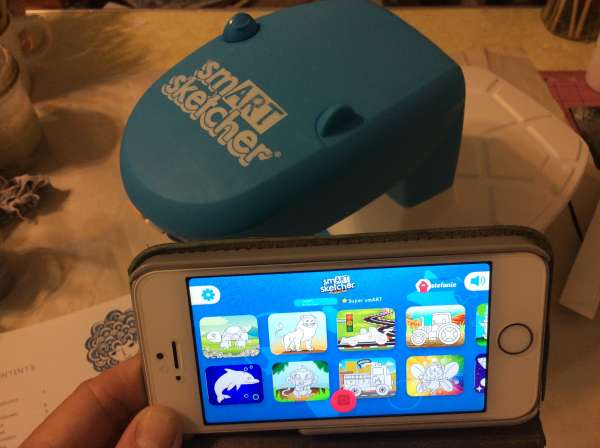
But today I wanted to start with taking my own picture using the red dot in the middle to take a picture of the face in a book to use to trace onto a board to paint. This has got to me the easiest image transfer technique I have tried yet!!
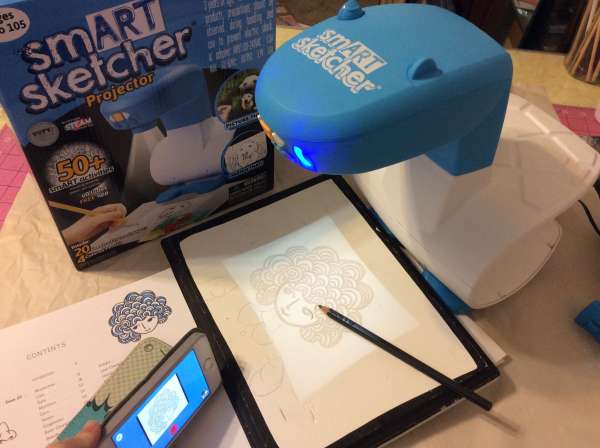
You then tap on the dot and it makes this fun “whooooshing” noise and it magically (via bluetooth) goes to the adorable Smart Sketcher.
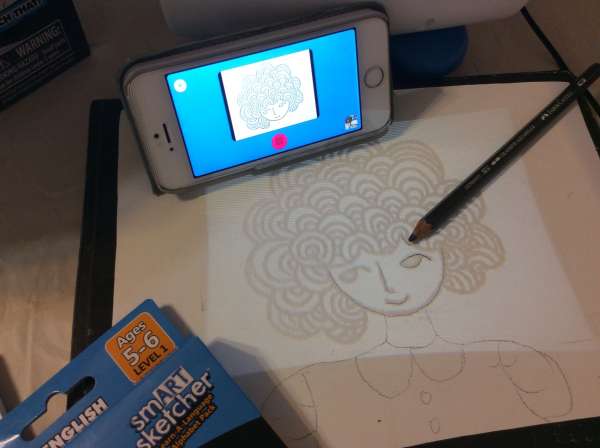
A tip I would say is make sure not to move The smART Sketcher or your surface or you will have to line it back up again and that can be challenging if you are working on an uneven surface.
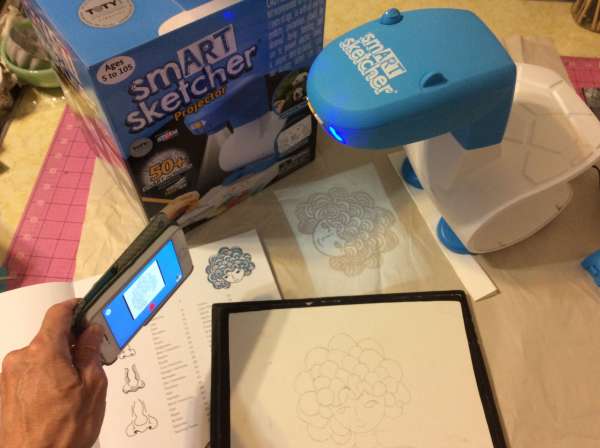
I can’t tell you how easy this was and how happy I am with the result. I was able to get to the fun painting part so fast being able to use a found image as a base guide and transfer it in a snap!
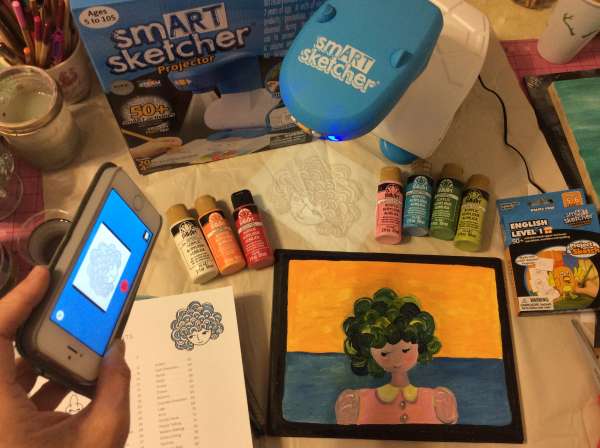
I used a bunch of Plaid paint in a variety of pretty colors to create the first in my series of “Zoom” paintings. The smART Sketcher is also available at Amazon.

 

«
»

Have you read?

DIY Review: Giving a Vintage Milk Can New Life as a Charming Outdoor Side Table

Ever stumbled upon a piece of decor that instantly transports you back in time? That’s exactly how I felt when I came across Cindy’s tutorial on transforming a vintage milk can into the most delightful outdoor side table. It’s one of those projects that blends nostalgia and functionality in a way that just makes your heart smile.

Cindy starts the tutorial with a bit of backstory on old milk cans—those heavy-duty relics of rural life that once carried fresh milk from farm to table. It’s kind of poetic, turning something that was once a workhorse on the farm into a centerpiece on your patio.

The steps she outlines are clear and totally approachable. You’ll need a vintage milk can, a wooden round (for the tabletop), a few basic tools like a drill and wood glue, and your favorite paint. What I appreciated most was how she kept the instructions flexible. Her husband welded a steel bar to the can to hold the tabletop in place (which is super sturdy), but she also offers a no-welding alternative that uses a snug-fitting piece of wood inside the opening. Perfect for folks like me who aren’t exactly on a first-name basis with a welder.

The painting part is where things get extra fun. Cindy uses mineral paint for the base and a whitewash technique on the wood top, finishing it off with some gentle distressing. It gives the table this lovely worn-in look—like it’s been part of your porch for years. I could practically see it next to a rocking chair with a pitcher of lemonade and a good book.

One little thing I personally loved? The fact that she didn’t over-polish the final look. It’s clean, yes—but still has that imperfect, charming farmhouse appeal. Like something your grandmother might have owned, but cooler.

If you’re into DIY with a heart and a healthy respect for vintage charm, this project is 100% worth trying. It’s simple, budget-friendly, and lets you bring a little slice of the past into your modern-day life. Now if only I could get my hands on a milk can…


Explore

books Christmas CraftGossip Giveaways Craft Inspirations Easter glass halloween Home Decor kid crafts More Crafts Patterns & Tutorials Recycled and Thrifted Ideas recycled art Recycled Clothing Recycled Jewelry Recycled kids crafts Recycled Sewing Recycling Ideas Recycling Organizing tin can

Featured Posts

How to make recycled Easter egg mushrooms

Easy way to make pretty organizers with a box and lid

How to make a succulent turtle

Turn Thrifted Tins into Festive Christmas Canisters – A Fun DIY Project

How to make a recycled book photo frame

RSS More Articles

  • Sewing Pattern Saturday Review: Bookworm Tablet Sleeve Sewing Pattern
  • Designer Spotlight: Mango Charm Studio
  • 3 FREE Tablescape Coloring Pages
  • DIY Rose Water and Glycerin Facial Mist for Dry Skin Relief
  • A Single Skein Shawl to Knit for Summer
  • Book Review: Dear Math, We’re Not Friends
  • 7 Easy Ways to Upgrade Plain Tomato Sauce From a Squeezy Bottle
  • The Hattitude Beanie free crochet pattern
  • FREE Palm Leaf Font for Summer
  • 10 Quilted Bag Ideas to Make with Scrap Fabrics

Copyright © 2026 · CraftGossip | Start Here | Contact Us | Link to Us | Your Editors | Privacy and affiliate policy