There is something ridiculously charming about a little loaf of banana bread baked in a tin can. It feels old-fashioned, thrifty, slightly cheeky, and very “I made this from what I had in the cupboard,” which is honestly one of my favourite kinds of crafting.
This idea first caught our eye years ago as a clever recycled baking and gift-giving project, and it still has that lovely handmade appeal. A clean tin can becomes a mini baking container, the banana bread pops out in a neat little round loaf, and suddenly you have a sweet homemade gift that looks far more thoughtful than grabbing something from the supermarket on the way out the door.
Before we get too carried away with the cute factor, let’s talk about safety. Recycled tin cans are not manufactured as bakeware, so this is one of those projects where you need to use common sense. Choose clean, undamaged food cans, avoid rusty or dented cans, line them well with baking paper, and use them for fresh baked gifts only. Do not seal homemade bread in a can and store it on the shelf. These are little fresh treats to bake, cool, wrap, and gift within a day or two.
If you love practical recycled craft ideas, you might also like our roundup of <a href=”https://recycledcrafts.craftgossip.com/8-crafts-to-use-recycled-tin-cans/2014/12/16/”>8 crafts to use recycled tin cans</a>, or this newer collection of <a href=”https://recycledcrafts.craftgossip.com/40-recycled-crafts-for-adults-that-turn-trash-into-treasure/2026/05/30/”>recycled crafts for adults that turn trash into treasure</a>. Tin cans really do earn their keep around the craft table.
Why Bake In Tin Cans?
Baking quick bread in cans gives you small, round loaves that are perfect for gift baskets, neighbour gifts, teacher treats, church morning tea, craft group swaps, or a little “thinking of you” parcel.
It is also a lovely way to reuse clean food cans before they head to the recycling bin. I do love a project that lets me feel a tiny bit smug about saving packaging from the bin — especially when banana bread is involved.
These mini loaves are also easier to share than one large loaf. You can make several small gifts from one batch, and because they are already portioned, they look sweet wrapped in parchment, tied with twine, or tucked into a small paper gift bag.
What Kind Of Cans Should You Use?
For this project, use clean, empty food cans with smooth sides if possible. Standard soup, fruit, vegetable, or bean cans work well, as long as they are not damaged.
The best cans are:
- Straight-sided cans so the bread slides out easily
- Clean food cans only
- Cans with no rust, dents, or sharp torn edges
- Cans that have had the label and glue fully removed
- Cans opened with a smooth-edge can opener if you have one
Avoid using cans that held very strong-smelling foods such as fish, pet food, or heavily spiced sauces. No matter how much you scrub, nobody wants banana bread with a mystery tuna breeze. Ask me how I know from cleaning out craft supplies that should never have been saved.
Also avoid using painted decorative tins, coffee cans with plastic parts, cans with plastic linings that look damaged, or anything that is not clearly a food can.
If you are baking these for a large group or selling baked goods, I would use proper mini loaf pans or paper baking molds instead. You can find mini loaf pans, parchment liners, gift tags, twine, and small bakery bags on Amazon, and they are handy supplies to keep around if you often make handmade food gifts.
Supplies You Will Need
Clean empty tin cans
Baking paper or parchment paper
Non-stick baking spray or butter
Scissors
Baking tray
Cooling rack
Ribbon, twine, or fabric scraps for wrapping
Gift tags or small note cards
Optional: tea bags to tie on top for a sweet “tea and cake” gift
Ingredients For Mini Banana Bread
This recipe makes around 4 to 6 mini tin-can loaves, depending on the size of your cans.
3 ripe bananas, mashed
1/3 cup melted butter or neutral oil
1/2 cup brown sugar
1 egg
1 teaspoon vanilla extract
1 1/2 cups plain flour
1 teaspoon baking soda
1/4 teaspoon salt
1/2 teaspoon cinnamon
Optional: 1/2 cup chopped walnuts, pecans, chocolate chips, or dried fruit
You can also use your favourite quick bread recipe. Zucchini bread, pumpkin bread, apple cinnamon bread, carrot cake-style loaves, and gingerbread all work beautifully in small cans. Just avoid anything too runny or delicate, as a firmer quick bread batter holds its shape best.
Step 1: Prepare The Tin Cans
Wash the cans thoroughly in hot soapy water and remove all labels and glue residue. Dry them completely.
Run your finger carefully around the top edge. If there are any sharp bits, do not use that can for baking. You can cover slightly rough edges with folded parchment later, but sharp torn metal is not worth the risk.
Preheat your oven to 175°C / 350°F.
Grease the inside of each can lightly with butter or non-stick baking spray.
Cut strips of baking paper to line the sides of each can. The parchment should sit a little higher than the rim of the can so you can lift the bread out more easily after baking.
Cut a circle of parchment for the bottom of each can, or press a square of parchment into the base and smooth it down as best you can.
This lining step is important. It helps stop sticking, makes the loaves easier to remove, and keeps the batter from sitting directly against the metal lining of the can.
Step 2: Make The Banana Bread Batter
In a large bowl, mash the ripe bananas with a fork. The spottier the bananas, the better the flavour. This is their big moment after being ignored in the fruit bowl all week.
Stir in the melted butter or oil.
Add the brown sugar, egg, and vanilla extract. Mix until combined.
In a separate bowl, whisk together the flour, baking soda, salt, and cinnamon.
Add the dry ingredients to the banana mixture and stir gently until just combined. Do not overmix. Banana bread likes a gentle hand, not an enthusiastic arm workout.
Fold in nuts, chocolate chips, or dried fruit if using.
Step 3: Fill The Cans
Place the lined cans on a baking tray. This makes them much easier to move in and out of the oven and catches any little drips.
Spoon the batter into each can, filling each one about halfway to two-thirds full. Do not fill them to the top, as quick bread rises as it bakes.
Tap each can gently on the bench to settle the batter.
Step 4: Bake The Mini Loaves
Bake at 175°C / 350°F for around 25 to 35 minutes, depending on the size of your cans.
Start checking at the 25-minute mark. The loaves are ready when the tops spring back lightly and a skewer inserted into the centre comes out clean or with a few moist crumbs.
Smaller cans will bake faster. Larger cans may need a little longer.
If the tops are browning too quickly, loosely tent the tray with foil.
Step 5: Cool And Remove From The Cans
Allow the loaves to cool in the cans for 10 to 15 minutes.
Carefully lift each loaf out using the parchment paper. If it resists, run a butter knife gently around the edge between the parchment and the can.
Place the loaves on a cooling rack and let them cool completely before wrapping.
Do not wrap warm banana bread tightly, or you will trap steam and end up with soggy bread. Delicious? Still yes. Gift-worthy? Not quite.
How To Gift Tin Can Banana Bread
Once the mini loaves are completely cool, you can wrap them in parchment paper, waxed paper, or a small cellophane bakery bag.
Tie with twine, ribbon, raffia, or a strip of scrap fabric. This is a lovely way to use up those tiny fabric offcuts we all keep because “they might be useful one day.” See? Vindicated.
For a sweet gift idea, tie a tea bag to the top with a little note that says:
“Best enjoyed with a cup of tea.”
You could also add a handmade tag with the flavour and date baked. If you are giving these to neighbours, teachers, or craft group friends, include the ingredients too, especially if you have added nuts.
For more eco-friendly handmade selling ideas, have a look at our post on <a href=”https://recycledcrafts.craftgossip.com/recycled-crafts-that-sell-eco-friendly-ideas-for-makers-etsy-shops/2026/07/06/”>recycled crafts that sell for makers and Etsy shops</a>. Food gifts are not quite the same as craft products, of course, but the same principles apply: thoughtful packaging, clear labelling, and a good materials story make all the difference.
Fresh Gift Only — Do Not Seal And Store
This part matters.
These little tin-can loaves are for fresh gifting only. Do not put the lid back on the can, seal the bread inside, or treat it like a shelf-stable canned food. Homemade cakes and breads should not be canned or stored at room temperature in sealed containers.
Bake them, cool them, wrap them, and gift them fresh. If you need to make them ahead, wrap the cooled loaves and freeze them, then thaw before gifting.
Storage Tips
Fresh banana bread can usually be stored wrapped at room temperature for 1 to 2 days, or in the fridge for a few days longer.
For best texture, wrap cooled loaves well and freeze them for up to 2 months. Thaw at room temperature before gifting.
If adding cream cheese frosting, custard, fresh fruit topping, or anything dairy-based, store the loaves in the fridge and gift them chilled.
Easy Variations
Try these flavour ideas once you have made the basic banana bread version:
Chocolate chip banana bread
Cinnamon apple quick bread
Pumpkin spice mini loaves
Gingerbread mini cakes
Carrot cake-style mini loaves
Lemon poppy seed loaves
Date and walnut bread
Cranberry orange holiday loaves
For Christmas gifts, gingerbread or cranberry orange loaves wrapped in brown paper and tied with red twine look lovely. For a spring gift, lemon poppy seed with a yellow ribbon is simple and cheerful. For a cosy winter neighbour gift, banana walnut with a tea bag tied to the top is hard to beat.
Extra Decorating Ideas For The Cans
If you want to gift the bread inside the can, make sure the bread is already wrapped in parchment or a food-safe bag first. Then decorate the outside of the empty can like a gift container.
You can cover the outside of the can with:
Scrapbook paper
Fabric scraps
Brown kraft paper
Washi tape
Ribbon
Twine
A printable label
A handwritten recipe card
If decorating cans is your happy place, you may also enjoy turning tins into organisers, planters, and seasonal decorations. Clean tins with smooth edges are one of the handiest recycled craft supplies to save, as long as you do not let the stash get out of hand. One shelf becomes two shelves, and suddenly you are explaining to your family that the recycling pile is actually “creative inventory.”
Helpful Supplies To Keep On Hand
If you plan to make handmade food gifts often, a few supplies make everything easier:
Parchment paper
Mini loaf pans
Paper baking molds
Bakery bags
Cotton twine
Kraft gift tags
Ingredient label stickers
A smooth-edge can opener
Cooling racks
Affiliate-friendly note: a good smooth-edge can opener, parchment sheets, and simple bakery bags are worth keeping in the kitchen if you make edible gifts often. They make the final gift look polished without being fussy.
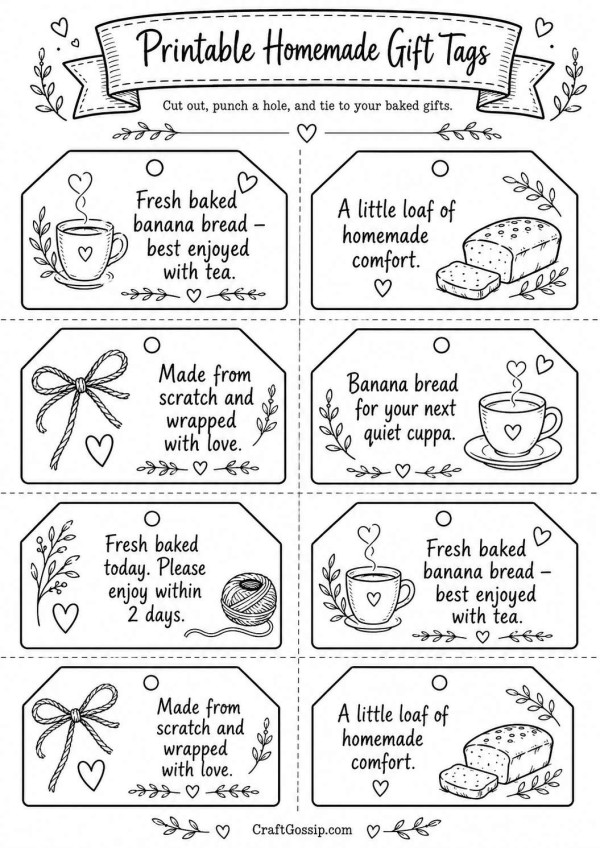
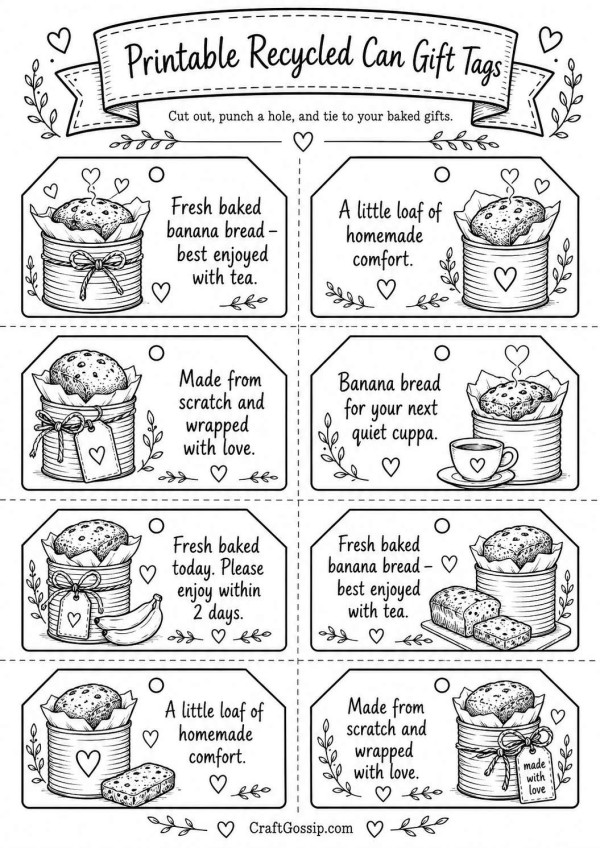
Printable Gift Tag Wording
Here are a few sweet tag ideas you can copy:
“Fresh baked banana bread — best enjoyed with tea.”
“A little loaf of homemade comfort.”
“Made from scratch and wrapped with love.”
“Banana bread for your next quiet cuppa.”
“Fresh baked today. Please enjoy within 2 days.”