• Home
  • Suggest A DIY
  • DIY Newsletter

Recycled Crafts

Creative DIY Projects That Turn Trash Into Treasure

  • About CraftGossip
  • Our Network
    • Bath & Body Crafts
    • Candle Making Ideas
    • Crochet Ideas
    • Cross Stitch
    • Edible Crafts
    • Felting Patterns
    • Glass Art
    • Home & Garden Ideas
    • Indie Crafts
    • Jewelry Making
    • Kids Crafts
    • Knitting Patterns
    • Lesson Plans
    • Needlework
    • Party Ideas
    • Polymer Clay
    • Quilting Ideas
    • Recycled Crafts
    • Scrapbooking
    • Sewing Patterns
    • Card Making
    • DIY Weddings
    • Not Craft Ideas
  • Giveaways
  • Roundups
  • Store
  • Search

Mix and match embossed Christmas cards

August 12, 2017 by Stefanie Girard

If you make your own cards you know how it can be addictive. Which, when it comes to card making can come in handy since we all love to send out lots of cards at the holidays. It makes sense to start now in the summer.

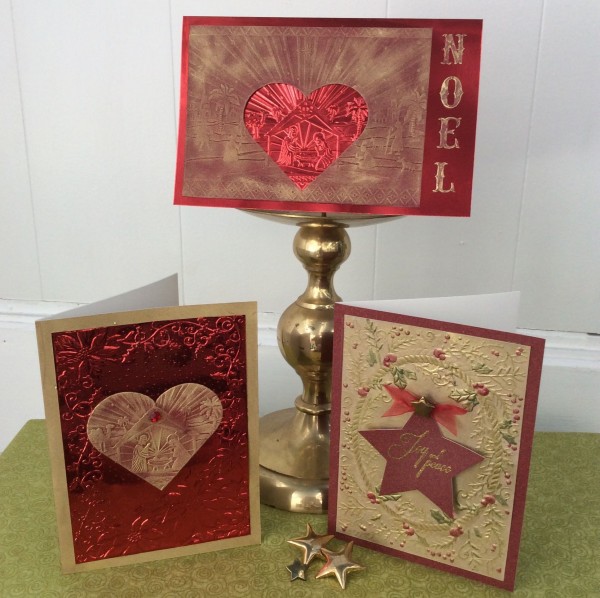
For this set I used some of the positive and negative parts of my die cut embossed images to make two different cards. For the holly card I used a recycled cracker box. It embossed like a dream!
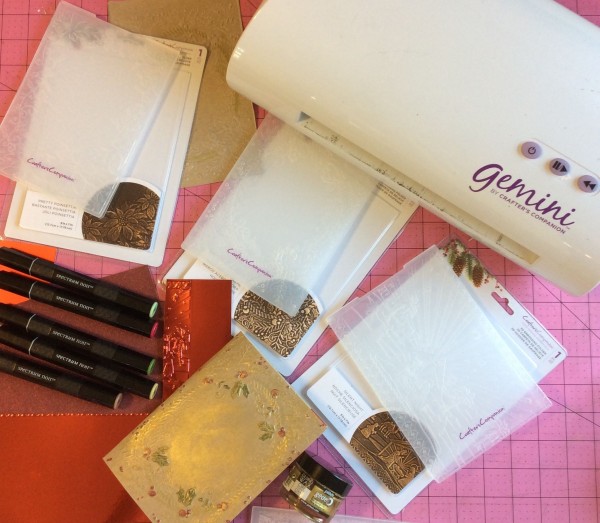
For the top card I embossed a manger scene twice. Once on shiny red cardstock and once on red glitter cardstock.

Then I rubbed some gold gilding wax on it to bring out the image.

I die cut a heart shape out of the red glitter with guiding piece.

Then I overlapped it onto the red shiny cardstock.

I die cut the letters to spell “NOEL” and glued them down along the side of the card.

For the card on the left I took the die cut heart from the first card and clued it down to another piece of red shiny cardstock that I embossed using the Crafter’s Companion poinsettia 3-D embossing folder.

Then assembled it onto a gold piece of cardstock.

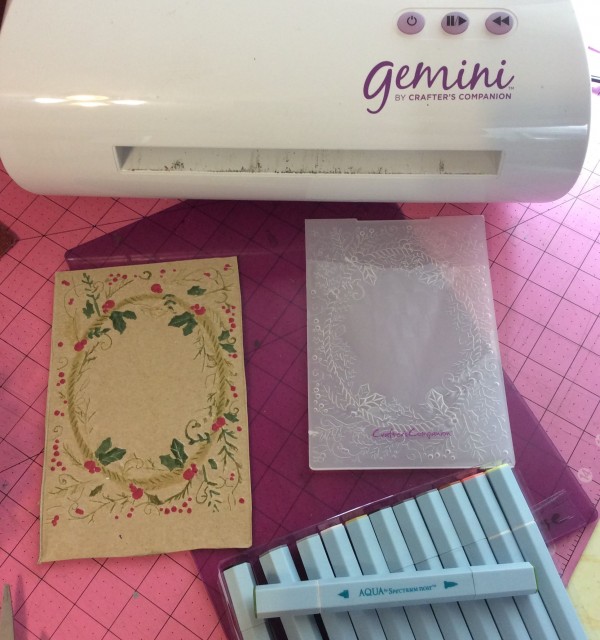
The third card on the right I embossed a piece of a Triscut box using a Holly embossing folder.

I colored the berries and leaves using Spectrum Noir markers and then added some gold guiding wax on top of the coloring.
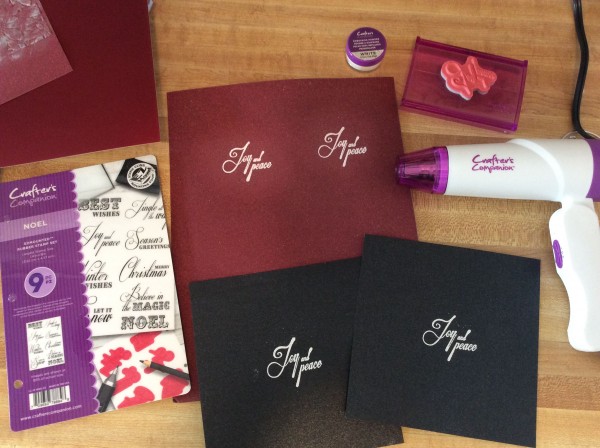
I stamped and embossed the phrase Joy and Piece from the Crafter’s Companion Noel stamp set onto a scrap of red glitter paper and die cut a star shape.
To top off the star I ran a small scrap of red organza ribbon through a little star button and glued it all together.

I highly recommend making lots of coordinating elements using the inside and outside shapes from your die cuts to whip up a whole bunch of cards!
 

«
»

Have you read?

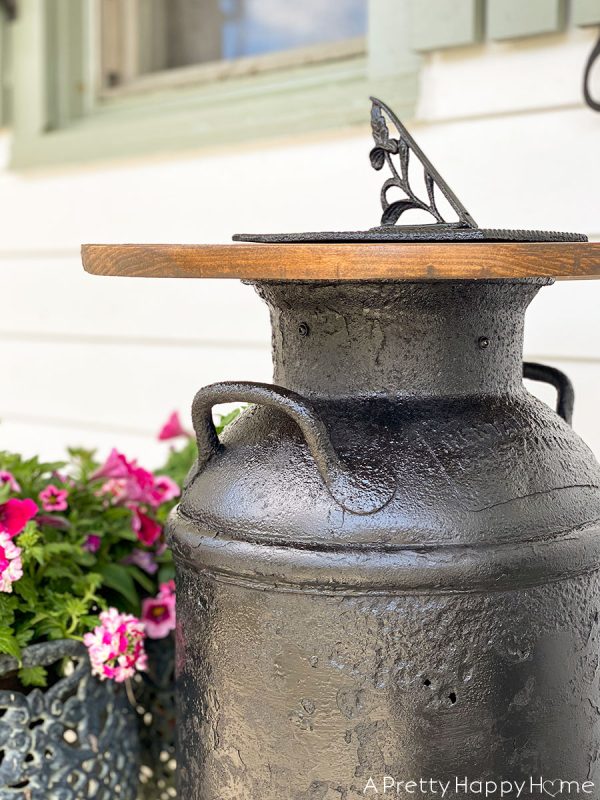
DIY Review: Vintage Milk Can Side Table Makeover – Upcycled Charm with a Story

You know that thrill when you find an old, rusty piece of junk and immediately see its potential? That’s exactly the vibe I got reading the tutorial from A Pretty Happy Home on turning a vintage milk can into a side table. It’s one of those simple yet satisfying projects that blends upcycled charm with real functionality—and adds a whole lot of character to your space.

First off, there’s just something magical about milk cans. They’ve got history. You just know they’ve lived on a dusty farm porch or sat beside a barn door through decades of seasons. In this project, that history gets to shine—literally—after a little elbow grease and creative thinking.

What I loved about this makeover is how unfussy it is. The milk can wasn’t scrubbed within an inch of its life or made to look overly polished. Instead, it got a respectful refresh: a little cleaning, a bit of clear coat to protect the patina, and a sturdy, round wood top to complete the transformation into a DIY farmhouse side table.

The wood top itself was made from leftover pieces—hello, recycled wood projects—which gives this whole DIY an extra eco-friendly touch. It’s a small win for the environment and a big win for anyone who appreciates budget-friendly home decor that doesn’t look cheap.

You don’t need fancy tools or a woodworking shop to pull this off. That’s the beauty of these repurposed furniture ideas—they’re accessible. And they let the vintage pieces speak for themselves. This one, in particular, looks just as good next to a cozy armchair as it would on a porch with a cup of tea and a warm breeze.

The final result? A rustic milk can side table that’s equal parts practical and nostalgic. It’s got that collected-over-time feel that you just can’t buy from a big box store. And as someone who loves giving old things new life, it absolutely inspired me to go digging through the nearest antique store (or maybe my parents’ shed) to see what I can rescue next.

If you’re looking for easy upcycled decor projects, or a way to add authentic farmhouse style without breaking the bank, this tutorial is a perfect weekend project. Honestly, this is the kind of piece that guests will ask about, and you’ll get to say, “Oh, that old thing? I made it.”

And you will say it with pride.

Explore

books Christmas CraftGossip Giveaways Craft Inspirations Easter glass halloween Home Decor kid crafts More Crafts Patterns & Tutorials Recycled and Thrifted Ideas recycled art Recycled Clothing Recycled Jewelry Recycled kids crafts Recycled Sewing Recycling Ideas Recycling Organizing tin can

Featured Posts

Make a mobile out of lost toys (or found)

Recycled Shampoo Bottle Purse

How to Make a Recycled Shampoo Bottle Purse and Lots More Creative Upcycling Ideas

Winner- Wool Studio book

Earth Day recycled file folder earth garland

5 craft ideas to make with recycled greeting cards

RSS More Articles

  • Barrel Pants for Women: 12 Summer Bottoms Sewing Patterns
  • FREE Beauty and the Beast Book Nook Cut Files
  • 15 Unusual Granny Square Crochet Patterns You Can Make for Free
  • Book Review: Knitted Safari Friends – 20 Adorable Animals to Make
  • Krylon Classic Spray Paint Is Back – And That Retro Can Is Pure Craft-Room Nostalgia
  • Designer Spotlight: Colorfully Sarah Shop
  • How to Organize Scrapbook Supplies in a Small Space (Without Losing Your Creativity)
  • Dollar Tree Free Shipping Code: Shop Online and Save
  • How to Make an Upcycled Shaker Card
  • Free Felted Woodland Mini Mending Pattern Review

Copyright © 2026 · CraftGossip | Start Here | Contact Us | Link to Us | Your Editors | Privacy and affiliate policy