• Home
  • Suggest A Craft
  • DIY Newsletter

Recycled Crafts

Creative DIY Projects That Turn Trash Into Treasure

  • About CraftGossip
  • Our Network
    • Bath & Body Crafts
    • Candle Making Ideas
    • Crochet Ideas
    • Cross Stitch
    • Edible Crafts
    • Felting Patterns
    • Glass Art
    • Home & Garden Ideas
    • Indie Crafts
    • Jewelry Making
    • Kids Crafts
    • Knitting Patterns
    • Lesson Plans
    • Needlework
    • Party Ideas
    • Polymer Clay
    • Quilting Ideas
    • Recycled Crafts
    • Scrapbooking
    • Sewing Patterns
    • Card Making
    • DIY Weddings
    • Not Craft Ideas
  • Giveaways
  • Roundups
  • Store
  • Search

How to make no-sew fabric pumpkins

September 25, 2017 by Stefanie Girard

If you are someone who loves to craft and sew, chances are you have a collection of beautiful fat quarter packs that coordinate perfectly. These versatile fabrics are perfect for small sewing projects, and today we’re going to show you how to make a set of no-sew fabric pumpkins using your favorite fat quarters. Not only are they a fun and easy project to create, but they are also perfect for adding a touch of autumnal charm to your home décor.

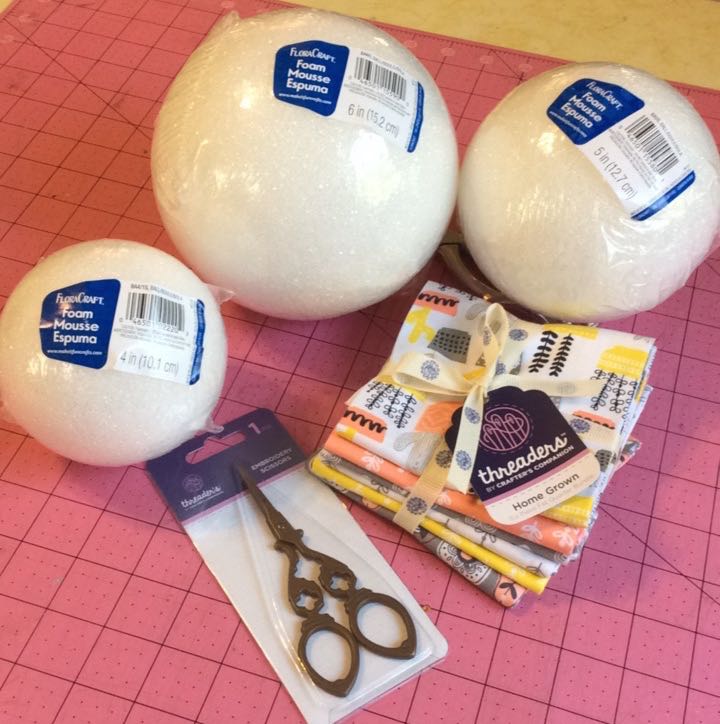
Grab yourself 3 Styrofoam balls in a variety of sizes . To get started, you’ll need three Styrofoam balls in varying sizes and a set of Threaders Home Grown fat quarters. Once you have all your materials ready, it’s time to get started on this fun and creative project.

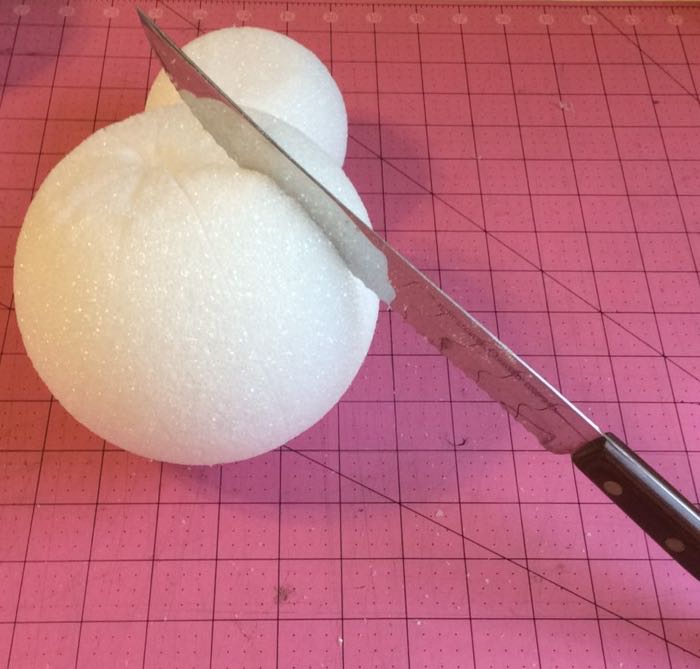
The first step is to carefully cut slices in each Styrofoam ball, and then take a bit off the top and bottom with a serrated kitchen knife. Be sure to be very careful while doing this to avoid any injuries. Once you have your foam balls prepared, you can move onto the next step.

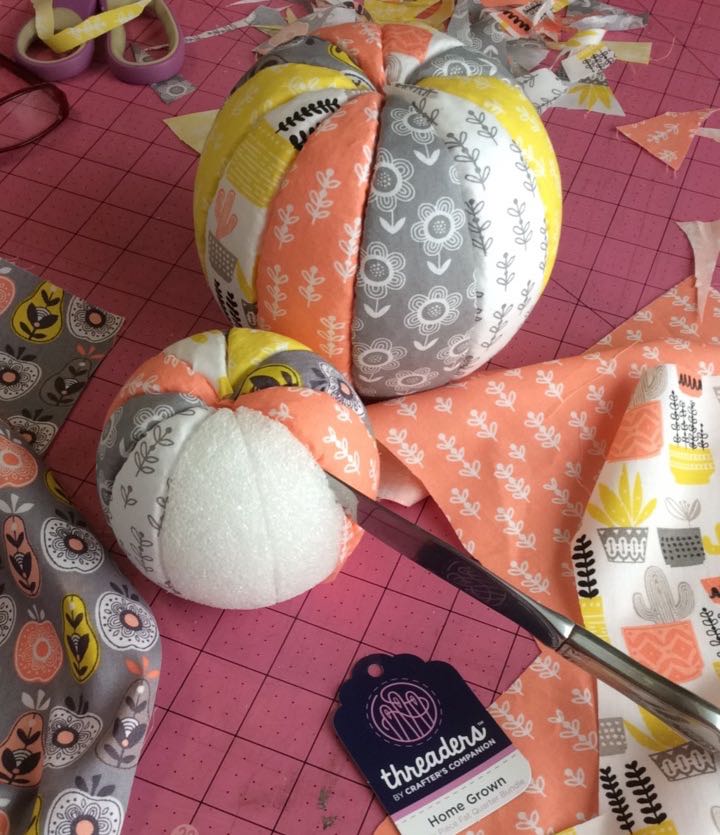
Cut pieces of fabric about 1/2 inch bigger than each foam slice. You can use any fabric you like, but fat quarters work particularly well for this project. Choose fabrics in colors and patterns that coordinate with your home décor or reflect the season. Once you have your fabric ready, it’s time to start tucking it into the foam ball.

Using a butter knife, carefully tuck the fabric into the slices of foam. Be sure to smooth out any wrinkles or bumps, so your fabric looks clean and polished. Continue this process until the entire foam ball is covered in fabric. You can use one fat quarter per pumpkin or mix and match different fabrics for a unique look.

Once your pumpkin is fully covered in fabric, it’s time to add the finishing touch. Head outside to your yard and clip a few pieces of branches. You can use any type of branches, but we recommend choosing those that are thin and flexible. Trim them to the desired length and with a bit of glue, place them in the center top of each fabric pumpkin. This will give your pumpkin a cute and natural stem that adds a touch of rustic charm to the overall look.

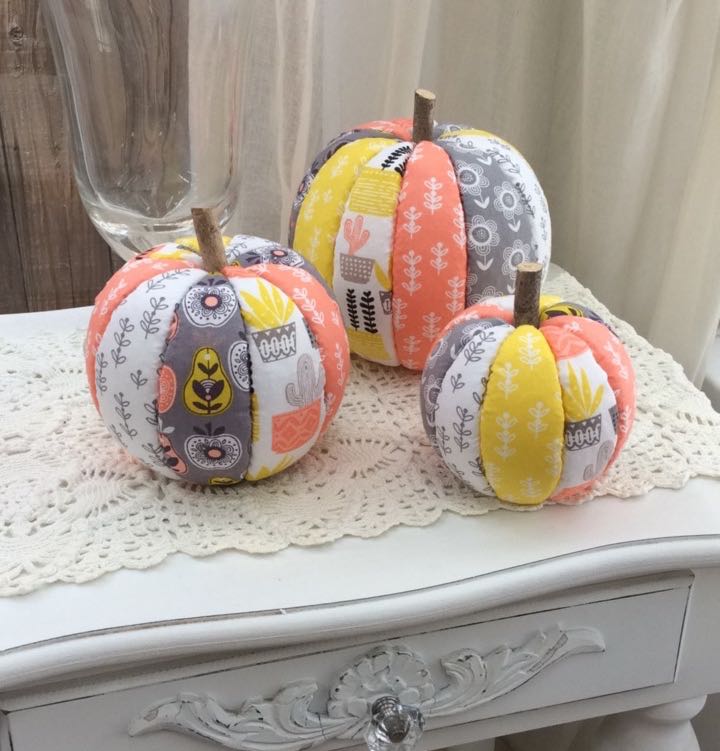
And there you have it, your own set of beautiful no-sew fabric pumpkins. These pumpkins are perfect for adding a touch of autumn to your home decor, but you can also use them year-round. Place them on a bookshelf, use them as a centerpiece, or give them as gifts to family and friends. The possibilities are endless, and the best part is that you can create these beautiful pumpkins in just a few simple steps. So, go ahead and grab your favorite fat quarters and get started on this fun and easy project today.

Related Posts:

  • How to make recycled clothes pin puppets
  • Cool way to combine weaving and clay
«
»

Comments

  1. Sharon says

    September 27, 2017 at 4:09 pm

    So pretty! Love your fabrics!

  2. Alice says

    August 24, 2019 at 12:47 pm

    Thank you for sharing such a great idea. I plan to use Halloween fabric with solid black between each. Wow! finally a project I can get excited about.

  3. Nancy Hannon says

    September 11, 2019 at 2:43 pm

    I used cinnamon sticks(3) glued together for my stem. Working on stiffening some green fabric for leaves. Thank you for this idea!

Have you read?

I Found a Table Made from Mannequin Legs—and I’m Still Not Over It


manequin table recycled

Okay, I have to tell you about one of the most bizarre-yet-brilliant DIYs I’ve come across in a while. While scrolling through google (as one does when deep into a late-night upcycling rabbit hole), I stumbled on a video tutorial for a table made out of mannequin legs. And honestly? I couldn’t look away.

This project is peak creative chaos—in the best way. The concept is exactly what it sounds like: four mannequin legs, flipped and fixed in place, supporting a standard tabletop. It’s got this quirky, surreal vibe that makes it feel part high fashion, part modern art installation. Think: Tim Burton meets IKEA.

What I loved most about this video is how surprisingly accessible it is. The creator breaks the process down clearly—so even though the end result looks totally wild, the steps are manageable. You’ll need a few tools and a decent amount of glue or screws (depending on how permanent you want this table to be), but nothing too technical.

Design-wise, this piece is an absolute conversation starter. It would look amazing in a creative studio, a funky coffee shop, or even as a statement piece in a minimalist home—anywhere you want to break the “normal furniture” mold. The contrast between the realistic mannequin legs and a basic tabletop is just the right kind of weird.

If you’re into recycled home decor, eco-conscious DIY projects, or just love adding some unexpected personality to your space, this one’s worth bookmarking. Whether or not you ever make it yourself, it’s guaranteed to make you see mannequins—and furniture—in a whole new way.

Catch the full tutorial and see the visual magic for yourself on Recyclart. Just be prepared to say, “Wait, is that a leg?” every time someone visits your house.

Explore

books Christmas CraftGossip Giveaways Craft Inspirations Easter glass halloween Home Decor kid crafts mason jar More Crafts Patterns & Tutorials recycled art Recycled Clothing Recycled Jewelry Recycled Sewing Recycled Tutorials Recycling Ideas Recycling Organizing tin can

RSS More Articles

  • Designer Spotlight: Natalka Studio
  • Paw Print Shaped Dog Mini Album
  • Another Great Shawl to Use Your Leftovers
  • How to Fix a Missed Crochet Stitch (No Frogging Needed!)
  • Mother’s Day Gift Guide 2025: My Top Amazon Picks She’ll Actually Love
  • The Quilter’s Fabric Dictionary: 57 Terms You Need to Know
  • Best Sewing Machine for Quilting Beginners: Your No-Stress Buying Guide
  • McCall’s Half-Price Pattern Sale – Starts Friday!
  • Learning about Chad for Kids – Lesson Plan
  • Peacock Stitch Crochet Cardigan in Sirdar Country Classic

Copyright © 2025 · CraftGossip | Start Here | Contact Us | Link to Us | Your Editors | Privacy and affiliate policy

Copyright © 2025 · Sprinkle Theme on Genesis Framework · WordPress · Log in