 Over at Craftberry Bush there is a tutorial on how to make a book page pumpkin. Donna of the blog As The Card Rack Turned decorated hers a bit differently. She also shared a another tutorial.
Comments
Have you read?
DIY Review: Upcycled Vintage Book Flower Press – A Thoughtful Keepsake Gift
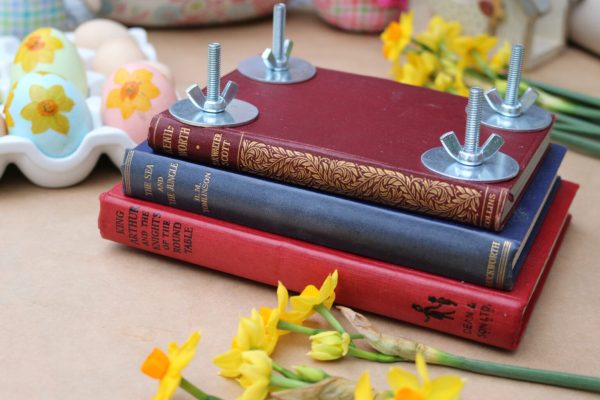
Looking for a heartfelt, handmade gift that combines nostalgia with nature? Cassie Fairy’s tutorial on transforming old, damaged books into a vintage-style flower press is a charming and practical project that makes for a perfect keepsake gift.?
Why It’s a Great Gift Idea
This DIY flower press is not just a functional item; it’s a sentimental treasure. By upcycling a vintage book, you’re preserving memories and giving a nod to the past. It’s ideal for nature lovers, gardeners, or anyone who appreciates the art of preserving flowers. The pressed flowers can be used in various crafts, such as creating bookmarks, greeting cards, or framed art, allowing the recipient to cherish the blooms long after they’ve been pressed.?
What’s Involved in the Project
Cassie provides a step-by-step guide, making it accessible even for beginners. The process involves selecting a sturdy, hardcover book, adding spacers like cardboard or chipboard, and securing everything with bolts and wing nuts. This setup allows for even pressure, ensuring that flowers are pressed flat and dry without damage. The vintage book cover adds an aesthetic touch, making the flower press not only functional but also a decorative piece.?
Final Thoughts
This upcycled flower press is more than just a gift; it’s a way to share the beauty of nature and the joy of crafting. It’s a thoughtful, sustainable, and creative present that will be appreciated for years to come. Whether you’re giving it as a gift or making one for yourself, it’s a delightful project that brings a touch of vintage charm into the modern world.?
For a detailed guide on creating your own, visit Cassie Fairy’s blog: How to Upcycle Old, Damaged Books into a Vintage-Style Flower Press.
The Craftberry pumpkin (and apple) tutorials seem to have been inspired by Lucy’s memories of helping her dad create a phonebook seat.
Her very nice post reminded me of a great-aunt’s recycling of the big old fat Sears and Roebuck catalogues – which she methodically folded, page by page, to create doorstops.
Having taught high-school math, she was my algebra tutor. I did not absorb the math, but did learn how to make the doorstops.
She folded each page diagonally – down from the outer corner to the center and when she was finished, the doorstop was shaped like a tiki hut. The front and back catalogue covers were simply glued together, to form a cylindrical or conical shape.
A reader at Craftberry wondered how to make the phonebook stool. It may have been a similar process, but probably required an extra fold – to remove the point (which is fine for a tiki hut, but not good for sitting).