• Home
  • Suggest A Craft
  • DIY Newsletter

Recycled Crafts

Creative DIY Projects That Turn Trash Into Treasure

  • About CraftGossip
  • Our Network
    • Bath & Body Crafts
    • Candle Making Ideas
    • Crochet Ideas
    • Cross Stitch
    • Edible Crafts
    • Felting Patterns
    • Glass Art
    • Home & Garden Ideas
    • Indie Crafts
    • Jewelry Making
    • Kids Crafts
    • Knitting Patterns
    • Lesson Plans
    • Needlework
    • Party Ideas
    • Polymer Clay
    • Quilting Ideas
    • Recycled Crafts
    • Scrapbooking
    • Sewing Patterns
    • Card Making
    • DIY Weddings
    • Not Craft Ideas
  • Giveaways
  • Roundups
  • Store
  • Search

How to drill holes in pebbles and pretty projects made with them

March 23, 2023 by Stefanie Girard

If you’re looking to add a touch of natural beauty to your home decor, then pebbles are a great place to start. These little stones come in all shapes and sizes, and with a little bit of creativity, you can turn them into beautiful works of art.

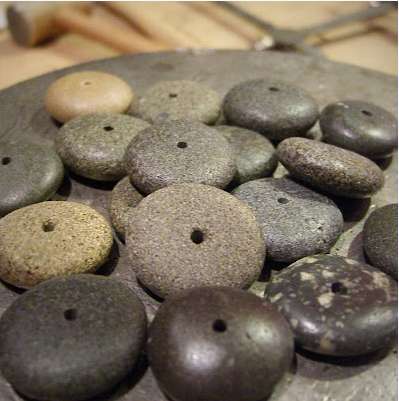
One of the easiest ways to transform plain pebbles into something special is by drilling holes in them. This may sound daunting at first, but with the right tools and a little bit of practice, it’s actually quite simple. 

Unlike wood or metal, pebbles are naturally uneven and can crack easily if you apply too much pressure. To prevent this from happening, start by marking the spot where you want to drill with a pen or marker. Then, fill a bowl with water and submerge the pebble, making sure that the spot you marked is fully covered. The article below goes into more depth.

While challenging pebbles are so pretty the work can be worth it. I collect pebbles at the beach and they are just waiting for me to try this.

Once you’ve drilled your holes, the possibilities for pebble projects are endless. You can string them together to make a unique necklace, create a one-of-a-kind wind chime, or use them to decorate a picture frame. With a little bit of imagination, you can turn even the most ordinary pebbles into something truly extraordinary.

So if you’re looking to add a touch of natural beauty to your home decor, why not give pebble drilling a try? It’s a fun and easy DIY project that’s sure to impress your friends and family. And who knows, you might just discover a new passion for creating beautiful things with your own two hands.

It will have to wait for spring after it stops raining here in SoCal but I can file this away until then.

Rock and roll over to the blog Mindfully Made for the tutorial on how to drill holes in pebbles and see some of the pretty projects you can make with the drilled pebbles.

Related Posts:

  • Eco-Craft Fun: 25+ Sustainable Activities to Teach…
  • Turn That Old Fridge Into a Backyard Showstopper –…
«
»

Have you read?

How to Paint Melamine Furniture

Recently, we received an email from Jenny, one of our readers, asking for some advice on painting melamine furniture. Jenny was looking to refresh an old dresser but wasn’t sure about the right way to tackle the project. Well, we’ve got just the thing! After some digging, we came across a fantastic article on Spraypaint Blog titled How to Recycle and Paint Melamine Furniture, which walks you through the process step-by-step.

Why This Article is Perfect for Jenny (and You!)

This guide is incredibly comprehensive, covering everything you need to know about painting melamine—an often tricky material to work with. Melamine is known for its smooth, glossy surface, which can be tough to paint without the right preparation. But with the tips from this article, you’ll learn how to properly prep your melamine pieces, choose the right paint, and achieve a professional-looking finish.

The article also dives into the importance of sanding and priming the surface to ensure that the paint adheres well. With these steps, Jenny (and anyone else trying this project) can be sure that their painted melamine furniture will not only look great but last for years to come.

Jenny, we hope this article gives you all the info you need to tackle your melamine furniture project! It’s clear from the tutorial that a little prep work goes a long way, and with the right products, even melamine can be transformed into a beautiful, personalized piece.

For anyone else curious about painting melamine, check out the full article on Spraypaint Blog for all the tips and techniques: How to Recycle and Paint Melamine Furniture. Happy painting!

My Tips for Painting Melamine Furniture

Hey Jenny (and anyone else planning a melamine project), here are my top tips to help you get the best results when painting melamine furniture:

Prep is Key
Clean the surface well, then lightly sand it with fine-grit sandpaper to give the primer something to grip onto. Trust me, it makes a big difference!

Prime Like a Pro
Don’t skip the primer! Use a bonding primer that’s made for glossy surfaces or melamine. It’ll make sure your paint sticks and lasts.

Pick the Right Paint
Go for a good enamel or acrylic paint. I use a foam roller for a smooth finish—no brushstrokes! Apply a few thin coats, letting each one dry in between.

Topcoat for Durability
Once the paint’s dry, apply a protective topcoat (polyurethane or polycrylic) to help it stay scratch-free.

Give It Time
Let the paint cure for at least 48 hours before using the furniture—longer is even better! It’ll help the finish hold up over time.

Get Creative
Don’t be afraid to try fun colors or finishes! Melamine is perfect for getting a bit adventurous.

Explore

books Christmas CraftGossip Giveaways Craft Inspirations Easter glass halloween Home Decor kid crafts mason jar More Crafts Patterns & Tutorials recycled art Recycled Clothing Recycled Jewelry Recycled Sewing Recycled Tutorials Recycling Ideas Recycling Organizing tin can

RSS More Articles

  • Artistic Stitches: Exploring Punch Needle Tattoo Designs
  • Knit Dinosaurs on a Circular Knitting Machine
  • Emily’s Paris Scarf – Crochet Kit
  • 30 Big Block Quilts For Beginners Or Time Poor Quilters
  • FREE Patchwork Pouch Pattern
  • Book Review: Secret Stories of Lost Beasts
  • Etsy Spotlight: 1955 Baby Doll Nightgown & Bloomers Pattern
  • Baby Banner and Mini Album Project
  • Color Wheel Block Tutorial by Red Pepper Quilts
  • How to Paint Melamine Furniture

Pick Your Blog

  • Sewing
  • Knitting
  • Quilting
  • Crochet
  • Home & Garden
  • Recycled Crafts
  • Scrapbooking
  • Card Making
  • Polymer Clay
  • Cross-Stitch
  • Edible Crafts
  • Felting
  • Glass Art
  • Indie Crafts
  • Kids Crafts
  • Jewelry Making
  • Lesson Plans
  • Needlework
  • Bath & Body
  • Party Ideas
  • Candle Making
  • DIY Weddings
  • Not Craft
  • Free Craft Projects

Copyright © 2025 · CraftGossip | Start Here | Contact Us | Link to Us | Your Editors | Privacy and affiliate policy