• Home
  • Suggest A Craft
  • DIY Newsletter

Recycled Crafts

Creative DIY Projects That Turn Trash Into Treasure

  • About CraftGossip
  • Our Network
    • Bath & Body Crafts
    • Candle Making Ideas
    • Crochet Ideas
    • Cross Stitch
    • Edible Crafts
    • Felting Patterns
    • Glass Art
    • Home & Garden Ideas
    • Indie Crafts
    • Jewelry Making
    • Kids Crafts
    • Knitting Patterns
    • Lesson Plans
    • Needlework
    • Party Ideas
    • Polymer Clay
    • Quilting Ideas
    • Recycled Crafts
    • Scrapbooking
    • Sewing Patterns
    • Card Making
    • DIY Weddings
    • Not Craft Ideas
  • Giveaways
  • Roundups
  • Store
  • Search

Handmade with a Past: Tuesday’s Top Recycled Etsy Find

August 27, 2025 by Shellie Wilson Leave a Comment

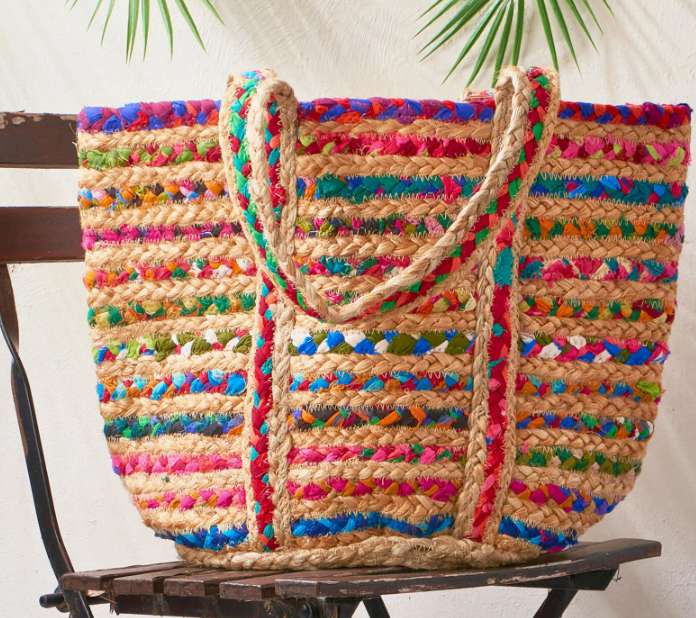
If you’re looking for a bag that’s as stylish as it is eco-friendly, look no further than this recycled cloth jute beach tote bag. Handcrafted from upcycled materials, this tote combines the rustic charm of jute with the sustainability of recycled cloth, making it the perfect accessory for your next beach trip, farmers’ market visit, or casual day out.

What I love about this bag is its combination of practicality and earth-conscious design. The sturdy jute fabric gives it a timeless look, while the use of recycled cloth keeps things fresh and eco-friendly. It’s large enough to hold all your essentials—whether you’re headed to the beach or carrying groceries—and it’s the kind of bag you can feel good about using.

Why this tote bag is a must-have:

  • Made from recycled cloth and jute, giving new life to old materials while keeping things stylish

  • Perfect for a beach day, carrying groceries, or just as your go-to everyday tote

  • Eco-conscious design that helps reduce waste while looking chic

This bag isn’t just a practical piece; it’s also a conversation starter. People will ask where you got it, and you can proudly say, “It’s handmade, recycled, and fabulous!” A must-have for anyone looking to add more sustainable options to their daily life.

Related Posts:

  • Upcycling or Hoarding? Why Your DIY Projects Could…
  • Thrift Your Way to Sustainable Crafting: 10 Flea…
«

Have you read?

DIY Milk Jug Halloween Skeleton Faces – Day of the Dead Inspired

Every year when Halloween rolls around, I find myself itching to create something new for the porch or entryway. Pumpkins are fun, but I also love projects that are thrifty and a little unexpected. These DIY milk jug skeleton faces tick all the boxes—they’re spooky, colorful, and upcycled from something you’d normally toss in the recycling bin.

Even better, they’re inspired by Mexican sugar skulls (Calaveras), which makes them perfect for those of us who like blending Halloween with a touch of Day of the Dead artistry. If you’ve ever admired the bold, painted skulls covered in flowers and bright designs, this is a playful and budget-friendly way to bring that style into your own decorations.

Why You’ll Love This Craft

  • Eco-Friendly: A brilliant way to recycle old milk jugs instead of tossing them. 
  • Budget-Friendly: Uses supplies you probably already have—markers, paint, string, scissors. 
  • Customizable: Every skull face can be completely different—no two need to match. 
  • Festive & Fun: Bright colors bring cheer to your Halloween and fall décor. 
  • Kid-Friendly: Safe for older kids and teens to paint and decorate (you may need to pre-cut the jugs). 

Supplies You’ll Need

  • Empty gallon milk jugs (washed and labels removed) 
  • Sharpie markers or acrylic paints (assorted bright colors plus black) 
  • Paintbrushes (thin ones for detail) 
  • Scissors or a craft knife (adult use recommended) 
  • Hole punch 
  • Yarn, twine, or string for hanging 
  • Beads (optional, for string decoration) 
  • Battery-operated tea lights (optional for glowing effect) 

Step-by-Step Tutorial

Step 1: Prepping the Jugs

Start by giving your empty milk jugs a good wash to get rid of any milk residue (trust me, you don’t want lingering smells). Peel off labels and let them dry completely. Using scissors or a craft knife, cut away one flat side of the jug so you’re left with a rounded “mask” shape. The spout becomes the chin of your skeleton face—it’s a surprisingly good fit!

Punch two small holes at the top corners of each cut-out so you can hang them later.

Step 2: Sketch the Skeleton Face

With a black Sharpie or paint, outline the classic skeleton features:

  • Eyes: Large hollow circles—cut them out completely for a mask look, or just color them black. 
  • Nose: A small upside-down heart or triangle shape. 
  • Mouth: A stitched line across the chin. Add short vertical lines to mimic teeth. 

This is your base—simple and spooky!

Step 3: Paint the Sugar Skull Details

Now comes the fun part. Sugar skulls are all about color, flowers, and swirls. Here are some ideas to get you started:

  • Paint colorful flower petals around the eyes. 
  • Add vines, spirals, or dot patterns across the forehead and cheeks. 
  • Use contrasting colors for bold designs—bright pinks, purples, turquoise, yellows, and greens work beautifully. 
  • Add little hearts or cross shapes for variety. 

If you’re working with kids, hand them markers instead of paints for easier cleanup.

Step 4: String & Bead the Decorations

Cut yarn or twine into long lengths for hanging. You can even thread beads onto the string for extra flair,. Tie the strings through the holes you punched and gather them together to hang on a door, wall, or tree branch.

They look especially festive grouped in threes or fives.

Step 5: Light Them Up (Optional)

For an extra wow factor, tuck a battery-operated tea light inside each jug before hanging. The plastic glows at night, and the painted details shine like stained glass. It’s a budget-friendly way to add some ambiance to your Halloween porch without the mess of real candles.

Tips & Variations

  • Use glow-in-the-dark paint for a spooky nighttime surprise. 
  • String a whole row together to make a garland across your porch or fence. 
  • Spray the inside of the jug with white paint for a more opaque look. 
  • Add glitter glue accents if you want them to shimmer in daylight. 
  • Try smaller jugs (like juice or creamer bottles) for mini skull faces. 

This project has become one of my favorite DIY Halloween decorations because it checks so many boxes: thrifty, creative, and surprisingly pretty for something made out of old milk jugs. Whether you’re decorating for trick-or-treaters, a fall party, or just want to add some seasonal cheer, these milk jug skeleton faces bring a Day of the Dead flair to your home.

They’re also a great activity for family craft nights—each person can design their own skull and you’ll end up with a gallery of colorful, quirky faces to hang around the house.

So next time you finish a jug of milk, don’t toss it—save it for Halloween crafting!

Leave a Reply

Your email address will not be published. Required fields are marked *

Explore

books Christmas CraftGossip Giveaways Craft Inspirations Easter glass halloween Home Decor kid crafts More Crafts Patterns & Tutorials recycled art Recycled Clothing Recycled Jewelry Recycled kids crafts Recycled Sewing Recycled Tutorials Recycling Ideas Recycling Organizing tin can

RSS More Articles

  • 100 Mesmerizing Blackwork Patterns You’ll Obsess Over – A Must-Have for Embroidery Lovers
  • The Tunic Bible: One Pattern, Endless Indian-Inspired Styles
  • Book Review: Knit Modern Scandi Sweaters
  • 12 Love of Crafting Scrapbook Layout Ideas
  • Handmade with a Past: Tuesday’s Top Recycled Etsy Find
  • How To Make Fizzy Bath Salts
  • Quiltmaker’s 100 Blocks Volume 6 – A Must-Have for Every Quilter’s Library
  • Crochet Pattern Review: Woodland Wonders Blanket
  • Transform Fallen Leaves into Stunning Mandala Art – Here’s How
  • DIY Pottery Clay Sardines with Hand-Drawn Designs

Copyright © 2025 · CraftGossip | Start Here | Contact Us | Link to Us | Your Editors | Privacy and affiliate policy