• Home
  • Suggest A Craft
  • DIY Newsletter

Recycled Crafts

Creative DIY Projects That Turn Trash Into Treasure

  • About CraftGossip
  • Our Network
    • Bath & Body Crafts
    • Candle Making Ideas
    • Crochet Ideas
    • Cross Stitch
    • Edible Crafts
    • Felting Patterns
    • Glass Art
    • Home & Garden Ideas
    • Indie Crafts
    • Jewelry Making
    • Kids Crafts
    • Knitting Patterns
    • Lesson Plans
    • Needlework
    • Party Ideas
    • Polymer Clay
    • Quilting Ideas
    • Recycled Crafts
    • Scrapbooking
    • Sewing Patterns
    • Card Making
    • DIY Weddings
    • Not Craft Ideas
  • Giveaways
  • Roundups
  • Store
  • Search

Book Review: Stamp It! DIY Printing with Handmade Stamps

January 7, 2014 by Stefanie Girard

stamp it! by Jenny Doh 
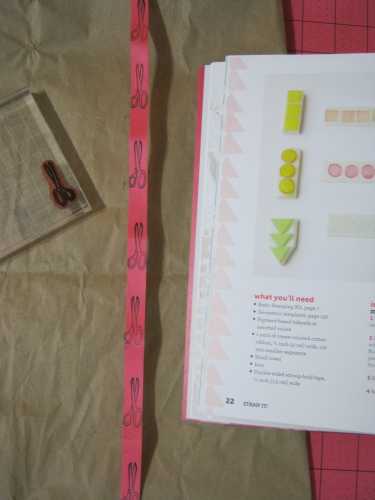
I am a big fan of stamping and I have made some stamps in my day so I was super excited about Stamp It! DIY Printing with Handmade Stamps. I think my favorite part about Stamp It! are the projects. Whether you choose to make the stamps using the great tutorials and templates or use pre-mades the projects are so cute and fun. There are all sorts of paper and fabric projects. I predict nothing in your house will be left unstamped with all the inspiration in Stamp It!. I have a couple of favorite stamps one of which is my scissor stamp and so I thought I’d try the ribbon stamping idea in Stamp It!.

IMG_7054

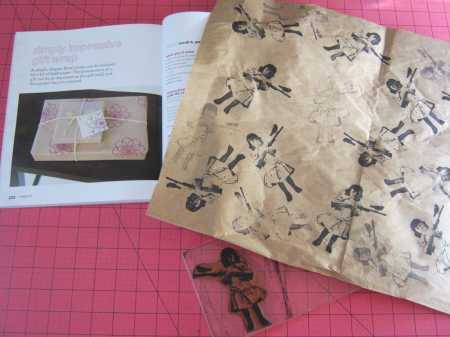
I think it worked out pretty cute. I also stamped on some butcher paper that I recycled from some shipping packing material. I think the two will make a great combo or used by themselves with a solid element.

make your own wrapping paper

More about the book from the publisher, Lark Crafts:

Stamp It! DIY Printing with Handmade Stamps

by

Jenny Doh

“Want to create a stylish, hand-printed look on your crafts—but find traditional printmaking intimidating? Then stamp it! Ten top designers, each with a distinctive style, have devised a collection of 45 stunning stamped projects plus 200 easily duplicated motifs. The stamps themselves are made of readily available household or store-bought items, and a lavishly photographed basics section walks beginners through the techniques, from transferring images to cutting and carving the stamps to inking. Make gift tags, stationery, wrapping paper, invitations, building blocks, and more!

Features projects by top designers, including:
Ishtar Olivera  • Kerri Winterstein  •  Jo  •  Riyo Kihara  •  Noelle Griskey  •  Gertie Jaquet  •  Memi the Rainbow   •  and more!

Jenny Doh is the former Editor-in-Chief of Somerset Studio magazine and is the President and Founder of crescendoh.com. Jenny serves regularly as keynote speaker across the nation delivering messages related to creative passion, authentic leadership, effective communication, and focused compassion. For her leadership in publishing and the art-and-crafting community, Jenny was recognized by Folio magazine as one of the top 40 leaders within the publishing industry. Jenny is the author of several books, including Hand in Hand and We Make Dolls (both Lark) She lives in Santa Ana, CA.“

Related Posts:

  • Make your own printing press with a surprising home…
  • The nuts and bolts of printing with nuts and bolts
«
»

Have you read?

How To Make A Milk Carton Village – A Recycled Craft for Kids

Ready to turn your recycling bin into a colorful, miniature village? Grab those empty milk cartons and let’s create a town filled with tiny houses, shops, and even a school or bakery! This craft is perfect for kids of all ages and encourages imagination, storytelling, and eco-friendly creativity.

 What You’ll Need:

  • Empty milk or juice cartons (washed and dried)

  • Paints or markers

  • Paintbrushes

  • Craft glue or glue stick

  • Scissors (adult supervision recommended)

  • Colored paper or old magazines

  • Bottle caps, buttons, or plastic lids (for windows or decorations)

  • Sticks, straws, or skewers (for flag poles or chimneys)

  • Optional: glitter, stickers, washi tape, cotton balls (for snow or clouds!)

 Step-by-Step Instructions:

Step 1: Clean and Prep the Cartons
Make sure your milk or juice cartons are washed and completely dry. Remove any plastic lids or caps and keep them for decorations!

Step 2: Plan Your Village
Decide how many buildings you want to make. Each milk carton becomes a house, shop, or whatever your imagination dreams up. Arrange them side by side or in a circle like a real village square.

Step 3: Cut Out Doors and Windows
With the help of an adult, carefully cut small door and window shapes into your cartons. You can also glue cut-out shapes from colored paper if you’d rather not cut into the carton.

Step 4: Paint and Decorate
Use paint or markers to bring your buildings to life. Make brick patterns, colorful siding, or roof tiles. Let each child choose their own theme – rainbow bakery, monster house, fairy home, or tiny fire station!

Step 5: Add the Roofs
You can paint the top pointy part of the carton like a roof, or glue on cardboard triangles to create overhangs. Want to add a chimney? Glue a straw or cardboard roll on top!

Step 6: Make Flags and Signs
Cut small flags from recycled plastic or paper and tape them to straws or sticks. Glue your flags to the rooftops. You can even create tiny signs for each building – “Toy Store,” “Library,” or “Super Cat’s House.”

Step 7: Build Your Village
Place all the finished buildings together on a large piece of cardboard, tray, or table. Use bottle caps for stepping stones, cotton balls for bushes or clouds, and draw roads with marker.

Step 8: Play!
Now that your village is built, use little toys, action figures, or LEGO people to live in your new town. Create stories and adventures—your Milk Carton Village is officially open!

 Learning Bonus:

This craft is not just fun—it also teaches recycling, fine motor skills, creative thinking, and storytelling. Plus, it’s a great group activity for playdates, classrooms, or family craft nights.

Let your kids’ imaginations run wild—and remember, no two villages need to look the same. Each one tells its own story!

Explore

books Christmas CraftGossip Giveaways Craft Inspirations Easter glass halloween Home Decor kid crafts More Crafts Patterns & Tutorials recycled art Recycled Clothing Recycled Jewelry Recycled kids crafts Recycled Sewing Recycled Tutorials Recycling Ideas Recycling Organizing tin can

RSS More Articles

  • How to Make a Hooded Cape for Kids and Adults – Easy Sewing Tutorial
  • Designer Spotlight: Murder Puffin
  • DMC Striker Embroidery Pattern – A Free Football-Themed Stitch for Sports Fans
  • Knits to Make for Your Labubu
  • Little Birds: 26 Handmade Projects to Sew, Stitch, Quilt and Love
  • Stenciling Like a Pro? You NEED These Must-Have Supplies
  • 15 Highland Cows You Can Crochet
  • Etsy Spotlight – The Thomas Boys Shirt Sewing Pattern
  • 7 FREE Back to School SVG Cut Files
  • How to Make a Sticks and Stones Quilt – Free Quilting Tutorial

Copyright © 2025 · CraftGossip | Start Here | Contact Us | Link to Us | Your Editors | Privacy and affiliate policy